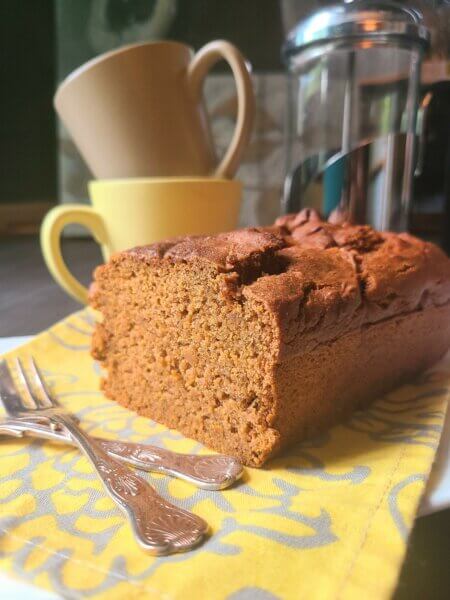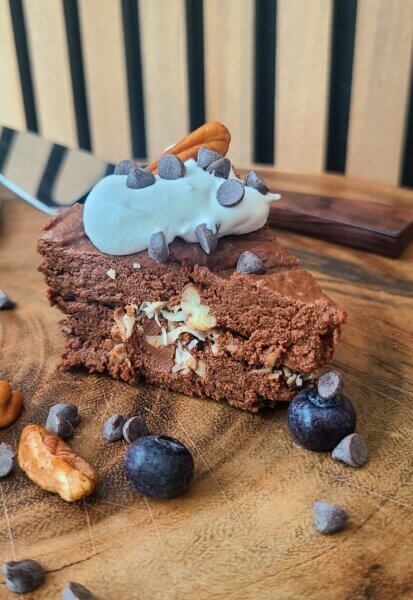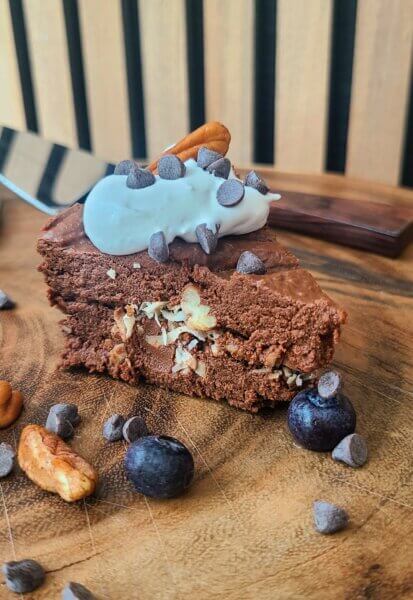
These are possibly the fudgiest and moistest brownies you will ever devour, but with a slight tender crunch from the optional chocolate chips and nuts. Plus they are just the right thickness. And its a simple recipe to memorize because all the amounts are either “1/2” or “1” (except the baking powder).
Sublime on their own, they are downright irresistible with a scoop of plant-based vanilla ice cream, non-dairy whipped cream, or a glass of ice cold non-dairy milk.
Best Pumpkin Brownies (vegan & plant-based) Yield: 9 brownies
1/2 cup canned pureed pumpkin 1/2 cup neutral vegetable oil 1/2 cup water 1 teaspoon vanilla extract 1 cup natural sugar 1 cup all-purpose flour 1/2 cup cocoa powder 1/2 teaspoon baking powder 1/4 teaspoon sea salt Optional about recommended: 1/2 cup plant-based semi-sweet or dark chocolate chips Optional but recommended: 1/2 cup pecan, hazelnut, or walnut pieces
Preheat oven to 350°. Grease an 8-inch square baking pan, line with a wide strip of foil or parchment paper Slightly extended over edges., and lightly oil again. In a large bowl, combine all wet ingredients until smooth with a whisk. Add all dry ingredients except chocolate chips and pecans, and whisk until completely combined. Fold in chocolate chips and nuts if using. Transfer batter into prepared pan and lightly smooth top. Bake twenty minutes or until set on top and slightly pulling away from edges of pan. Cool completely in pan on wire rack and then tightly cover until serving time.
On a school architecture trip to Chicago in May, I had occasion to slip into Seoul Taco for a tofu taco, which served to solidify my love of Asian-Mexican fusion cooking. So, with our turn to host our Starlight Supper Club coming up in June and my husband Jonesin’ for bulgogi b*** in lettuce wraps–mushrooms for me and the vegetarians–we settled on an Asian-Fusion menu.
Bob and I hosted this thrice-annual fete on a weeknight so my cousin visiting from Houston could join the clan, most of whom he had met previously. I am out of school for the summer, but he and I had a day hike planned that Wednesday, so my contributions needed to be quick and fuss-free. To fit the bill, I whipped up this unforgettable soup loved by all–even Bob–and a delectable Miso Blackberry Quick Cobbler, which I will share in another post.
Our Supper Club always serves buffet style no matter which one of the three couples hosts and no matter the menu, so in the soup went to our stainless steel “crockpot” on low for a streamlined and attractive serving solution.
However and to whomever you serve it, you will definitely want to add this one-bowl wonder to your repertoire:
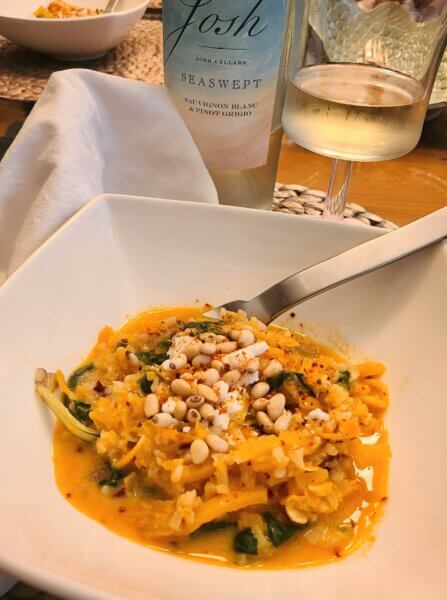
Black Bean & Hominy Soup
Yield: 8 servings
1 tablespoon olive oil 1 small onion, diced, or about 1 cup 2 stalks celery, diced, about 1/2 cup 1 carrot, diced, about 1/2 cup 2 medium red, orange, and/or yellow bell peppers, diced, about 2 cups Pinch sea salt 3 large cloves garlic, minced 1 tablespoon Asian chili crisp 1 tablespoon, minced ginger 2 teaspoons vegetable soup base or 1 large vegetable bouillon cube 2 teaspoons soy sauce 2-15 ounce cans black beans with juice 2-15 ounce cans, hominy, drained (we like the yellow for color) 10 ounces riced cauliflower, cooked (we buy a frozen package and cook it in its package in the microwave, per directions) 2-15 ounce cans fire-roasted diced tomatoes with juice 2 cans coconut milk (lite or regular)
In Dutch oven or large heavy-bottomed pot, bring olive oil to a sizzle over medium heat. Add onion, celery, carrot, bell peppers, and pinch salt and saute, stirring frequently, several minutes, until softened. Adjust heat if necessary. Add garlic and saute 30 seconds, stirring continually. Stir in remaining ingredients in order and let simmer 20 to 30 minutes, stirring occasionally, until flavors are married. Serve warm in bowls or mugs (pictured), garnished as desired.
I am a year-round soup lover, even when it is scorching hot outside, because soup is a quick and flavorful meal in a bowl that is hydrating and beautiful. Pureed pumpkin and lite coconut milk make this one creamy and golden, but the vegetables provide plenty of texture and a nutritional punch. Layering on the garnishes turns each bowl into an extravaganza, best scooped with a warm tortilla.
1 tablespoon olive oil 1 yellow onion, diced 1 large bell pepper, any color, diced (I use 1 cup diced bell pepper of 3 different colors) Pinch sea salt 1-15.5 ounce can fire roasted tomatoes with juice (I like to use the variety with garlic) 1-15.5 ounce can pureed pumpkin 1-15.5 ounce can lite coconut milk 1-10 ounce frozen package riced cauliflower, cooked according to package directions (for this recipe, I choose a lime and cilantro version) 1/2 teaspoon ground cumin 1/2 teaspoon smoked paprika 1/2 teaspoon ground turmeric Additional sea salt plus freshly ground black pepper to taste Water to thin as desired
Accompaniment: warm tortillas (gf if desired) Garnishes: Plant-based sour cream (I like to melt it in microwave for drizzling), chili oil, black bean and corn salsa, fresh cilantro, lime wedges, roasted and lightly salted pumpkin seeds
In Dutch oven or large heavy-bottomed pot, bring olive oil to a sizzle over medium heat. Add onion, bell peppers, and pinch salt and saute, stirring frequently, several minutes, until softened. Adjust heat if necessary. Stir in remaining ingredients in order and let simmer 20 to 30 minutes, stirring occasionally, until flavors are married. Serve in large bowls with warm tortillas, garnished as desired.
If you are in search of the perfect plant-based spoonbread, look no further! Aquafaba and a teaspoon of baking powder replace eggs for a spoonbread with a creamy consistency inside and a crispy crust around the edges. Plant-based butter and sour cream, creamed corn, and corn kernels combine to create a flavor-packed dish with a heavenly texture that will be your go-to side at summer barbecues and a staple at family dinners and holidays throughout the year.
Preheat oven to 350 degrees. Spray a 9-inch deep-dish pie pan or casserole dish with nonstick spray. In bowl of electric mixer, whip aquafaba on medium-high until soft peaks just begin to form, about 2 to 3 minutes. Add melted butter, sour cream, and creamed corn and beat on low speed until well combined. Add cornbread mix and baking powder and beat again on low speed just until combined and mixture is smooth. Add corn kernels and stir in by hand or mix one final time on low speed until corn is evenly distributed. Transfer mixture to prepared dish and bake for approximately one hour or until golden brown, slightly crispy around edges, and set.
(Feel free to scroll just a little ways down straight to recipe.)
Note: while baking time is 45-60 minutes, that is all hands-free time and, otherwise, the recipe goes together in a flash.
Grace, one of my favorite, buoyant, and determined students, submitted this family favorite, along with her accomplished painting of blackberries, for the illustrated NA Family eCookbook my Art 1 students and I published this year to popular acclaim.
I veganized her already vegetarian recipe for company and, served warm or room temperature, it has become a fan favorite among our omnivorous and vegetarian friends alike.
I first served it to a gluten-free guest and prepared the recipe with Bob’s Redmill 1:1 gluten-free baking mix. It was perfection. Though I have since made it with all-purpose flour, it was ever so slightly doughier. So, I prefer it made with gf 1:1 baking mix or, as I tried another time, half all-purpose flour and half chickpea flour. Feel fee to experiment, also with the fruit…
Blackberries are Grace’s and my favorite, but blueberry or peaches and raspberry–with a couple tablespoons bourbon in the batter!–were also delicious. Avoid the temptation to use more fruit than the recipe calls for, as the ratio of fruit to cakey goodness will be off.
As for miso, Bob and I hosted our Starlight Supper Club last night for which we prepared an Asian-Mexican fusion menu. I whisked some yellow miso into the batter and my Blackberry Miso Quick Cobbler was a rave!
Enjoy my version or–your own–of this flexible recipe.
Quick Cobbler
Yield: 8 servings
6 tablespoons vegan butter 1 cup + 2 tablespoons Bob’s Red Mill 1:1 gluten-free baking mix or all-purpose flour 1 cup + 2 tablespoons natural sugar 1 teaspoon baking powder 1 cup nondairy milk (we like unsweetened soymilk) Optional: 3 tablespoons white or yellow miso 2 cups fresh berries or diced fresh fruit 1/2 teaspoon ground cinnamon 1/2 teaspoon ground nutmeg Accompaniment: nondairy whipped topping (we like So Delicious brand Cocowhip)
Preheat oven to 350 degrees. Place butter in 8-inch casserole dish or 8-inch cast iron skillet, and slide into preheating oven for a couple minutes or until melted. Remove to heatproof surface. Meanwhile, in medium bowl, whisk together 1 cup 1:1 gluten free baking mix or all purpose flour, 1 cup sugar, baking powder, nondairy milk, and optional miso until no lumps remain. Pour batter evenly over melted butter, scraping bowl out well with a spatula, but do not spread in dish. Place fruit in scraped out bowl, sprinkle with remaining 2 tablespoons 1:1 gluten-free baking mix or all-purpose flour, remaining 2 tablespoons sugar, cinnamon, and nutmeg. Drop fruit evenly over batter, swirl a few times with a table knife, and bake 45 minutes to one hour, depending on depth. Watch, and when golden brown, remove from oven to wire rack. Serve warm or room temperature with a dollop of nondairy whipped topping. Note: for extra crispiness, sprinkle with a tablespoon or two additional sugar before baking.
All the veg we need without all the moaning and groaning from the veg-phobic…like my beloved spouse!
Created as an antidote to restaurant meals and other “fancy” cooking for our Starlight Supper Club and a happy hour this week while my cousin, Earl, is visiting from Houston, I loaded this recipe up with camouflaged vegetables so that Bob was none the wiser and he loved it! The guys enjoyed it with a plant-based grilled cheese sandwich for dipping, natch, but I thought it was perfectly satisfying unaccompanied. Note: If smokey isn’t your jam, use regular canned diced tomatoes.
1 tablespoon olive oil 1 small onion, diced (approximately 1 cup) 1 carrot, diced (approximately 1/2 cup) 1 stalk celery, diced (approximately 1/2 cup) 1 red bell pepper, seeded and cut into 1/2-inch slivers Pinch salt Pinch black pepper 2 to 3 large cloves garlic, halved 2 teaspoons tomato paste 2 teaspoons vegetable base or 1 large bouillon cube 1 teaspoon dried basil 2-15 ounce cans diced fire roasted tomatoes 1-15 ounce can coconut milk ( I use lite, but you do you!) Optional garnish: drizzle olive oil and/or vegan sour cream thinned with water or non-dairy milk, fresh minced parsley or basil
In large skillet, heat olive oil over medium. Add fresh vegetables, except garlic, with pinch salt and pepper, and saute, stirring occasionally, until tender. Add garlic and saute 1 minute longer. Transfer to bowl of large food processor and process until smooth, scraping down sides of bowl as necessary. Add tomato paste, vegetable base, basil, and 1 can tomatoes, and puree again until smooth. Add remaining can tomatoes and coconut milk and puree a final time. Return to skillet and heat until bubbly. Serve warm, garnished as desired.
Are you a “nice-cream” convert? You may be after tasting our take on Ben & Jerry’s Cerru Garcia ice cream.
This luscious vegan & plant-based dessert boasts all the decadence and none of the added sugar or fat.
Its creamy texture contrasts beautifully with the crunchy almonds and chocolate chunks while each bite of plump cherry delivers a sweet-and-tangy burst of flavor.
Freeze the bananas the day before you plan to serve. The most difficult part about it is deciding whether to enjoy it as soft serve or scoops!
RECIPE
3 medium-large bananas, peeled and cut into 1-inch pieces and frozen in an airtight container
Approximately 2 tablespoons unsweeted or plain non-dairy milk ( I use unsweetened soy)
Scant 1/8 teaspoon almond extract
16 cherries from can of cherry pie filling (I like Lucky Leaf: no corn syrup and only 100 calories per 1/3 cup)
Approximately 1/4 cup slivered almonds
Approximately 1/4 cup vegan chocolate chunks or chips
Topping: Nondairy whipped topping (I like Cocowhip)
Blend bananas, soymilk, and almond extract until creamy in high speed blender, food processor, or Nutri-Bullet (my choice). Stir in cherries, almonds, and chocolate chunks, and refreeze to desired consistency, about 30 minutes for soft serve. Serve in scoops topped with non-dairy whipped topping. For ultra-decadence, you can sprinkle with additional almonds and chocolate chunks or chips.
If lite, nutritious, colorful, and filling is your jam, this dish–warm or cold–is ready to devour in 10 minutes…you’re welcome! Plus the texture contrasts and bursts of layered flavors makes this “throw together” exciting to eat and share.
I can eat an entire recipe when famished, but it should serve two. I doubled the recipe for a luncheon with a pair of dear friends yesterday–they are retired and I am on summer break–and we had one serving left over (which will be my lunch today).
To my delight–and surprise in one case–they both asked for the recipe.
I hope you will enjoy this dish often this summer as I already have! When I dreamed it up while trying to devise a dish to go with my husband’s bulgogi for an upcoming supper club party, it quickly became my go-to.
Enjoy!
-Betsy
10 ounces frozen riced cauliflower, steamed in the bag in the microwave for 5 to 6 minutes, according to directions
2.5 ounces baby spinach, wilted for about two minutes in bowl in microwave
2 tablespoons non-dairy cream cheese, flavored or not (I use Tofutti “Smoke”)
1/2 cup mild kimchi with vegetables (I use Cleveland brand from Harris Teeter; in Eastern VA and NC, it is in the cold case in the produce section where vegan items hang out)
1 tablespoon chili crisp (more or less to taste)
Garnishes: Peanuts, sliced scallions, sesame seeds–I like “tuxedo” (black & white mixed)–and optional carrot chip
Stir together cauli and spinach with cream cheese until melted. Stir in kimchi and chili crisp, reheat if necessary, or chill, and serve garnished as drsired.
“Miso?!” you are probably thinking. I did too, but when a friend recently threw down the gauntlet with his NY Times Peanut Butter and Miso Cookies (https://cooking.nytimes.com/recipes/1020538-peanut-butter-miso-cookies), I decided to up the ante.
I like peanut butter, but mostly as a breakfast food on an English Muffin. So I chose cashew butter–though almond may be a more readily available sub, depending on where you live–added ginger, a favorite fall spice; maple syrup, another favorite fall flavor and addition of moisture since there is no egg; and stirred in white chocolate chips, though I consider them optional, if delicious.
And just like that, I had a new favorite cookie, the recipe requested by a favorite student. I hope you love them as much as we do!
Cashew Butter, Ginger, and Miso Cookies with (optional) White Chocolate Chips
Yield: approximately 18 cookies
1/2 cup vegan butter, softened 1/3 cup white miso paste (you can use yellow, but it will be a bit stronger; both are available at Asian groceries and some supermarkets) 1/4 cup cashew or pecan butter (available at supermarkets like Kroger, but you can sub almond butter) 1 cup firmly packed dark brown sugar 1/4 cup maple syrup 2 tablespoons ground ginger (or less if you want a milder cookie) 1 teaspoon fresh grated ginger 1 1/2 teaspoons baking powder 1 teaspoon baking soda 1 1/2 teaspoons vanilla extract 1 3/4 cup all purpose flour Optional: 1/2 cup or more vegan white chocolate chips (I order from Amazon, but I believe stores like Whole Foods carries) 1/2 cup granulated sugar
Preheat oven to 350 degrees. Line a baking sheet with Silpat or parchment paper. (You may need 2 sheets or to bake in 2 batches, depending on size of sheet.) Place granulated sugar in small, shallow bowl.
On medium-high speed, cream together butter, miso paste, and cashew butter until smooth and fully combined. Beat in brown sugar until fluffy and most sugar crystals are dissolved. Add maple syrup, both gingers, baking powder, baking soda, and vanilla. Beat on medium-low just until combined. Add flour, one-third at a time, and beat on low speed just until combined, scraping down sides of bowl as needed; avoid over-beating. Stir in white chocolate chips if using.
Scoop up dough with small cookie scoop (about 2 tablespoons) or rounded tablespoon, form into balls by gently rolling between your palms, roll in granulated sugar, and place at least 2″ apart on prepared sheet, as they will spread. Bake 7 minutes, open oven door and, with a flat spatula, quickly press cookies into 3/4″ disks, close door and continue baking for about 5 to 6 minutes or until spread to about 1/2-inch thick, crinkly, no longer shiny, and lightly browned. Cool on wire racks and store in airtight container.