Vegan “Tuna” Salad with Sunflower Seeds, Apple, Capers, and Dill

Nutty TunaYield: approximately 4 cups “tuna” salad

On Mother’s Day, my phenomenal weekend yoga instructor, Angela Philips, mentioned after our morning class that she had prepared her “Nutty Tuna,” made with sunflower seeeds, for her Mother’s Day brunch.  She had given me that recipe years ago and at the mere mention, I began craving it.

So I made a batch on Monday, but it wasn’t quite right.  I hadn’t consulted the recipe, choosing to make it from memory instead, and, among other things, I went overboard on my substitution of Nori powder for dulce flakes and used an inferior mayo I had on hand that had been given to me.  Honestly, it was kind of a dud.  I ate a fair amount of it during the week so as not to be wasteful, but it was off the mark, and I discarded the remainder today with little remorse.

But, this past Saturday, I purchased the ingredients I needed, tried it again yesterday afternoon, and I am happy to report that it is delicious.  This time, I consulted the recipe just to see if I needed to adhere more closely and decided that I didn’t because, for example, I didn’t want to include the parsley it called for and I knew I wanted mayonnaise to adhere all of the ingredients together, while the original recipe relies only on the moistness of the celery, onion, parsley, soaked sunflower seeds and a tiny bit of lemon juice.

From the original recipe, I did decide to use the capers called for instead of the pickle relish I had added last week.   When I was a pre-vegan kid, we always added pickle relish to our tuna salad, but it didn’t work so well with this vegan version.  And I added fresh dill, which Angela has started doing too.  Though I associate dill more with “chicken” salad, it is widely known to be compatible with seafood, and it is really nice in this recipe.  In addition, I included some dried apple, as we often chopped up fresh apple in our childhood tuna salad.  Since it is not apple season here and I had some moist and plump dried ones in the pantry, I opted for them and am so glad I did, as they lend just a hint of sweetness.

In the end, this recipe is a little down-home with all the mayo and a little upscale with the addition of capers.  As such, I think it is the best of both worlds and hope you agree.

Be sure to begin soaking sunflower seeds the day before you plan to serve the salad.


14 ounces roasted sunflower seeds (salted or not, but the salt will be drained away after soaking)

1 Nori sheet torn in pieces (or 1 teaspoon Nori powder or dulce flakes)

2 cups warm water

4 celery hearts, trimmed and cut into 2-inch pieces

3 green onions, white and green parts, cut into 2-inch pieces

3 tablespoons drained fresh capers

1 cup lightly packed fresh dill fronds, stemmed and broken in half

Optional but very good: 1/3 cup dried apple pieces (be sure they are moist and plump)

1-2 teaspoons fresh lemon juice

8 to 10 tablespoons Vegenaise vegan mayonnaise (my favorite brand for this, but use the mayo of your choice)

Sea salt to taste

Freshly ground black pepper to taste


Place sunflower seeds and Nori sheet pieces in medium bowl and cover with warm water.  Cover and let stand 8 hours or over night.  Drain, pressing gently, to remove as much water as possible.  Place celery, green onions, capers, fresh dill, optional dried apple, and 1 teaspoon lemon juice in bowl of food processor and pulse until finely minced, scraping down sides of bowl as necessary.  Add drained and pressed sunflower seeds and continue pulsing until sunflower seeds are also finely minced.  Add mayonnaise, submerge into mixture with a spatula, and pulse until well combined.  I prefer almost a spread consistency, but still with lots of texture.  Taste and adjust seasoning with salt, pepper, and additional teaspoon of lemon juice, if desired.  Pulse just to distribute.  Serve immediately or chilled on a sandwich, toasted bagel, stuffed in a tomato, or on crackers.  Note: if you desire a more pronounced flavor of the sea and a darker color, use Nori powder or dulce flakes and add them to the mixture in the food processor rather than to the soaking water.

Vegan Savory Spring Tart with Cherry Tomatoes, Kiwi and Kale (yep, kiwi!)

Savory Spring Tart with Cherry Tomatoes, Kiwi and Kale--WholeYield: 8 servings

I am on a savory spring tart kick.  First asparagus, kale, and strawberries; now cherry tomatoes, kiwi, and kale.  In art teacher lingo, the colors are still that appetizing “complementary” combination of red and green, but I was craving tomatoes–and it’s not yet tomato season, so I went with the cherry variety–and needed a contrast in color.

Kiwi in a savory tart may sound somewhat odd, but it is similar to incorporating fruit into, say, a spinch salad or, perhaps more to the point, a salsa.  In a word: addicting.

In this tart, the tomatoes become lightly charred for an even more delectable and complex flavor.  I love a slice served with a drizzle of white balsamic reduction, available at our local Kroger.  You can make the reduction, if you prefer, by slowly simmering the vinegar, but I get in a hurry and create shellac, so I purchase it.  I also tuck on a garnish of fresh basil.  Yes, I know that one is “supposed” to only use herbs as a garnish if they are included in the dish, but it just looks so pretty and I am happy to enjoy that burst of freshness from the basil because it complements the tart even though it is not baked into it.

Rules, scmules.

Vegan Presto! Press-In Pie Crust

1 ½ cups all-purpose or whole wheat flour or half of each (I prefer all whole wheat)

1 teaspoon sea salt

2 teaspoons sugar

½ cup canola oil

2 tablespoons plain or unsweetened non-dairy milk (I use soymilk)

Preheat oven to 400 degrees. In a medium bowl, stir together dry ingredients, make a well, add wet ingredients, and stir together with a fork, just until combined.  Press the crust into the bottom and sides of an 8-inch tart pan with removable sides.  (Pressing with the bottom of a sturdy glass can be helpful in achieving a uniform thickness and neat appearance.) Bake for 10-12 minutes or until set and slightly browned (or, if not making this quiche, bake according to the directions for whatever recipe you are making). Leave oven on when you remove the crust. Note: this crust, made with whole wheat flour, made beautiful, sturdy 4-inch tart crusts that held up perfectdly even when removed from the tart pans and slid off their removable bottoms.  I suspect the same would be true of mini-tarts made with my go-to choice of white whole wheat.


Savory Spring Tart with Cherry Tomatoes, Kiwi and Kale--SliceVegan Cherry Tomato, Kiwi, and Kale Filling

1 tablespoon olive oil

1 medium yellow onion, fairly finely chopped

3 large cloves garlic, minced

14 ounces extra firm tofu, drained

½ cup unsweetened or plain nondairy milk (I use soymilk)

1 tablespoon Dijon mustard

2 teaspoons vegetable powder (or 1 vegetable bouillon cube, crumbled)

¾ teaspoon sea salt

¼ teaspoon fresh grated nutmeg  (there’s something about fresh!)

¼ to ½ scant teaspoon red pepper flakes

Freshly ground black pepper to taste

Optional: 2 tablespoons nutritional yeast or grated vegan Parmesan cheese

2 cups lightly packed chopped kale

Approximately 12 cherry tomatoes (amount will vary depending on size, as they need to fit end to en from center of tart to edge to create a radius, if you will)

8-1/2 inch slices kiwi (purchase 2, as you’ll need more than  1 and can enjoy the leftovers)

Optional garnish: white balsamic reduction (homemade or available in most grocery stores) and fresh basil sprigs

In a large cast iron skillet, heat olive oil over medium-high.  Add onion and saute, stirring frequently, for about 3 minutes.  Add garlic and saute, stirring, for another minute.  Remove from heat.  Place all ingredients, including sauteed onion and garlic, except kale, cherry tomatoes, kiwi, and optional garnishes, in the bowl of a food processor and process until smooth, scraping down the sides of the bowl as necessary.  Add kale, submerge it into the filling mixture with a spatula, and process again until kale is very finely chopped and well-distributed, but not pureed unless that is your preference.  Scrape mixture into tart shell, lightly spreading to the edges of the tart and smoothing the top.  Arrange cherry tomato halves, end to end, in evenly spaced spokes.  Place kiwi slices between each spoke, spritz or brush tomatoes and kiwi with olive oil, and bake tart for 35 minutes or until set.  Remove from oven, let rest 10 minutes on a wire rack, carefully remove sides and serve slices with a drizzle of white balsamic reduction and a sprig of fresh basil.

Vegan Savory Spring Tart with Grilled Asparagus, Kale and Strawberries (yep, strawberries in a savory quiche!)

Grilled Asparagus, Kale and Strawberry Quiche--Birdseye ViewYield: 8 servings

Beautiful plump, juicy strawberries–with their perfectly balanced sweet and tart notes–from Pungo, a local farming community and home to the Pungo Strawberry Festival–and fresh asparagus gave rise to this beautiful, simple, and simply delicious quiche.  When I removed it from the oven, even my husband said, “That’s pretty!”

Vegan Presto! Press-In Pie Crust

1 ½ cups all-purpose or whole wheat flour or half of each (I prefer all whole wheat)

1 teaspoon sea salt

2 teaspoons sugar

½ cup canola oil

2 tablespoons plain or unsweetened non-dairy milk (I use soymilk)

Preheat oven to 400 degrees. In a medium bowl, stir together dry ingredients, make a well, add wet ingredients, and stir together with a fork, just until combined.  Press the crust into the bottom and sides of an 8-inch tart pan with removable sides.  (Pressing with the bottom of a sturdy glass can be helpful in achieving a uniform thickness and neat appearance.) Bake for 10-12 minutes or until set and slightly browned (or, if not making this quiche, bake according to the directions for whatever recipe you are making). Leave oven on when you remove the crust. Note: this crust, made with whole wheat flour, made beautiful, sturdy 4-inch tart crusts that held up perfectdly even when removed from the tart pans and slid off their removable bottoms.  I suspect the same would be true of mini-tarts made with my go-to choice of white whole wheat.

Grilled Asparagus, Kale and Strawberry Quiche--Slight Birdseye ViewVegan Grilled Asparagus, Kale and Strawberry Filling

1 tablespoon olive oil

1 medium yellow onion, fairly finely chopped

3 large cloves garlic, minced

14 ounces extra firm tofu, drained

½ cup unsweetened or plain nondairy milk (I use soymilk)

1 teaspoon Dijon mustard

2 teaspoons vegetable powder (or 1 vegetable bouillon cube, crumbled)

¾ teaspoon sea salt

¼ teaspoon fresh grated nutmeg

¼ to ½ scant teaspoon red pepper flakes

Freshly ground black pepper to taste

Optional: 2 tablespoons nutritional yeast or grated vegan Parmesan cheese

2 cups lightly packed chopped kale

16 asparagus spears, trimmed to about 4 inches (the radius of the tart pan), grilled (I oil, lightly salt and grill in a grill pan over medium-high heat for about 12 minutes, turning occasionally)

8 strawberries, stemmed and halved

Optional garnish: 1 whole strawberry, white balsamic reduction (homemade or available in most grocery stores) and sunflower seeds

In a large cast iron skillet, heat olive oil over medium-high.  Add onion and saute, stirring frequently, for about 3 minutes.  Add garlic and saute, stirring, for another minute.  Remove from heat.  Place all ingredients, including sauteed onion and garlic, except kale, grilled asparagus, strawberries, and optional garnishes, in the bowl of a food processor and process until smooth, scraping down the sides of the bowl as necessary.  Add kale, submerge it into the filling mixture with a spatula, and process again until kale is very finely chopped and well-distributed, but not pureed.  Scrape mixture into tart shell, lightly spreading to the edges of the tart and smoothing the top.  Arrange asparagus spears in evenly spaced spokes with the tips facing out.  Place strawberry halves, cut side up, between every other pair of asparugus spears, and bake tart for 35 minutes or until set.  Remove from oven, let rest 10 minutes on a wire rack, carefully remove sides, garnish with a whole berry in the center, and serve slices with a drizzle of white balsamic reduction and a sprinkle of sunflower seeds.

Grilled Asparagus, Kale and Strawberry Quiche--Slice

Vegan Grilled Asparagus and White Bean Spread–so easy and elegant!

Grilled Asparagus and White Bean SpreadYield: approximately 2+ cups

1-15 ounce can white beans (like cannelini), rinsed and drained

1 tablespoon olive oil + 1/4 cup

Pinch sea salt or to taste

1 bunch asparagus, trimmed (*see note below)

2 large cloves garlic

1 tablespoon finely chopped fresh dill (or 1 teaspoon dried dill weed)

Optional: tiny pinch of red pepper flakes

Juice of 1/2 large lemon

Pinch freshly ground black pepper or to taste

Optional garnish: a couple of grilled asparagus tips, lemon slices or fresh dill sprigs

Place white beans in food processor.  Spray a grill pan with nonstick spray and place over medium-high.  Add asparagus in a single layer, drizzle with 1 tablespoon olive oil, roll to coat, and grill for about 10 to 15 minutes (depending on diameter of asparagus), rolling them over about halfway through or as needed to prevent burning.  Remove to cutting board, cut in half, and add to food processor along with all remaining ingredients, including 1/4 cup olive oil.  (If using asparagus tips as garnish, set a couple aside.)  Pulse until desired texture is reached.  I like it fairly smooth, but with a hint of texture and flecks of color.  Serve at room temperature or chilled with small toasts or crackers.

*To trim sparagus, hold one spear horizontally between the thumb and forefinger of each hand.  Bring hands down and toward each other causing the spear to bend and eventually snap.  Wherever it snaps is where all spears should be trimmed–use it as your measuring guide–for the most tender and freshest tasting asparagus.

Vegan Pad Thai and Scallion Pancakes–Restaurant Redux

Pad Thai Pancakes--Dining Room--CroppedYield: 4 pancakes (2 main dish or 4 appetizer servings)

I love Pad Thai, but our local restaurant won’t serve a lunch size portion at dinner, and a dinner portion is way too much food for one meal.   Heck, it’s way too much food for several meals.

So, after bringing home leftovers and enjoying them as is for one meal, I still had a heaping pile remaining.  Recently fantasizing about Vietnamese crispy pancakes, I decided to fold the Pad Thai into a pancake batter made with all purpose flour for structure combined with rice flour for lightness and authentic flavor.

Be forewarned: these are NOT crispy, as you can’t fold noodles into pancake batter, even pancake batter made with rice flour and veggie stock, and wind up with a crispy cake.  But, they are still delicious, not to mention easy, filling, and quite pretty.

You could serve any kind of Asian-inspired sauce over the pancakes that you like, but I found a sprinkle of vegan fish sauce with 3 dots of sriracha to be perfect.  The bright red of the sriracha is a snappy color contrast to the green scallion tips, lime, and basil, and a zesty counterpoint to the other flavors.  I thought the three little dots were cute–and just enough to swipe a bit of the pancake through on it’s way to my mouth–but drizzle on more or mix it with a peanut-lime sauce if you choose.

Whatever you do, enjoy your restaurant leftovers re-imagined!

1/2 cup unbleached all-purpose flour

1/2 cup brown rice flour

1/3 cup vegan fish sauce (sold as vegetarian in Asian markets)

2/3 cup rich vegetable stock

Pinch sea salt if needed

2 scallions, white and about the same amount green as white, thinly sliced (reserve some of the green tips for garnish if desired)

1 to 1 1/4 cups vegan Pad Thai leftovers, large pieces of vegetables and tofu cut in half, slightly warmed in microwave (mine contained sliced mushrooms, broccoli, green beans, baby corn, carrots, and fried tofu pieces, along with the noodles)

2 tablespoons vegetable oil

Optional garnish: additional vegan fish sauce, green scallion tips, slices of fresh lime, chopped peanuts, sprigs of fresh basil or Thai basil, sriracha

In a medium bowl, whisk together both flours.  Then gradually whisk in vegan fish sauce, stock, and sea salt if needed to make a batter.  Using a fork, fold in scallions, followed by leftover Pad Thai.  Heat 1 tablespoon oil in a cast iron skillet over medium-high, swirling to completely coat bottom of pan.  Using a 1/3 cup measure, scoop up 1/4 of batter and carefully transfer to skillet, smoothing and spreading to about 1/3 to 1/2-inch thick.  Repeat with another 1/4 of batter.  Cook 2 pancakes at a time for about 1/2 to 2 minutes on each side or until golden brown and done all the way through.  Transfer to plates, keep warm and repeat with remaining tablespoon of oil and batter.  Serve immediately garnished as desired with green scallion tips, slices of fresh lime, chopped peanuts, and/or dots of sriracha.

Pad Thai Pancakes


Blooming Vegan Brownies: My VERY BEST Moist & Fudgy Brownies

Very Best Moist Fudgy Vegan Brownies 5Yield: 1-8″ pan or 9 to 16 brownies (to double, I recommend baking in 2-8″ pans, rather than in a 9 x 13″ pan)


Stop!  Toss out any other brownie recipes. Seriously, this is the only one you’ll ever need!

Recently, one of my students brought the darkest, most beautifully textured brownies that I have ever seen to a meeting.  I resisted as long as I could and then took a tiny pinch for the sake of research and just about swooned.

When I remarked on how deep and darkly fudgy they were, she explained that it was her use of cocoa powder instead of melted chocolate.  But, in fact, it was the amount of cocoa powder, because my formerly “best” brownie recipe calls for cocoa powder, as well, and they are no comparison…and they have one-third less cocoa powder in them!

She was only too happy to share the non-vegan recipe, one she had found online that claimed to taste like “box mix brownies.”  That is nothing to brag about, in my opinion and, fortunately, these are vastly superior to a box mix.  I knew the recipe would include eggs and, indeed, it called for 2.  Normally, subbing other ingredients for eggs is no problem in cakes, pancakes, etc. But in something like a perfect brownie in which the texture is absolutely critical, it can be very tricky indeed.

My first attempt was an epic fail.  I created something sort of like oily fudge–not much like a brownie–and not nearly as good.  I ended up scooping up spoonfuls of the mixture which, even after cooking, was more akin to a truffle mixture, forming it into balls, inserting a pecan half, and rolling in powdered sugar.  Not bad, but not what I was going for.

So, knowing I would have to work harder on the egg substitute, I scanned a long list of alternatives, none of which sounded quite right, as I’m not a huge fun of Ener-G egg replacer, flax seed egg replacer, etc.  I also didn’t want to use an ingredient like applesauce, as I felt its tanginess would clash with the chocolate.  And, while I love banana and chocolate together–think banana split–I didn’t want that pronounced banana flavor.  But I liked the idea of the moisture and consistency of both applesauce and bananas, and it occured to me that pureed pumpkin might be perfect, as it’s mellow flavor wouldn’t be too assertive and its warm color would only enhance the deep, rich brown of the chocolate.

So I made up my own substitution using pumpkin plus leavening.  For each egg, up to 2 in a recipe, substitute 1/4 cup canned pureed pumpkin, 1/2 teaspoon baking powder, and 1/4 teaspoon bakng soda.  My addition of a  pinch of Cream of Tartar helped activate the baking soda.  I don’t know if the Cream of Tartar is really necessary, as it is actually an ingredient in baking powder which I also use in the recipe.  But, the brownies were so good that I hesitate to make any changes.  One day I will probably try it without the Cream of Tartar and will adjust the recipe if that ingredient seems superfluous.  The cornstarch, called for in the original recipe, absorbs mositure, prevents baking soda and acids from reacting too quickly, and lends tenderness to baked goods.

The results were spectacular!   I have removed my old brownie recipe here on The Blooming Platter and hereby pronounce Blooming Brownies my go-to most-favorite brownie recipe of all time.  And I hope you agree!

6 tablespoons vegan butter

1 1/4 cups granulated sugar (I use demerara)

5 tablespoons vegetable oil (I use canola for its neutral flavor)

1 teaspoon vanilla

3/4 cup cocoa powder

1/2 teaspoon baking soda

1/2 cup canned pumpkin puree

1/2 cup all-purpose flour (I use white whole wheat)

1 tablespoons cornstarch

1 teaspoon teaspoon baking powder

1/4 teaspoon sea salt

1/8 teaspoon Cream of Tartar

3/4 cup vegan chocolate chips, small chunks, or a combination (you may use about half semi-sweet chocolate and half dark chocolate if desired)

Optional garnish: powdered sugar

Preheat oven to 325 degrees.  Spray the bottom of an 8-inch square pan with non-stick cooking spray and line with a piece of parchment paper cut to fit.  In a microwave-safe bowl, heat butter with sugar just until butter melts.  Remove from the microwave and whisk to combine.  Allow to cool for 5 minutes and then whisk in oil, vanilla, cocoa powder and baking soda.  Transfer mixture to the bowl of a stand mixer (or use a hand-held mixer) and, on low speed, mix in pumpkin puree, just until combined.  In a separate bowl, whisk together flour, cornstarch, baking powder, salt and Cream of Tartar. Add to chocolate mixture and mix on low, againt just until no flour pockets remain.  Remove bowl from stand and fold in chocolate chips and/or chunk.  *Spread the batter evenly into the prepared pan and bake about 28 minutes or until brownies are set (begin checking at 25).  Remove from oven and allow to cool at least 45 minutes before cutting or serving.  Sift powdered sugar over the top before serving, if desired.  Store any leftovers well-covered, but not refrigerated. Note that because of the pumpkin in the batter, after sitting, the powdered sugar will turn slightly yellow, so it’s best to sprinkle only what you are serving.

*Important note: when I make these brownies, a thin “slick” of moisture seems to separate and rest on top prior to baking.  Simply press a paper towel onto the surface of the batter to absorb it before baking.  Discard paper towel.

Quick Vegan Chilaquiles–A Mexican Restaurant Leftovers Redux

Quick ChilaquilesYield: 2 servings

Joe and I go out for Mexican food at least once a week–alternating between two neighborhood restaurants– and, last night, we both ordered something different than we normally do.  He, an omnivore, ordered chilaquiles and I ordered what I didn’t realize was vegan fajitas, as it was called something like “Vegetarian E,” with a side of refried beans.  Had I realized, I would have known it would be way too much food, though I never mind tasty leftovers.

I topped my beans with a few of the griddled veggies–onions, red and green peppers, and mushrooms–including some of those nice deeply caramelized bits, and enjoyed them with a side of tortilla chips (too many!) and fresh, zesty pico de gallo.  I felt completely sated, yet there was a heaping mound of the vegetables still left and three tortillas rolled up in foil.  So, we packed it all up and brought it home.

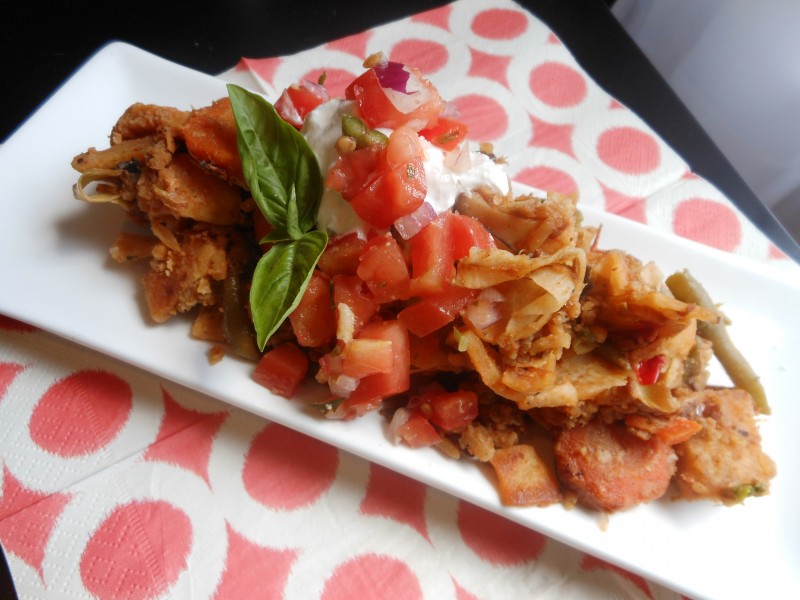
Having considered lots of options for those vegetables–some I hope to try in the future–I ultimately decided on my own version of chilaquiles for lunch today.  I sliced the tortillas, pan sauteed them in a little oil, crumbled in some tofu and spices which I sauteed until the tofu began to turn the barest hint of golden brown, added the veggies with a little salsa and nutritional yeast, and sauteed the whole mixture until heated through.

I hope you find this quick Mexican melange as addicting as I did topped with a dollop of vegan sour cream and a slice of marinated cucumber.

1 tablespoon vegetable oil

3-8 inch flour tortillas, stacked, rolled, and cut into 1/2-inch clices

Sea salt

7 ounces extra-firm tofu, drained and pressed gently with paper towel (half of a 14 ounce box)

1/2 teaspoon ground cumin

1/2 teaspoon smoked paprika

2 cups sauteed and slightly caramelized fajita veggies (sliced onion, red and green bell peppers, and mushrooms)

2 tablespoons prepared salsa (I used a pineapple variety)

2 tablespoons nutritional yeast

Garnish(es): vegan sour cream, sprigs of fresh cilantro, slices of cucumber or lime, and lightly salted and roasted papitas (pumpkin seeds)

Heat oil in a large cast iron skillet over medium-high.  Add tortillas and a pinch of salt and saute, stirring constantly, until beginning to turn crisp. Crumble in tofu, sprinkle with cumin and smoked paprika, and saute, stirring, for a couple of minutes or until tofu becomes a little drier and begins to turn a light golden brown.  Scrape up any bits of tortilla or tofu that begins to stick on the bottom of the skillet and turn brown, as they add great flavor.  Add the vegetables, salsa, and nutritional yeast, and continue sauteing, stirring, and scraping, until heated through, only a couple more minutes.  Serve immediately garnished as desired.

Vegan Vietnamese Tofu Stack with Golden Shitake-Onion Saute, Herb and Peanut Pesto, and Pickled Cucumber-Carrot Relish

Vietnamese Tofu Stack with Golden Shitake Saute, Herb and Peanut Pesto, and Pickled Cucumber-CarrotsYield: 4 servings

This sensational stack was inspired by dinner Friday night at Vietnam Garden (with locations in VA Beach and Norfolk, VA).  My dinner was actually a vegan Pho with fried tofu strips, but I wanted to create a dish that capitalized on all of the same delicious tastes and textures without needing to fry the tofu, nor up the carb content with noodles.  And this beautiful dish does just that.

I do love the hydrating properties of Pho–especially after hot yoga on Friday nights(!)–and I know I could put anything in it that I wanted, e.g. unfried tofu and no noodles, but the truth is that I also didn’t want to take the time to create a rich homemade stock which is essential to Pho.

My resulting “stack” accomplished exactly what I hoped for and it is addicting!  I recommend making the Herb and Peanut Pesto and the Pickled Cucumber-Carrot Relish a day ahead so that the dish goes together even faster.  But, if your schedule doesn’t allow for that, it is still a pretty quick dish and the flavors will be plenty developed.  Just make pesto first, followed by the relish and let them sit while you saute the mushrooms and broil the tofu.

The presentation is stunning with hardly any effort thanks to the beautiful contrasting colors and shapes of the ingredients.  Your family will be wondering who’s coming to dinner!  On the other hand, make it for guests and they will be sure you labored for hours especially for them.

Vietnamese Tofu Stack with with Golden Shitake Saute, Herb and Peanut Pesto, and Pickled Cucumber-Carrot Relish

1-14 ounce box extra-firm tofu, drained, patted dry, and cut into 8 slices

Sea salt
Freshly ground black pepper

Soy sauce (or tamari)

Herb-Peanut Pesto (recipe follows)

Golden Shitake-Onion Saute (recipe follows)

Pickled Cucumber-Carrot Relish m(recipe follows)

Sprigs of fresh thai basil, cilantro, mint; lime wedges; and/or chopped peanuts

Place tofu on an oiled or Silpat-lined baking sheet.  Sprinkle the barest hint of sea salt and pepper on each piece of tofu.  Then place one drop of soy sauce on each and rub in with your fingers to completely cover the top surface. Broil tofu or 5 minutes or until golden and slightly set.  Remove pan from oven, top each piece of tofu with about 1 generous tablespoon of Herb-Peanut Pesto, spread to the edges, and broil for another 2 minutes to heat and set pesto topping.

To serve:  spoon 1/4 of mushrooms and onions in the center of each serving plate.  Top with two pieces of broiled tofu, slightly overlapped.  Arrange Pickled Cucumber-Carrot Relish over the top and garnish as desired with a sprig of fresh herbs, wedge of lime, and/or sprinkling of chopped peanuts.  Serve immediately.


Herb-Peanut Pesto

(Note: at the Kroger where I shop, herbs are sold in .66 ounce containers and my garden herbs, other than rosemary and thyme, are not thriving yet, plus we can’t grow cilantro well in our climate.)

.66 ounces fresh Thai or Italian basil (Thai basil is readily available in Asian markets)

.66 onces fresh cilantro

.66 ounces fresh mint

1 small (3 inches) mild to medium chili pepper, stemmed and seeded

1/2 cup lightly salted and roasted peanuts

1 large garlic clove

Juice of 1 small lime

2 tablespoons vegan fish sauce (sold as vegetarian at Asian markets)

1/4 cup olive oil

Sea salt (if needed) and freshly ground black pepper to taste

Place all ingredients except olive oil in a food processor and pulse until finely minced, scraping down sides of bowl as needed.  With motor running, drizzle in olive oil to form a pesto, scraping down sides of bowl onc eor twice.  Taste and season with salt and pepper if desired.  If time allows, chill until serving time.


Golden Shitake-Onion Saute

2 tablespoons olive oil

1/2 large yellow onion, thinly sliced

Pinch sea salt

10 ounces golden or regular shitakes, sliced about 1/4 to 1/3-inch thick

2 large garlic clove, minced

In a large cast iron skillet, heat oil over medium-high.  Add onion and a pinch of sea salt and saute, stirring frequently for a minute or two to soften.  Add mushrooms and saute for another two to three minutes or until they have cooked down and are beginning to turn lightly golden brown.  Add garlic and continue sauteing and stirring just for another 30 seconds.  Remove from heat.


Pickled Cucumber-Carrot Relish

1-8 inch cucumber, thinly sliced (I use a mandolin for this task)

3/4 cup baby carrots, finely chopped (I use a food processor for this task)

2 tablespoons apple cider vinegar

1 tablespoon demerara sugar (or granulated sugar)

1 tablespoon agave nectar

1/8 teaspoon sea salt

1/8 teaspoon freshly ground black pepper

1/4 teaspoon dried red pepper flakes or to taste

Gently toss together all ingredients, taste and adjust seasoning if desired.  If time allows, chill until serving time.

Love My New GSD Haushaltsgeräte 30 000 Mandolin

MandolinOne of our many culinary wedding gifts was a mandolin made for home use, which I used early on, just about sliced my finger off, and promptly gave away.

It’s been many years since then and, with all of the cooking I’ve done, I’ve never felt I needed or wanted another mandolin.  But something I saw–probably on a cooking show–had me thinking about them again.  And, this winter, I abruptly decided I had to have one.  So I popped into our local kitchen shop, asked for their best recommendation, and emerged with the GSD Haushaltgerate 30 Mandolin for under $70 which you can purchase on ebay here if you are unable to find one in your area.

Love it!  It comes with few (illustrated) instructions because few are needed: it couldn’t be quicker or easier to operate.

Be sure to use the guard to protect your fingers well before you think you need it.  The little prongs pierce the food and hold it in place so that you end up with few remnants that aren’t perfectly sliced and diced.

As for cleaning, just rinse with warm water, as instructed, lest you wound yourself.

Stay calm and slice on!

A Wynn Resort-Las Vegas Redux: Vegan Ginger-Ale Pancakes with Fresh Vegan Peach-Basil-Maple-Ale Chutney

Peach pancakes

Yield: 4 servings

Las Vegas not the first place you think of when someone mentions gourmet vegan food?  Me either.

But that’s about to change thanks to the chefs at The Wynn Resort-Las Vegas teaming up with celebrity vegan chef and cookbook author, Tal Ronnen. Together, they created a vegan menu even a meat-craving–or carving–high roller would love.  (I am a longtime Ronnen fan and owner of his bestselling cookbook, The Conscious Cook.)

To help introduce their vegan menu to a broader public–so that what happens in Vegas doesn’t stay in Vegas(!)–The Wynn invited vegan bloggers like me to adapt one of the dishes Ronnen created for their menu and share both the recipe and rationale.  Such an invitation gave me pause because the last thing any of his dishes need is adapted.  They all look gorgeous and sound delicious.

But, since our area of coastal Virginia has been bitten hard by the craft beer craze and since peaches grow so beautifully here in the south–never mind that ginger and basil are such a perfect pairing with peaches–I decided to combine them to create my own version of Peach Pancakes.  The Wynn’s are served with peach compote and honey butter so, mind you, mine are not an improvement on theirs; rather just a twist…or a flip, as it were.

Usually I beg off when my husband books a trip to Vegas, but the next time he decides to head out there for a UFC event, I may just have to tag along to enjoy dining at The Wynn!

Las Vegan anyone?


Fresh Vegan Peach-Basil-Maple-Ale Chutney

2 medium peaches, seeded and medium-finely diced (I leave the skin on for more color and nutrition)
1 cup “ale” (use your favorite craft beer or ale)
2 tablespoons apple cider vinegar
8 large basil leaves, stacked, rolled, and very thinly sliced to make chiffonade
2 tablespoon demerara sugar (or substitute an additional tablespoon of maple syrup)
4 tablespoons maple syrup

Stir together all ingredients in a small or medium saucepan and simmer over medium-high, uncovered, while you make the pancakes or until the juice has reduced and chutney has thickened.

Vegan Ginger-Ale Pancakes

½ cup whole wheat flour
½ cup self-rising flour
2 tablespoons natural or brown sugar
1/4 teaspoon ground ginger or to taste (or about 2 to 3 teaspoons fresh grated ginger)
½ teaspoon baking powder
¼ teaspoon baking soda
1/2 cup “ale” (the remainder of the 12 ounce bottle used in the chutney, above)
1/2 cup unsweetened non-dairy milk (plain or vanilla, lite or regular, would also be good)
Vegan butter and/or vegetable oil for frying
Fresh Vegan Peach-Basil-Maple-Ale Chutney
Sprigs of fresh basil

Preheat oven to warm. In a medium mixing bowl, place first 6 dry ingredients. Make a well in the center and pour in beer and soymilk. Whisk together until well combined. In a large cast iron skillet or griddle over medium-high heat, melt 1 tablespoon of the vegan butter, oil or a combination. (I like a combination: the oil reduces chances of burning while the butter contributes flavor.) Using a scant 1/4 cup measure, make pancakes, two at a time. Cook two-three minutes on the first side until you get a nice rise, a few bubbles appear, and the edges appear set. Gently flip and cook another couple of minutes on the reverse. Add butter and/or oil to keep skillet greased as needed. If pancakes are cooking too quickly, lower heat to medium, especially for second side. When cooked through, remove pancakes to plates or a serving platter, keep warm, and repeat with remaining butter or oil and pancake batter. Serve each short stack with Fresh Vegan Peach-Basil-Maple-Ale Chutney spooned over the top and a sprig of fresh basil.

Related Posts Plugin for WordPress, Blogger...