VegNewsletter Features a Recipe from The Blooming Platter Cookbook

Hi everyone~

I just signed up for VegNews Magazine’s free online VegNewsletter and wanted to encourage you to do the same!

While you’re at it, you might want to subscribe to the actual magazine; it’s a great deal at only $20 per year with discounts for 2 and 3 year subscriptions.

The range of content is amazing.  Vegan food and wine is just the start.  There is travel and  fashion and, well, news on a host of topics as the title suggests.

Speaking of food and wine, the current issue features a recipe from The Blooming Platter Cookbook!  It’s my Mango Coconut Sorbet, a summertime favorite.

Thanks to all the folks at VegNews for including The Blooming Platter in VegNewsletter; it’s such an honor!  I can’t wait to meet all of you on my trip to San Francisco next week!

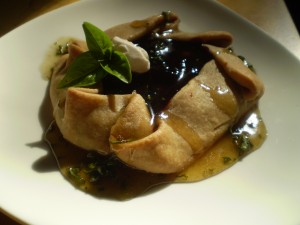
Vegan Fresh Plum Tarts or Hand Pies with Basil Caramel Sauce

Yield: 4 tarts

My annual gift of fresh plums from Mike Grover via Diane O’Neal partially inspired these new treats.  Mike’s tree is prolific and, each year, he harvests more than he knows what to do with, so he generously shares.  Last year I created a favorite Vegan Thai Rice Noodle, Plum, and Shitake Salad published in my  new cookbook (see below) and Vegan Rice Cakes with Fresh Plum and Sake Maple Syrup; Mike created a beautiful-looking plum bread.

This year, with July 4 tomorrow, I created glistening red plum tarts and hand pies.  The jewel-tooned filling is encased in scrumptious dough from The Blooming Platter Cookbook.  I prepared enough dough and filling for four, so I shaped two as tarts and two as hand pies.  Though both require equal amounts of my tasty dough, I decided that I prefer the tarts because the beautiful filling shows more.  If you really want to serve hand pies, though, you could cut sluts in the top surface to reveal some of the  colorful interior.

The filling is based on a recipe in the July 2011 issue of Bon Appetit for Cherry Hand Pies.  It was the result of combining both fresh and dried cherries.  That sounded like it would deepen the flavor, yet still taste fresh.  The best of both worlds!  So, since I happened to have both fresh and dried plums, that’s what I used.

After sampling one, it seemed to need just a little something to take it over the top.  So I did what I always do: closed my eyes while taking a bite and mentally pairing the tart with other flavors until I hit on the right combination.  In this case it was caramel sauce and basil whipped cashew cream!  However, since I didn’t have any cashews and didn’t want to purchase some and then have to wait while they soaked over night, I decided to make a quick Basil Caramel Sauce.  Yowza!  Just perfect.

The sauce only takes about 5 1/2 minutes to make, and 5 minutes of that time is simmering.  Adding the basil at the end, allows it to stay fresh and green, but opens its flavor up.  It would be good with a spoon!  Note that it thickens as it cools.

Filling:

1 cup fresh chopped pitted plums (my plums were only about the size of a walnut, so I simply pitted and halved them)

1/3 cup dried chopped plums

1/2 cup natural sugar (adjust as necessary, depending on the tartness of your plums)

pinch of sea salt

1/2 teaspoon vanilla (or try a liqueur like Chambord)

2 teaspoons arrowroot powder (or cornstarch)

2 teaspoons cold water

In a quart saucepan, combine both kinds of plums, sugar and salt.  Simmer, stirring frequently, for about 5 minutes.  While mixture simmers, stir together arrowroot powder or cornstarch and water to make a slurry.  Stir vanilla into the plum mixture, followed by the slurry.  If using arrowroot powder, remove the mixture from the heat immediately after adding or it could “break.”  If using cornstarch, return the mixture to a simmer and then remove it from the heat.  Allow to cool to room temperature.  While mixture cools, make dough.

Dough (this recipe is from The Blooming Platter Cookbook, page 168):

Note: this dough is the worlds easiest and best-behaved around.  I’m just sayin’…I  thought I had added too much ice water, but I just pulsed it a couple more times, lifted out the ball, and placed it on my very lightly floured surface, turning it over once to coat both sides, and it was perfect.

3/4 cup + 2 tablespoons white whole wheat flour (or unbleached all purpose flour)

pinch of sea salt

3 tablespoons non-hydrogenated coconut oil (semi-solid at room temperature; now considered part of a healthy diet!)

Scant 1/3 cup ice water

Preheat oven to 400 degrees.  Line a baking sheet with Silpat or parchment paper, or use a seasoned baking stone, and set aside.  Combine the flour, salt, and coconut oil in a food processor, and pulse a few times until the coconut oil is evenly distributed and the dough looks like coarse sand.  Begin adding water, 1 tablespoon at a time, pulsing a few times after each, just until the dough comes together.  It should be slightly moist, but not sticky, very easy to handle, and formed into somewhat of a ball.  Lift it out of the  processor, gathering up any loose bits, and divide the dough into fourths.

On a very lightly floured surface, shape each into a small disk and then roll out, using a lightly floured rolling pin, to about 5 inches in diameter.  The dough should be quite thin, but not so much so that it will tear.  Gently lift each dough circle and place on prepared baking sheet, gently reshaping if necessary.  (I like to use the tried-and-true method of rolling the circle of dough around the pin, transferring it to the baking sheet, and then unrolling in place)

Place one-fourth of the cooled filling in the center of each circle of dough.  If making tarts, fold up about an inch border of dough around the edges, gently pleating it to form a circle, but leaving a nice circle of filling showing in the center.  If making hand pies, fold one half of the dough over the filling, matching the edges of the dough circle to create a half-circle, crimping with a fork to seal.  (You may use a tiny bit of water rubbed on the edges with your finger to help seal, but I didn’t find it necessary.)  Make a couple or three slits in the top surface if desired to allow a little of the pretty filling to show through.

Bake for approximately 15 minutes, but check periodically to avoid over-browning.  Remove the baking sheet from the oven and, as soon as the tarts/ hand pies are easy enough to handle, use a metal spatula remove them to a wire rack to cool slightly.

While they bake, make Basil Caramel Sauce.

Basil Caramel Sauce:

1/2 cup natural sugar

1/4 cup cold water

2 tablespoons vegan soy creamer

1 tablespoon fresh minced basil

Garnish: for each tart/hand pie, a dab of vegan sour cream or whipped cream and a sprig of fresh basil

In a one-quart saucepan or small cast-iron skillet, combine sugar and water.  Heat over medium-high until simmering.  It will froth up liberally. Stir frequently for about 2-2 1/2 minutes.  Add creamer and continue stirring and simmering for another 2- 2 1/2 minutes.  Remove from heat and stir in basil.  Cool a minute or so to thicken every-so-slightly and serve immediately over tarts/hand pies and garnish them as desired.  Store any leftover tarts/hand pies or sauce in an airtight container in the refrigerator.  Reheat before using.

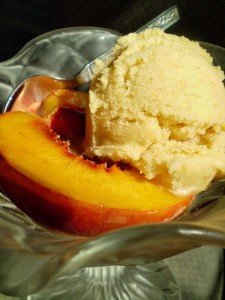
Vegan Bourbon-Broiled Peaches with Peaches-n-Cream Ice Cream

With summer in full swing, and Independence Day in the USA  just days away, the time seemed right to post a tasty teaser from The Blooming Platter Cookbook: A Harvest of Seasonal Vegan Recipes.

Driving past a farm market yesterday, I noticed that our long-awaited local peaches are in!  Hopefully, the same is true where your live because this cooling treat  might come in handy for your July 4 celebration.  Or, if you don’t observe this holiday, this dessert is sure to provide a welcome respite on any meltingly hot day.

Where we live in coastal Virginia, peaches are one of the glories of summer. It is hard to beat fresh peaches when eaten at the height of summer, fuzz and all, juice dripping down one’s chin. This preparation pays homage to the essence of the peach with the distinctive flavor of bourbon. It’s irresistible with the Peaches-n-Cream Ice Cream, or to save time, a store-bought vegan vanilla ice cream may be substituted.

If this recipe makes your mouth water, I hope you’ll consider purchasing a book so more than 150 others will be right at your finger tips!

Bourbon-Broiled Peaches
Yield: 4 servings

2 peaches, rinsed, halved and pitted
2 tablespoons bourbon
4 teaspoons natural sugar
Pinch sea salt
4 scoops Peaches-n-Cream Ice Cream (recipe follows), or your favorite vegan vanilla (optional but encouraged)

1. Position the oven rack on the top shelf of your oven and preheat the broiler. Place the peach halves, cut side up, in a small, shallow heat-proof dish. Brush them with the bourbon. Sprinkle each half with a teaspoon of sugar and a tiny pinch of salt. Broil for about 5 minutes to heat them through and melt the sugar. Watch them carefully to prevent scorching.
2. To serve, arrange broiled peach halves in shallow dessert bowls and top each with one scoop of the ice cream, if using.

Peaches-n-Cream Ice Cream
Yield: 1 quart

Make this delicious ice cream the day before you plan to serve it.

1 very large ripe peach, halved, pitted, skin left on
Juice of one small lemon
1/2 cup unsweetened soy milk, divided
1 cup plain soy creamer
3/4 cup natural sugar
1 large vanilla bean pod, split lengthwise, and seeds scraped out with the tip of a paring knife
2 tablespoons arrowroot powder
3 tablespoons pure peach preserves, optional
1/2 teaspoon vanilla extract (or more to taste)
1 1/2 cups vegan sour cream

1. Cut the peach into chunks and add to a food processor with the lemon juice. Process until it is a smooth puree. Set aside.
2. In a 1-quart saucepan, combine 1/4 cup soy milk, soy creamer, sugar, and vanilla seeds over medium heat and bring just to a boil.
3. In a small bowl, whisk the remaining 1/4 cup soy milk with the arrowroot powder until smooth. When the soy creamer mixture just reaches a boil, remove the pan quickly from the heat and whisk in the soy milk-arrowroot mixture until very smooth and thickened. Stir in the vanilla extract followed by the reserved peach mixture, peach preserves, if using, and vanilla extract. Allow the mixture to cool to room temperature. Whisk if lumps remain and/or press the mixture through a sieve. Cover the mixture and refrigerate it at least three hours or overnight; then whisk in the sour cream.
4. Freeze the ice cream according to your ice cream maker’s manufacturer’s directions. Scrape the finished ice cream into an airtight container and store in the freezer. Allow the ice cream to “ripen” and further set up before serving, if desired.

Vegan Coconut Cream-Mango Sorbet

If you think the Chocolate Carrot Cupcakes below look scrumptious, you should try them with my Coconut Cream-Mango Sorbet: just a tiny scoop in a Chinese soup spoon!

The dessert display at the party mentioned in the cupcake post was beautiful, clean and modern with a sweep of white ceramic soup spoons filled with golden-orange globes of sorbet playing off the robin’s egg blue cupcake decoration–perfect complementary colors and flavors.

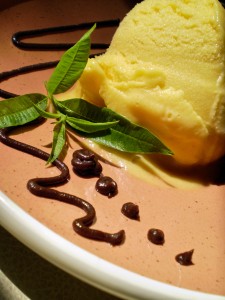
But with its subtle hint of fresh lime and tropical-sweet fruit flavor, this sorbet is luscious on its own or, if you don’t want to go so far as a cupcake,  with just a rich chocolate ganache squiggle as in the photograph.

This recipe and over 150 more, plus color photos, fill the pages of my new Blooming Platter Cookbook: A Harvest of Seasonal Vegan Recipes.  Your copy awaits at Amazon, Barnes & Noble, or Prince Books (both online and in their Norfolk, VA, store)!

Vegan Lemonade Ice Cream

Yield: approximately 1 quart

This is my mom’s favorite ice cream made my way.

When I was visiting my family a couple of weeks ago, Mama wanted me to veganize her Lemonade Ice Cream–doesn’t that just sound like summer?– to christen the Cuisinart electric ice cream maker I had given her and my dad (they gave me one just like it and I think it’s tops).

We didn’t get the ice cream made until the day before I was leaving early the next morning, so I wasn’t able to try any, but she reports that it met with ahhh-proval all the way around. I’ve been craving some ever since and finally made a batch this weekend. Oh, my, is it ever good: creamy and citrusy, kind of like a Dreamsicle only lemon flavored.

As always, I use Wheeler del Toro’s basic formula (if you didn’t purchase his Vegan Scoops cookbook last summer, treat yourself to it this summer). Since it makes about half as much ice cream base as my Mom’s recipe, which calls for one large can frozen lemonade, I simply used half a can.

Also, there was no arrowroot powder in my folks’ pantry, so I substituted an equal amount of cornstarch and it thickened beautifully. The only difference is that cornstarch doesn’t “break” when heated and, in fact, it needs to be cooked just a minute or so to thicken properly. Arrowroot reportedly prevents the formation of ice crystals and I’m not sure that cornstarch does. However, the batch I froze at my parents’ emerged from the ice cream maker silky smooth and didn’t last long enough for them to find out.

Enjoy this cool and refreshing sweet taste of summer as often as you like, as it’s a breeze to make.

1/4 cup unsweetened soy milk
2 tablespoons arrowroot powder
3/4 cup unsweetened soymilk (plain or vanilla would also be nice)
2 cups soy creamer
1/2 cup sugar
Optional garnish: twists of lemon rind or sprigs of fresh lemon verbena

In a small bowl, whisk together 1/4 cup soy milk with arrowroot powder until smooth. Set aside. Pour remaining soymilk, soy creamer and sugar into a small to medium saucepan and stir to combine. Place over medium heat and bring just to a boil. Remove from heat and quickly whisk in soy milk-arrowroot mixture until very smooth. Allow to cool to room temperature, whisk again if lumps remain and/or press through a sieve, and then cover and refrigerate several hours or overnight. When ready to freeze the ice cream, shake the lemonade container well, and whisk half a can into the soymilk mixture. Then freeze according to your manufacturer’s directions. Scrape the finished ice cream into an airtight container and store in freezer. Initially mine was frozen, but quite soft. But, after a night in the freezer, it was perfect. So you may want to freeze it a day before you plan to serve it.

Vegan Almond and Fresh Plum Tart

Yield: 8 servings

My go-to press in savory quiche and tart crust gets the sweet treatment with this elegantly rustic dessert. I simply added a little natural sugar to the dough and filled the partially-baked shell with a silky-smooth almond filling crowned with perfect little domes of fresh plums and a feathery dusting of powdered sugar. It’s the perfect way to end a summer meal or, for that matter, begin a summer day with a cup of tea. (Thanks, Diane and Mike, once again, for the gift of these plums from your tree.)

Vegan Press-in Sweet Pie Crust:
1 1/2 cups unbleached all-purpose or whole wheat flour (I used all-purpose in the photograph, as I didn’t have enough whole wheat, but you can combine the two to get the benefits of both)
1 teaspoon salt
1/4 cup natural sugar
1/2 cup canola oil
2 tablespoons unsweetened or plain soymilk, lite or regular

Preheat oven to 400 degrees. Mix the dry ingredients in a medium bowl. Pour the oil and milk over the dry ingredient mixture and work around with a fork or fingers until all of the liquid is absorbed. Transfer to an 8-inch tart shell with a removable bottom and press the crust firmly into the bottom and sides of the pie plate. The bottom and sides of a glass accomplish this task nicely. Bake for 10-12 minutes, remove from oven, and reduce oven temperature to 325 degrees. Let crust cool for 3 minutes, and then fill evenly with almond filling. Arrange plums, cut side down, in rings on top of filling, placing close together. Bake for 25-30 minutes or until almond filling is set. Let cool to almost room temperature, dust with powdered sugar and serve. Refrigerate leftovers, covered. Note: this crust, made with whole wheat flour, makes beautiful, sturdy 4-inch tart crusts that hold up even when removed from the tart pans and slid off the removable bottoms. Like the larger crust, I bake them 10-12 minutes before filling.

Pie Crust Source: http://www.steptalk.org/

Filling:

1-12 ounce box firm Silken tofu
1-8 ounce can almond paste, broken up into small pieces with fingers
1/2 cup natural sugar
1 teaspoon vanilla
1/2 teaspoon coarse sea or kosher salt

Place all ingredients in bowl of a food processor fitted with a metal blade and process until very smooth, scraping downsides of bowl as necessary.

Topping:
approximately 20 small fresh plums, halved and pitted

Optional Garnish:
a tiny bit of powdered sugar sifted over the top

Vegan Rosemary-Scented Pecan Crumble with Spiked Cranberry-Orange Filling

Yield: 8 servings

I know that a cranberry recipe in April seems odd, especially for a southeastern cook, but I actually have a good explanation:

Each month, as you may or may not know, Better Homes & Garden Magazine runs their “Prize Tested Recipe” competition. I’ve actually won or placed a couple of times in my pre-vegan (though vegetarian) days. The monthly call is for recipes in either of two categories that will be published about 6 months later. Hence, the winners of the “Cranberry Sweets” category that I entered will run next fall.

The recipe I submitted is a favorite that I created for our families’ annual Thanksgiving celebrations a few years back. However, I made a few alterations. For starters, I knew that BH&G would never choose a recipe that called for “vegan butter” as the original version of my crumble does. So, I thought about canola margarine as a substitution, but I wanted something even more widely available; I decided to try good ‘ole canola oil. It worked beautifully!

Knowing, though, that such a change might compromise the flavor, I decided to boost the recipe in that department in several ways. First, I added brandy, orange zest and cinnamon to the filling. Yum. But the real inspiration was what I added to the crumble: fresh rosemary, along with a hint of cinnamon. Double-yum!

If a homespun warm cranberry crumble is not something you find yourself craving this spring, I hope you’ll bookmark it for the fall. It really is already a winner in my (cook) book.

For this recipe and some 170+ more,
I invite you to purchase my first cookbook:

The Blooming Platter:
A Harvest of Seasonal Vegan Recipes

Vegan Heritage Press
Spring 2011

Vegan Chocolate, Raspberry and Cream Trifle

Yield: 6-8 servings (easily doubles)

My friend Susan Kaplan made a lovely Vegan Chocolate Bundt Cake for me as a holiday gift. I froze it to serve when she and her husband could come for dinner, which was this past Saturday. Joe and I each enjoyed another piece on Sunday, but there was still half of a cake left. So, because several days had passed and it was beginning to get dry, tonight I decided to transform it into a reasonably healthy trifle, eschewing peppermint for raspberries and Soy Whip for a not-too-sweet soy milk pudding. I think you’ll agree that my decision was a sound one.

1/2 recipe Vegan Chocolate Bundt Cake, cut into thirds (recipe follows)
*approximately 3 tablespoons raspberry liqueur (or one that would taste good with raspberries)
Vegan Vanilla Pudding (recipe follows), chilled
1 pint raspberries, rinsed and drained (about 36)

One day before serving, crumble 1/3 of cake into the bottom of a small clear glass trifle or other dish (I used a 5-inch square floral container but you may alternatively use individual wine or martini glasses). Sprinkle evenly with 1 tablespoon of liqueur, spread with 1/3 of pudding all the way to edges, and top with approximately 12 raspberries. Repeat layers two more times. Cover with plastic wrap and chill over night.

*Note: if you don’t have liqueur on hand or don’t consume alcohol, substitute room temperature strong coffee.

Vegan Chocolate Bundt Cake:
1 3/4 cups freshly brewed coffee
2/3 cup unsweetened Dutch-processed cocoa powder
1 1/2 cups granulates sugar
1/3 cup canola oil
1/3 cup applesauce
1/4 cup cornstarch
2 teaspoons vanilla extract
1 teaspoon almond extract
2 cups whole wheat pastry flour or all-purpose flour
1 teaspoon baking soda
1 1/2 teaspoons baking powder
1/2 teaspoon salt
2 teaspoons confectioners’ sugar

Preheat over to 325 degrees. Lightly grease an 8- or 10-inch bundt pan. Heat the coffee in a saucepan over medium heat until it comes to a simmer. Turn heat down and whisk in the cocoa powder until it has dissolved. Remove the saucepan from the heat and set aside to bring to room temperature. In a large mixing bowl, whisk together the granulated sugar, oil, applesauce, and cornstarch until the sugar and cornstarch dissolve, about 2 minutes. Mix in the extracts. Once the chocolate mixture has cooled a bit, stir that in as well. Sift in the flour, baking soda, baking powder, and salt. Beat until the batter is relatively smooth. Pour the batter into the prepared pan and bake for 45 to 55 minutes, or until a toothpick or butter knife inserted into the cake’s center comes out clean. Remove the pan from the oven and let the cake cool for about 20 minutes. Then invert the pan onto a serving plate to remove the cake, and cool completely. Once the cake is cool, sift the confectioners’ sugar over the top and serve.

Cake Source: Isa Chandra Moskowitz and Terry Hope Romero as published in Yoga Magazine via Susan Kaplan

Vegan Vanilla Pudding:
1/3 cup granulated sugar
3 tablespoons cornstarch
pinch salt
2 cups unsweetened or plain soy milk
1/2 teaspoon vanilla extract

In a small or medium saucepan, combine first three ingredients. Gradually whisk in soy milk. Turn heat to medium-high and cook, whisking constantly for 3-4 minutes or until mixture is quite thick. Remove from heat and cool to room temperature, whisking occasionally. Then chill in refrigerator for 2-3 hours.

Pudding Source: Jolinda Hackett at About.com who reprinted the recipe with permission from The Compassionate Cook Cookbook.

Vegan Baked Apples Baklava

Yield: 4 servings

If you love baked apples and baklava (without the honey, of course)–heck, maybe even if you don’t–you will flip over this recipe. It is so warming on a crisp morning or evening and is as good for breakfast as it is for dessert. (It’s not heavy, but it is generously proportioned, so it best follows a meal on the lighter side.) Don’t be tempted to dispense with the sauce, as it adds just the right contrast in texture, temperature and tartness. Similarly, the combination of vegan butter and olive oil is very intentional, as the latter lends an ultra-appealing savory quality to the dish.

For this recipe and some 170+ more,
I invite you to purchase my first cookbook:

The Blooming Platter:
A Harvest of Seasonal Vegan Recipes

Vegan Heritage Press
Spring 2011

Related Posts Plugin for WordPress, Blogger...
Site developed by IYPS

Featuring Recent Posts WordPress Widget development by YD