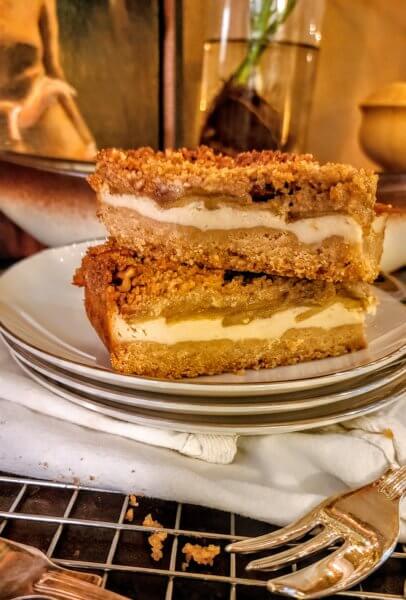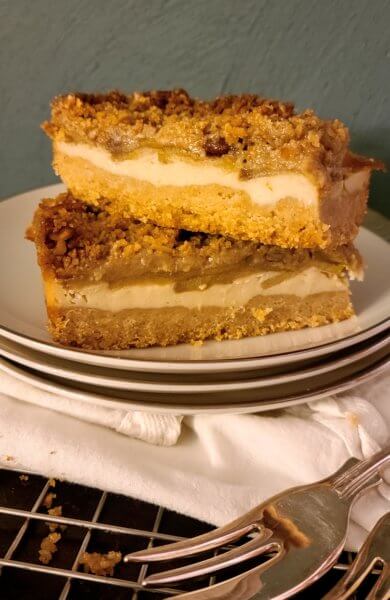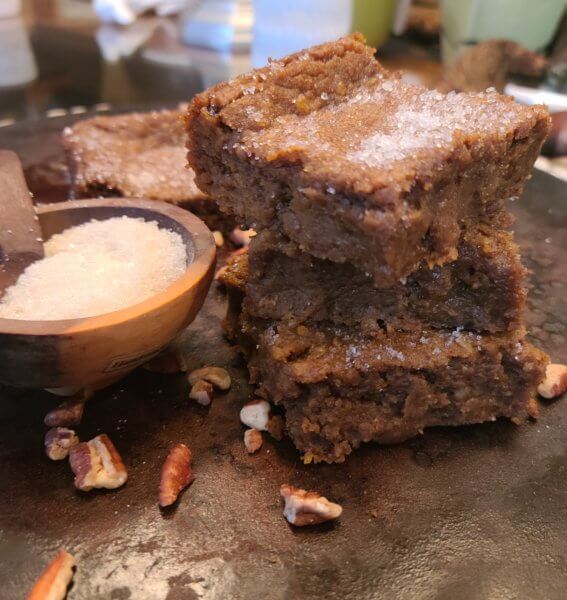
Spiced Apple Cheesecake Streusel Bars (vegan & plant-based)

Yield: 16 bars

These plant-based bars are irresistible autumn coziness personified. The four layers go together quickly if you make three of the layers in the same food processor bowl without even wiping it out. The tofu-based cheesecake layer is a dead ringer for its dairy cousin and a luscious complement to the spiced apples and crumbly topping. For those watching calories, these bars are even delicious made with Truvia brown sugar substitute.

Crust:
1 cup flour
1/4 cup brown sugar
8 tablespoons vegan butter

Preheat oven to 350. Line an 8 or 9-inch pan with a wide strip of parchment paper or foil to aid in removal. Pulse ingredients in food processor until mixture holds together in moist clumps. Press evenly into pan and bake for 15 minutes.

Cheesecake Filling:
8 ounces extra firm tofu
1/2 cup sugar
2 tablespoons cornstarch
Juice of 1/2 large lemon
1 teaspoon vanilla
Optional:1/2 teaspoon almond extract

Process for a couple of minutes or so in food processor, scraping down sides of bowl as necessary, until smooth and creamy. Pour filling over warm crust.

Apple Pie Filling:

1/2 cup water, divided
1 teaspoon apple pie spice, pumpkin pie spice, or ground cinnamon
1/4 teaspoon salt
2 apples, halved, cored, and thinly sliced or chopped (I don’t peel them, but you can)
2 tablespoons cornstarch

Poor 1/4 cup water into large skillet followed by spice, salt, and apples. Cook over medium heat until apples start to become tender, stirring occasionally. Whisk cornstarch into remaining water to dissolve, pour over apples, gently stir, and continue cooking until thick and apple slices are softened. Arrange apple slices in 3 rows over cheesecake layer.

Topping:

1/2 cup flour
1/2 cup Brown sugar
1/2 teaspoon apple pie spice, pumpkin pie spice, or ground cinnamon
4 tablespoons vegan butter
1/4 cup old-fashioned oats
1/4 cup chopped pecans

Pulse together first four ingredients in food processor until mixture holds together in moist clumps. Stir in oats and pecans. Sprinkle over apples in an even layer and bake for 30 minutes. Cool, cover, and refrigerate before slicing with a serrated knife and serving.

#vegan #veganrecipes #veganfoodshare #veganfoodporn #plantbased #plantbasedrecipes #plantbasedfoodshare #plantbasedfoodporn #vegandessertbars #plantbaseddessertbars

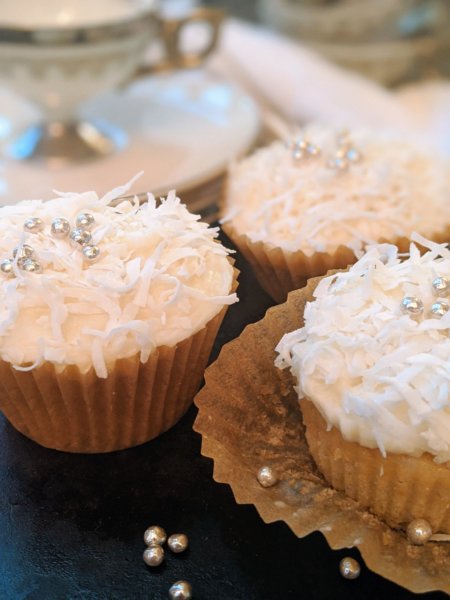
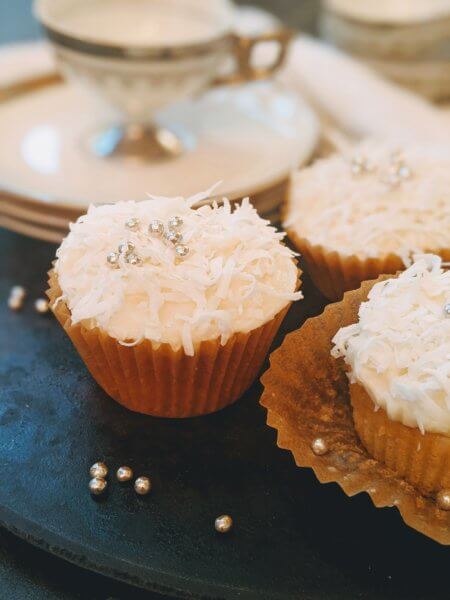
Small Batch Coconut Cupcakes with Coconut Pastry Cream and Coconut Cream Cheese Frosting (vegan & plant-based)

Yield: 4 cupcakes (easily multiplies to create 1 dozen or more)

I have been craving a big layered coconut cake. I love the look of big desserts. But let’s be honest, with only me and Bob living here–and him not eating my food, practically on principal–never mind food sharing dramatically curtailed because of this pandemic, I did not need a big coconut cake to eat by myself. I didn’t even need a dozen cupcakes.

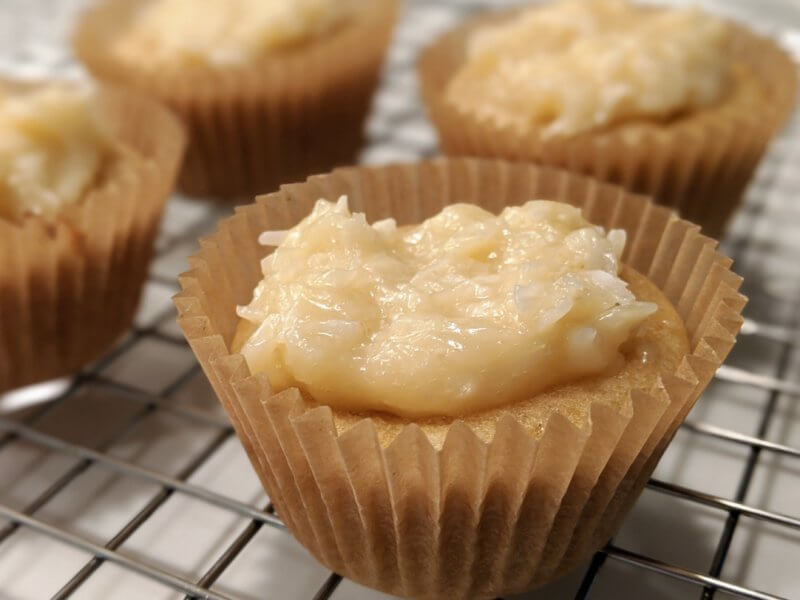
So I developed this recipe for four cupcakes, but I made them extra special with a layer of coconut pastry cream under the delicious coconut cream cheese frosting. I make the pastry cream in the microwave because it is such a small amount, but you could certainly make it in the smallest saucepan you have.

And I like to pipe the frosting on, even though it will be covered by shredded coconut, just so the pastry cream stays in place. Use a fairly large tip so that the coconut in the frosting won’t clog it.

Coconut Cupcakes with Coconut Pastry Cream and Coconut Cream Cheese Frosting

5 tablespoons all purpose flour
3 tablespoons granulated sugar
1 tablespoon + 1 1/2 teaspoons cornstarch
1/4 teaspoon baking powder
1/8 teaspoon baking soda
1/8 teaspoon sea salt
1/4 cup coconut milk (lite or regular)
1/4 teaspoon vanilla extract
1/4 teaspoon almond extract
Coconut Pastry Cream (recipe follows)
Coconut Cream Cheese Frosting (recipe follows)
Garnish: approximately 1/4 to 1/3 cup shredded coconut, sweetened or unsweetened (I prefer unsweetened)

Preheat oven to 350°. Line 4 muffin tins with paper cupcake liners. In a small bowl, whisk together all ingredients. Divide evenly among lined muffin tins. Thanks for approximately 22 to 23 minutes or until the toothpick inserted in center comes out clean. Cool and then top with 1/4 of the cooled pastry cream followed by 1/4 of the frosting. I like to pipe the frosting on (with a large tip) so the pastry cream stays in place. Sprinkle thickly with shredded coconut.

Coconut Pastry Cream:
1 tablespoon vegan butter
2 tablespoons granulated sugar
1 tablespoon cornstarch
1/8 teaspoon sea salt
2 tablespoons coconut milk (lite or regular)
1 drop vanilla extract
1 drop almond extract
Approximately 2 tablespoons shredded coconut (sweetened or unsweetened)

You can make this on the stove top, but because the quantity is so small, I find it easier to make in a small bowl in microwave. Melt together butter and granulated sugar, whisk well, and then whisk in cornstarch and sea salt, followed by coconut milk. Microwave about 30 seconds to thicken. Stir in coconut. Let cool.

Coconut Cream Cheese Frosting:
2 tablespoons vegan butter, softened
2 tablespoons vegan cream cheese, softened
1/4 teaspoon vanilla extract
1/8 teaspoon almond extract
Approximately 1 cup powdered sugar
If needed: 1 tablespoon coconut milk
1/4 cup shredded coconut (sweetened or unsweetened)

Cream together butter and cream cheese. Best in extracts followed by powdered sugar. If needed to teach desired consistency, beat in a little coconut milk or powdered sugar. Stir in coconut. If piping on, use a large tip that shredded coconut will easily pass through.

#vegan #veganrecipes #veganfoodshare #veganfoodporn #plantbased #plantbasedrecipes #plantbasedfoodshare #plantbasedfoodporn #vegancoconutcupcakes #plantbasedcoconutcupcakes #vegancoconutpastrycream #plantbasedcoconutpastrycream #vegancoconutcreamcheesefrosting #plantbasedcoconutcreamcheesefrosting

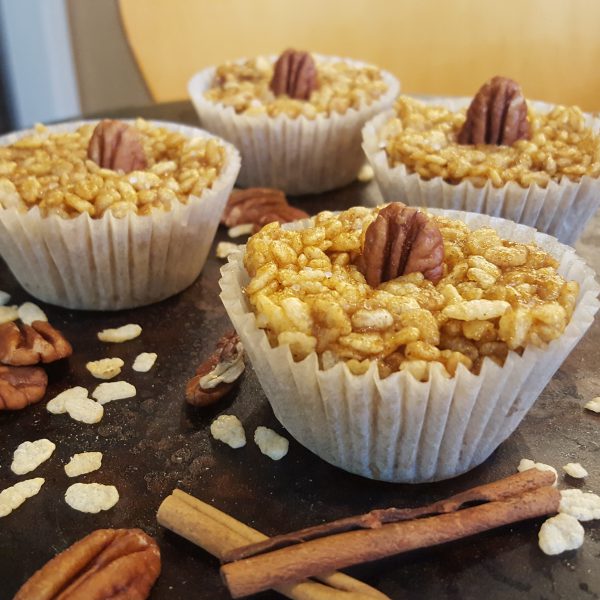
Vegan Pumpkin Spice Rice Krispie Treats

Pumpkin luvahs, do you feel me?!

Vegan Pumpkin Pie Spice Rice Krispie Treats
Yield: 1 dozen (approximately 170 calories each)

I don’t think my newest recipe needs much of a preamble except to say, what are you waiting for?

4 tablespoons vegan butter
10 ounces vegan marshmallows (I use Dandie brand)
6 cups rice cereal (I actually use Erewhon brown rice but you could use the Rice Krispies brand)
Pinch sea salt
1 tablespoon pumpkin pie spice
6 tablespoons pumpkin puree, not pumpkin pie filling
Optional garnish: 12 pecan halves

Line a muffin tin with 12 cupcake papers and set aside. In a large saucepan over medium to low heat, melt butter and marshmallows, stirring continually. Vegan marshmallows melt more slowly than regular marshmallows, so be patient and keep stirring with a wooden spoon. Remove from heat, stir in remaining ingredients, except pecans, until completely combined, and divide evenly among cupcake cups, pressing down firmly. Garnish each with a pecan half if desired. Cool to room temperature and store in refrigerator In an airtight container.

#vegan #veganrecipes #veganfood #veganfoodshare #veganfoodporn #plantbased #plantbasedrecipes #plantbasedfood #plantbasedfoodshare #plantbasedfoodporn


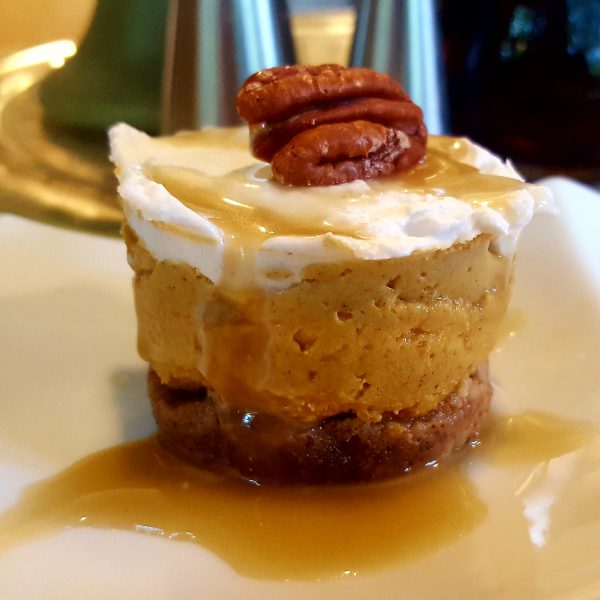
Mini Vegan No-Bake Pumpkin Cheesecakes (almost raw!)

 Yield: 12 mini cheesecakes

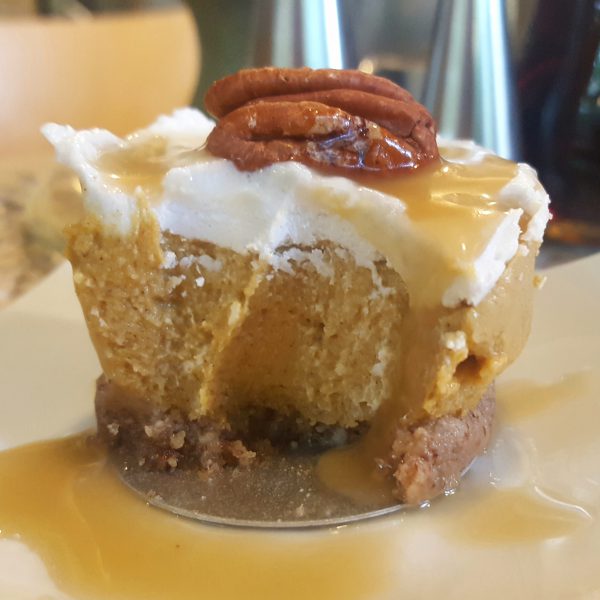
Vegan Almost Raw Mini Pumpkin Cheesecakes…this one for the win!

I promised I would be back with you when I had refined my recipe for vegan pumpkin cheesecake enough to share with all of you vegan aficionados. I am thrilled to say my most recent taste test is a keeper! And NO baking reqired.

Plus, I got smart, and purchased a mini cheesecake pan at the kitchen Barn so that I could make partial recipes and not have huge cheesecakes sitting around.

I went a completely different route this time with an unbaked version. I can’t call it completely raw, though, because, of course, the canned pumpkin puree is cooked at the factory and I simmer the sauce to thicken it. But I am not a raw vegan anyway, so it doesn’t matter.

This cheesecake goes together so quick and easy and is beautiful enough for company. So put it on your holiday menu and impress your friends with both the taste and the appearance. Regarding appearance, be sure to press each layer down firmly or you will end up with a few air bubbles as I did. Still, I think it was ready for its close-up. You?

This recipe requires a 12-cup mini-cheesecake tin with removable bottoms.

Note: when coconut milk cans are shaken, you want to only hear a little sloshing indicating semi-solid cream at the top.

Crust:
1/2 cup raw pecan halves or pieces
2 tablespoons unsweetened grated coconut
2 pitted medjool dates
2 tablespoons maple syrup
1/2 teaspoon ground ginger

Process in food processor until mixture is texture of course cookie dough. Divide evenly among 12 mini-cheesecake cups and press firmly and evenly into bottoms.

Filling:
2 cups raw cashews
3 cups water
1/4 cup canned pureed pumpkin
1/4 cup maple syrup
2 teaspoons pumpkin pie spice
1/2 teaspoon almond extract
1/2 teaspoon vanilla extract
1/2 cup semi-solid cream from top of 2 cans full-fat coconut milk (remaining tablespoons from second can will be used for sauce)
“Caramel” Sauce
Lightly salted and roasted pecan half

Heat cashews for 10 minutes on high power in large bowl in microwave. Drain and process in food processor until an almost smooth dough-like consistency forms. Add pumpkin, syrup, spice, and extracts and process until smooth, thick and creamy. Divide evenly among mini-cheesecake cups, pressing firmly and smoothing tops. Then divide coconut cream among each, also smoothing tops. Refrigerate 8 hours or overnight. Remove mini-cheesecakes from tin and serve each with a drizzle of “caramel” sauce and a roasted pecan half.

“Caramel” Sauce:

1/4 cup semi-solid cream from second can full-fat coconut milk
1/4 cup maple syrup
Optional: 1 teaspoon brandy, bourbon, or cognac

Vigorously simmer cream and maple syrup together over medium heat until thickened, about 3 minutes. Remove from heat and stir in alcohol if using. Cool to warm before drizzling over cheesecake.

Garnish:

12 lightly salted roasted pecan halves

#vegan #veganrecipes #veganfood #veganfoodshare #veganfoodporn #plantbased #plantbasedrecipes #plantbasedfood #plantbasedfoodshare #plantbasedfoodporn


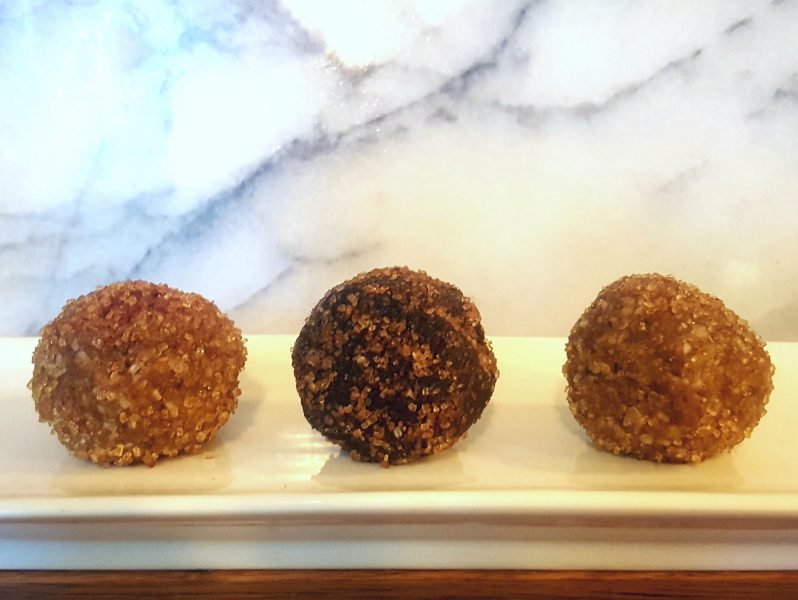
Raw Vegan Cinnamon-and-Sugar Donut Holes
(with an almost raw Chocolate Donut Hole variety)

Yield: 1 dozen donut holes

I had experimented with a recipe previously, but I wasn’t happy enough with it to post it. This time I am!

These are delicious, but bear in mind that they are far more calories than a fried vegan donut hole. Loaded with nutritious ingredients like walnuts, dates, unsweetened coconut, Chia and flax seeds, and for the chocolate ones, cocoa powder, they pack a punch of 150 calories each, almost as much as a regular whole vegan donut.

Yes, they are power-packed, but the scale doesn’t know that, so enjoy in moderation.

Blooming Platter Raw Vegan Donut Holes–
Cinnamon-and-Sugar or Chocolate

1 cup walnut halves and pieces
1 cup whole moist dates
1 cup unsweetened coconut shreds or chips
2 tablespoons chia or flax seed meal, or a combination
1/8 to 1/4 teadpoon fresh ground nutneg (don’t omit; nutmeg lends the holes their distinctive donut-y flavor
Optional: for Chocolate variety, add 2 tablespoons cocoa powder or add 1 tbsp to 1/2 the dough if you want one half dozen cinnamon-and-sugar and one half dozen chocolate
Cinnamon-and-Sugar Coating Coating (recipe follows)

Place all ingredients in bowl of food processor and process until the mixture is homogeneous and holds together. Form into 12 tight balls and roll in cinnamon-sugar coating.  Store in airtight container in refrigerator. Allowed to come to room temperature before serving if desired.

Coating:
2 tablespoons demerera sugar
1/2 teaspoon ground cinnamon

Mix together in a small cup.

#vegan #veganrecipes #veganfood #veganfoodshare #veganfoodporn #plantbased #plantbasedrecipes #plantbasedfood #plantbasedfoodshare #plantbasedfoodporn


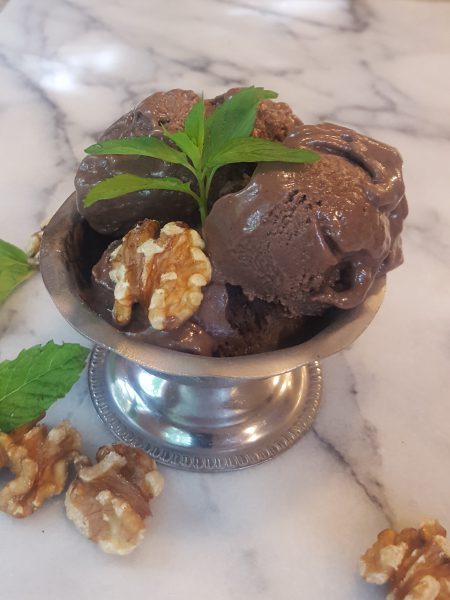
Vegan 4-Ingredient Chocolate-Banana Ice Cream
(its base is frozen bananas!)

Yield: 4 servings

Calories: app. 130/serving (however, you can eat the whole recipe for  only 520 calories which is equal to or less than a small meal!)

This recipe was inspired by one making the rounds via video on Facebook.  A while back, lying in bed very early one morning, I watched how it was made with the sound off–Bob was asleep–and then just went for it last night, propelled by this oppressive heat and humidity.  Around here, we call the heat index the “misery index.”

The original recipe called for 4 bananas and what appeared to be 2 tablespoons of peanut butter and 2 of cocoa powder.  I’m not a big peanut butter and chocolate fan.  My aversion dates from a childhood incident that resulted from eating way too many peanut butter-and-chocolate eggs out of my Easter basket on the heels of blueberry shortcake.  I nonetheless added one tablespoon thinking it might be necessary for texture.  It wasn’t.  For the chocolate, I used  Hershey’s Special Dark Cocoa Powder, but if you prefer a more reddish-brown color, then just use regular cocoa powder.

But whatever you do, peel your bananas before freezing them.  I don’t know what I was thinking, but when I pulled four banana-shaped ice cubes out of my freezer, I realized my mistake.  So, I thawed them, peeled them, cut them into chunks and refroze them.  The texture was still silky and glorious.

My two additions to the recipe are quick, easy, and absolutely necessary in my opinion.  After I tasted the ice cream, I felt it seemed a little flat or one-note.  I tend to like more complex flavors,though not fussy ones.  So, I added a hint of both almond and vanilla extracts and that did the trick.  However, I look forward to experimenting with other extracts like mint, orange, and perhaps rum or brandy.

If your summer promises to be as hot and humid as ours in Eastern, VA, this recipe is likely to become a staple.  A friend said that his daughter used to make a version and eat it for breakfast.  It is certainly more nutritious than most of what I see folks eating for breakfast.

Whenever you decided to enjoy a couple of scoops, I hope you will enjoy it as we do.

4 large bananas, peeled, cut into 2-inch chunks and frozen

2 tablespoons regular or Special Dark cocoa powder

1/4 teaspoon almond extract

1/2 teaspoon vanilla extract

Optional garnishes: walnut halves and mint sprigs

Blend all ingredients in a food processor until smooth and creamy.  Enjoy right away or freeze in an airtight container.  Thaw for two 30-second intervals in the microwave before trying to scoop.  Top, if desired with walnut halves and mint sprigs.


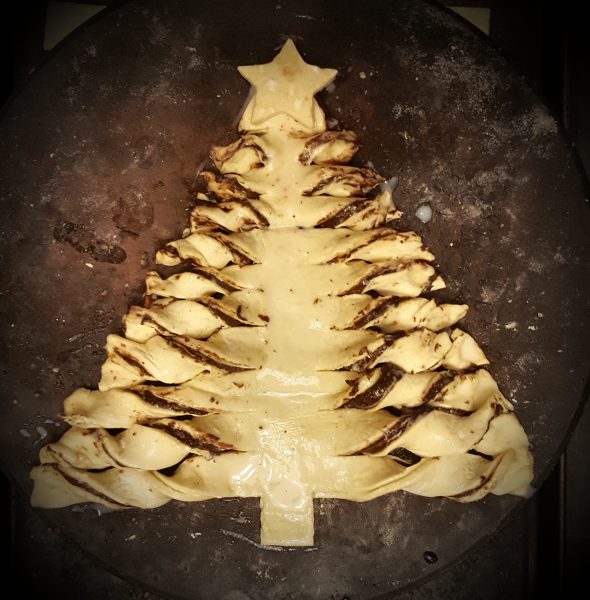
Vegan Nutella and Puff Pastry Christmas Tree

I can’t see Santa’s Forest for these adorable trees.

Apparently they are all the rage this year, but I was evidently a little late to the pastry tree party.  Make yours with pizza dough or puff pastry and spread with the sweet or savory filling you most crave. Just be sure to include a creamy base to adhere the layers together.

My version is sweet–but not too–uses only three ingredients and, after the pastry thaws, is ready to devour in under 30 minutes.  I left a Middle Eastern dinner and this tree last night for our dog sitters (yes, we are those dog owners) while we joined friends for their Christmas Eve Eve tradition: a salad and sip of wine followed by a Christmas light-lit walk over to the Naro, an independent film house, to see “It’s a Wonderful Life.” The twins left some of the tabouli salad but not a crumb of the pastry. It was a huge hit with these 19 year olds.

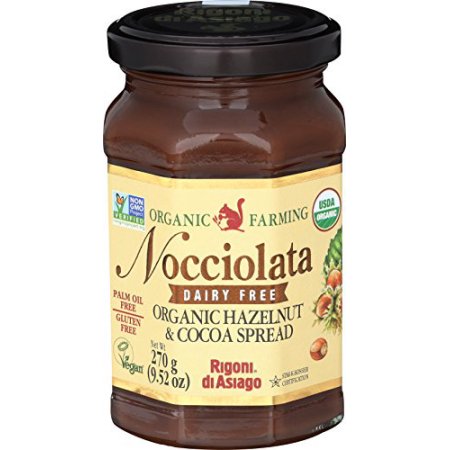
My take on this new classic was inspired by its key ingredient: Rigoni di Asiago’s Nocciolata Oraganic Dairy-Free Hazelnut & Cocoa Spread, generously sent to me for product review purposes. With a deeply nutty and chocolatey flavor–its richness undiluted by dairy–and a thick and creamy–but spreadable–texture, this product is tops in my pantry (it needs no refrigeration).  It is also gluten- and palm oil-free.

Recipe

1 box Pepperidge Farm Puff Pastry (2 sheets), thawed according to package directions

4.5 to 5 ounces vegan Hazelnut-Cocoa spread (1/2 jar Nocciolata)

1 to 2 tablespoons non-dairy milk

Preheat oven to 400 degrees. On baking stone or parchment- or Silpat-lined baking sheet, stack the two pastry sheets.  With a sharp knife, cut into a triangular tree shape with a 1-inch or so wide trunk at the bottom. Remove top sheet, spread bottom sheet with hazelnut-cocoa spread, replace top sheet, lining up edges, and press down gently.

Cut 1 star from scraps and whatever other shapes you like fir nibbling or to serve as croutons on salads. Place pastry shapes on a separate stone or lined baking sheet.

Make 3/4-inch wide horizontal cuts from outer edges of triangle toward the center, stopping even with outer edges of trunk leaving a 1-inch or so wide trunk up the center. Twist each long cut strip twice and the shorter ones once, pressing tips firmly against baking stone or sheet.  Brush very lightly with non-dairy milk, press star onto top point, and brush star with a tiny bit more non-dairy milk.  Bake for 20 minutes or until golden brown, but remove shapes cut from scraps after 10 or 15 minutes or they will burn. Remove baking sheet with pastry tree from oven, cool slightly, and slide tree onto serving platter. Serve warm or room temperature.


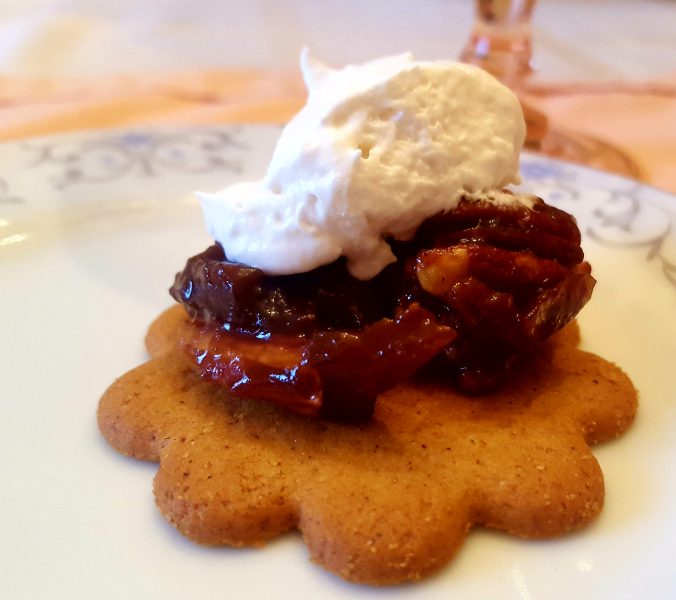
Vegan Mini-Chutney & Cocowhip “Pies”
Ready in a (Ginger)Snap

These pretty little mini-pies make holiday pie “baking” a snap. A gingersnap.

I am so happy to share this cheater “recipe” with you, the brain child of my good friend, Mary Beth Watson. It is really just a 3-ingredient lickity-split process.

After one bite, no one will care how little time you spent laboring in your kitchen.

Ingredients:

Anna’s or your favorite brand crispy scalloped (preferably) vegan gingersnaps

Chutney (apple-pecan or, for Christmas, cranberry-orange-walnut “sauce” works nicely)

So Delicious brand Cocowhip or your favorite vegan whipped cream

To make each mini-pie, top one gingersnap with a spoonful of chutney followed by a dollop of Cocowhip. That’s it! Make as many or as few as you need just before serving time.


Best Vegan Salted Maple Brandy (or Bourbon) Pecan Pie
(Classic Texture)


If a traditional pecan pie–with even more pecans–is what you crave, this pie is perfection and as easy as, well, you know.

Most recipes call for 2 cups–or even just 1 1/2 cups–pecans. Why?  Mine calls for 3 for the best filling-nut ratio. This is no time to skimp.

A week ago, I published my other favorite pecan pie, though that one has a more custardy texture, as it is made from a tofu and cornstarch-based custard. Bob the omni liked that one but he much prefers this one, which he eats with his chocolate ice cream that is always in the freezer. He did admit that another flavor of ice cream would be optimal.

So serve either pie with vegan vanilla ice cream and/or vegan whipped cream–perhaps a little drizzle of brandy or bourbon–enjoy, and then let us know what you you think. Happy Holidays!

Note: If you eschew booze, just replace it with 3 tablespoon water and 1 tablespoon of fresh lemon juice, as Veganegg has a somewhat pronounced, slightly savory, flavor that needs countered with the assertive flavor of alcohol or with an acid.

1 prepared vegan pie crust, homemade or purchased

1 1/2 cups pecan pieces

1 1/2 cups pecan halves

Non-stick spray

1/2 teaspoon sea salt

6 tablespoons Veganegg

3/4 cup water

1/4 cup brandy or bourbon

3/4 cup maple syrup

1 cup demerrera sugar

3 tablespoons melted vegan butter

2 tablespoons molasses (not blackstrap)

1 teaspoon vanilla extract

1 teaspoon almond extract

1/2 teaspoon sea salt

Topping: vegan vanilla ice cream, vegan whipped cream like So Delicious Cocowhip

Set out pie crust if frozen. Preheat oven to 350 degrees. Spread pecans in a single layer on a baking sheet, spray with nonstick spray, sprinkle with 1/2 teaspoon sea salt, and toast for 3 minutes.  Remove from oven and set aside to cool.

In a large bowl, whisk together Veganegg with water and brandy or bourbon. Whisk in all remaining ingredients. Set aside 32 pecan halves and spread all the rest into pie crust. Sprikle with sea salt remaining on baking sheet.  Place pie pan on baking sheet, pour filling evenly over the top. Decorate the top with concentric rings of pecan halves and bake for one hour. Pie will seem quite “loose” but will firm up as it cools.  Because of this, you may need to gently reposition some of your decorative pecan halves.

Cool completely, cover, and chill for a couple of hours.  Serve topped as desired.


Related Posts Plugin for WordPress, Blogger...