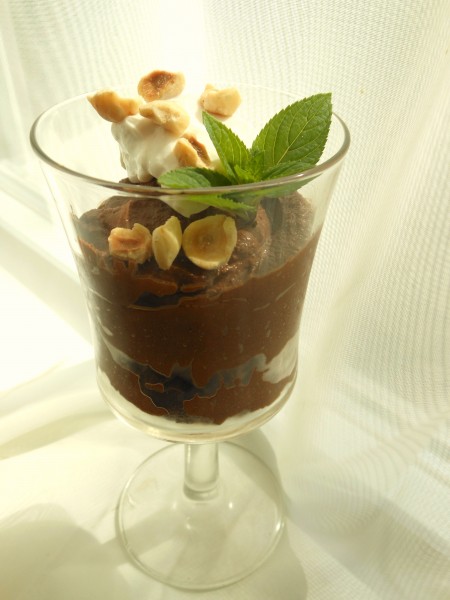
Vegan Chocolate-Plum Butter Mousse–A Transcendent Flavor Combination with Just 4 Ingredients!

DSCN1677Yield: 4 servings (easily doubles)

Honestly?  You absolutely can’t believe how delicious the marriage of chocolate and the deep, fruity flavor of plums is in this quick and easy four-ingredient mousse (which can be served as a tart by spooning it into a pre-baked shell).

This is a four-seasons treat since it is made with plum butter instead of fresh plums.  (Incidentally, fruit butters are misnomers, as they contain no dairy.)  But, since it is mid-summer, you might garnish it with fresh plum slices along with the mint, whipped topping, and hazelnuts.

That is, if you don’t consume it all before it makes it into the glasses!

10 ounces vegan dark chocolate, melted (I used chocolate chips and melted them in two 1-minute increments in the microwave, whisking after each)

1/4 box extra-firm tofu, drained and patted dry

1/2 cup vegan soy creamer (I used French Vanilla)

1/2 cup plum butter (I used Bauman’s  brand–which may be ordered online–made in small batches in Pennsylvania Dutch country from only plums, sugar or white grape juice, lemons, oranges and cinnamon)

Optional garnish: your favorite vegan whipped topping and/or chopped nuts (I like hazelnuts for this dessert) + mint sprigs

In a food processor, combine all ingredients, processing until smooth, scraping down the sides of the bowl as necessary.  After about a minute, the mousse will be light and fluffy.  After about another minute it will become somewhat denser and darker, yet still silken and fluffy.  Choose our preference.  Divide the mixture among 4 stemmed glasses or small ramekins and enjoy immediately or chill until serving time.

Note:  For individual baked crustless tarts, divide mixture among 4 ramekins coated lightly with non-stick spray and bake in the center of oven for 15 to 20 minutes or until set, but still glossy.  Check after 15 minutes, as tops should not be dry and starting to crack.  Allow to cool before serving, or cover and place in refrigerator until serving time.  Serve chilled.  Garnish if desired.

The Blooming Platter’s Vegan Single-Serving Microwave “Brownikins” (My Take on a Microwaved Brownie-in-a-Mug)

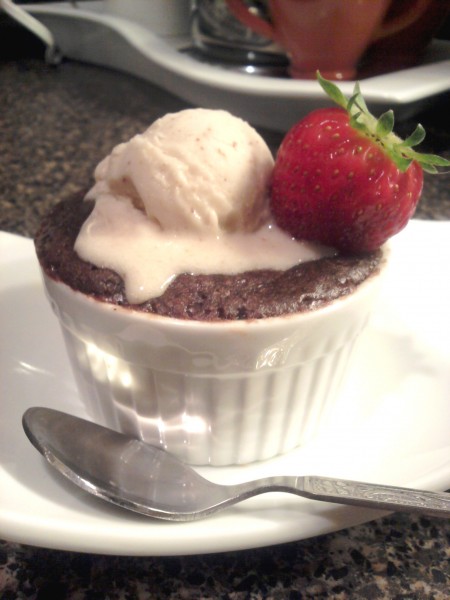
Brownikins--Microwave Brownie in a MugYield: 1 serving

Okay, don’t even try to convince me that every once in a while you aren’t dying for a tiny taste of something sinful, and wish you could make a miniature little confection that is quick, easy, and not a killer in the calorie department.

Well, now you can!

NPR was where I first heard about these microwaved brownies-in-a-mug, so I certainly didn’t invent them.  But I do think I have perfected a recipe that needed a little somethin’-somethin’.  I heard the program weeks ago, but I was having a powerful craving last night, so I did a little internet research and gave it a whirl.

I inadvertently overcooked my brownie a little–it keeps cooking for a bit even after you remove it from the microwave–so go easy.  But, even so, I wasn’t 100% sold, despite the fact that the recipe I tried had something like 5,000 “likes.”

I sent the recipe to my sister, Ginny, and she made one for our brownie-loving Papa, but he thought it was a little too rich in the chocolate department.  So, back to my kitchen I went this evening, this time armed with some ideas for how to improve the brownie’s taste and texture, along with some So Delicious Almond Milk Ice Cream (vegan) and a fresh strawberry to perch on top.

YUM!  A winner!  All I needed was a name.  My dear friend Sonya Harmon calls our “little” Great Dane (she’s smaller than her mate, Huff!) “Minnikins,” and I think that is the cutest name for our little gal.  So, since these “mini” brownies are almost as cute, I thought they should be called “Brownikins.”  Thank you, Sonya-kins!

Whatever you call them, you will love them!

And, by the way, you can certainly bake them in a mug as intended, but this recipe doesn’t begin to fill the mug, and I don’t like the brownie batter smeared on the sides after whisking the ingredients together.  So, I whisk it up in a small cup and then transfer into a mini-ramekin (about 1/3 cup) for the cutest presentation ever with a melon ball size scoop of ice cream and baby strawberry.  What’s one more mug to wash?

1 tablespoon canola oil or vegan butter melted

2 tablespoons water

1/4 teaspoon vanilla

2 tablespoons unbleached all-purpose flour (I use white whole wheat)

2 tablespoons natural sugar

2 teaspoons cocoa powder (not Dutch processed)

1/8 teaspoon baking powder

1/8 teaspoon or less sea salt (I love that little crunch of salt with the sugar.  You won’t need much if you use salted vegan butter, but don’t omit, as it is needed for flavor.)

Accompaniments: vegan ice cream, a fresh strawberry, plus optional vegan chocolate sauce and vegan whipped topping

In a small cup (microwave safe if you plan to cook the brownie in the cup), whisk together melted butter or oil, water, and vanilla.  Then whisk in all remaining dry ingredients.  Whisk until smooth.  If desired, transfer to a ceramic mini-ramekin and cook in a microwave oven on full power for 45 seconds or until a toothpick inserted in the center comes out clean or ever-so-slightly moist.  Let sit for a couple of minutes before garnishing and serving.

Photo Note:  Sorry about the quality of the photo.  I was so excited with my creation, that I just snapped it with my phone sitting on the kitchen counter at 8 p.m.: no waiting for optimum lighting conditions!

Mouthwatering Mother’s Day Breakfast/Brunch: Vegan German Chocolate Pancakes with Coconut Pecan Maple Syrup

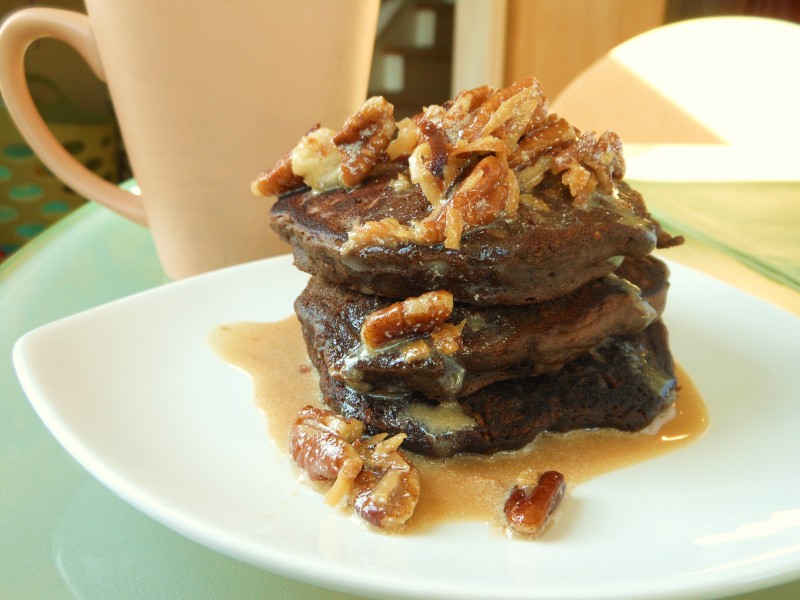
German Chocolate PancakesYield: 4 servings

Recently, I returned from a Spring Break trip to visit my family where I made my Papa his favorite vegan brownies.  But he and my Mama both have birthdays coming up, and I was reminded that his very favorite cake is German Chocolate.  So, back home in Virginia and with German Chocolate Cake on my mind, I decided I had to make Papa’s favorite cake as pancakes.

My Vegan German Chocolate Pancakes with Coconut Pecan Maple Syrup are somewhat rich and filling, so I like to eat a stack of three because that looks so nice, but keep them on the smaller side, so as not to weigh myself down for the day.  Other than the flour, soymilk, and pecans–and the coconut to some extent– there is not a lot of nutrition here, so be sure to serve this divine indulgence with a side of fruit and maybe a little vegan yogurt.

Also, in the “rich and filling” department, I have recently started making quesadillas using non-stick spray instead of my beloved canola oil-vegan butter mixture to grease the skillet.  So, for the sake of calorie reduction, I decided to try it with these pancakes and was VERY happy with the results.  But feel free to go for the higher calorie option if you want a bit more rich flavor.  I generally use a couple of tablespoons of each for a 4-serving batch of pancakes.

Thanks to Alisa Free, the “Go Dairy Free” Queen, for publishing the recipe on her popular, one-of-a-kind site.  Click HERE or on the link above to go straight to the recipe.

Vegan Chocolate Nayo Cake–My Version of Your Grandma’s Chocolate Mayonnaise Cake Takes the Cake!

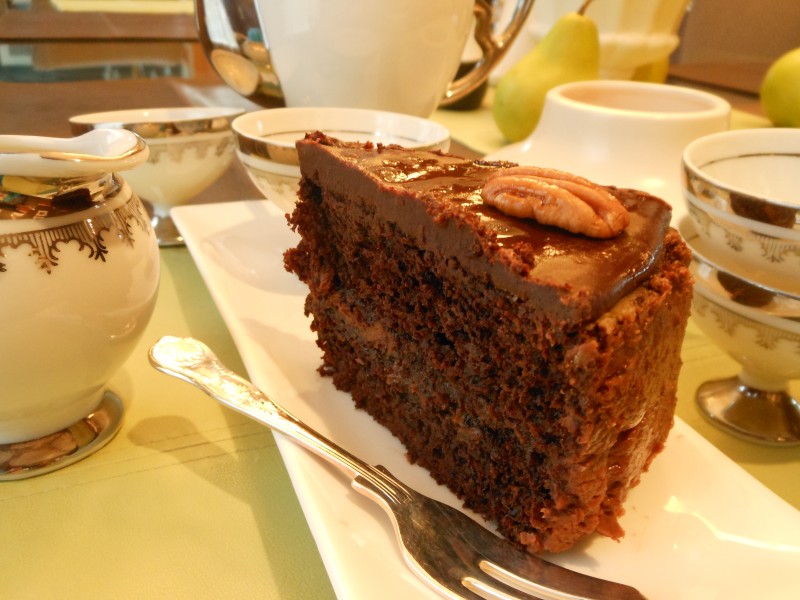
Slice of CakeYield:  one 8- or 9- inch layer cake

“Chocolate Mayonnaise Cake???” you may be thinking.  “Ick!,” right?
Wrong!  Chocolate Mayonnaise Cake is a long-standing classic for a reason.   But this is one time when I felt that an old standby needed a little boost.  Hence, my Vegan Chocolate Nayo Cake was born.  Click on the link to go straight to my recipe on the Nasoya website, or keep reading for the backstory.
Very generously, Nasoya recently sent me a jar each of their newly reformulated Nayonaise and NayoWhipped sandwich spreads to review.  So, since I had three jars of mayo in my fridge (those two plus my jar of Vegenaise), I decided I should make something that called for a lot of it to use some of it up before it spoiled.
I remembered a very “old-skool” recipe called “Chocolate Mayonnaise Cake,” so I Googled it and got busy with some research.  Many of the recipes I found call for a couple of eggs along with the mayonnaise, but I found one that was naturally vegan except for the mayo, so I started there, substituting NayoWhipped, as it is the sweeter of the two varieties that I was sent.
But I wasn’t completely sold on the cake.  Since vegan mayo contains no eggs, I felt the cake needed more lift.  But more than that, it need more flavor!  I had scanned through the comments on the recipe before I made it and the responses were 180 degrees apart: from the best cake folks had ever eaten to are-you-kidding-I’ll-never-make-this-again.   And, I can see how different palates would interpret the flavor so differently.  It needed work.

More searching turned up a vegan recipe, but it called for applesauce along with the mayo, and I don’t keep applesauce around.  What I really wanted was a recipe that could be made from a standard baker’s pantry.

So, since, unfortunately, our epileptic Great Dane, Minnie, had a seizure in the wee hours of the morning a little while back—time to up her phenobarbital!—I was WIDE awake and decided to hit the kitchen, creating my own version of Vegan Chocolate Mayonnaise Cake that I had been working out in my mind for the couple of days since my first test.
One of the people who commented on that first recipe I found recommended making it with coffee, so that was one of my substitutions, which dramatically helped in the flavor department.  But I punched up the flavor even more with Creme de Cacao (it’s vegan!). I just happened to have some on-hand after creating a Vegan Grasshopper Pie for St. Patty’s Day and, boy, am I glad I did!
Besides the coffee and Creme de Cacao, what really did the trick was some additional natural sugar and some apple cider vinegar, which is not as astringent as white vinegar, and adds very subtle complexity.  I upped the amount of baking soda from 1 1/2 teaspoons to 2, whisking it into the vinegar for some serious fizzing action.  This seems to give a little extra “oomph” to the leavening power of the baking soda.  But I also added just a teaspoon of baking powder for good measure.
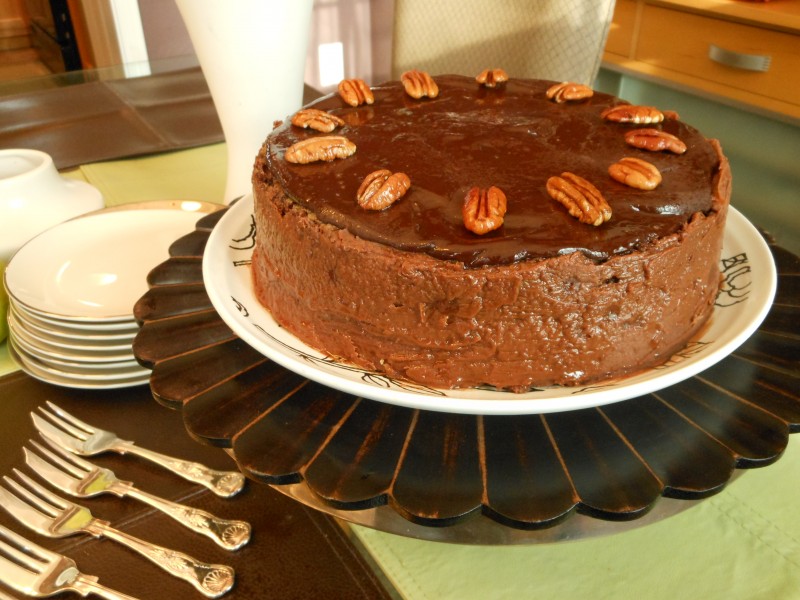
The finishing touches were a layer of spiked Chocolate Ganache and spiked Vegan Sour Cream Fudge Frosting.
I am so happy with the end result and just as happy to share it with you and other visitors to the Nasoya website (if you haven’t tried their tofu, I recommend it too!)!

Whole Cake


Vegan Grasshopper Pie–Happy St. Pat’s Day!

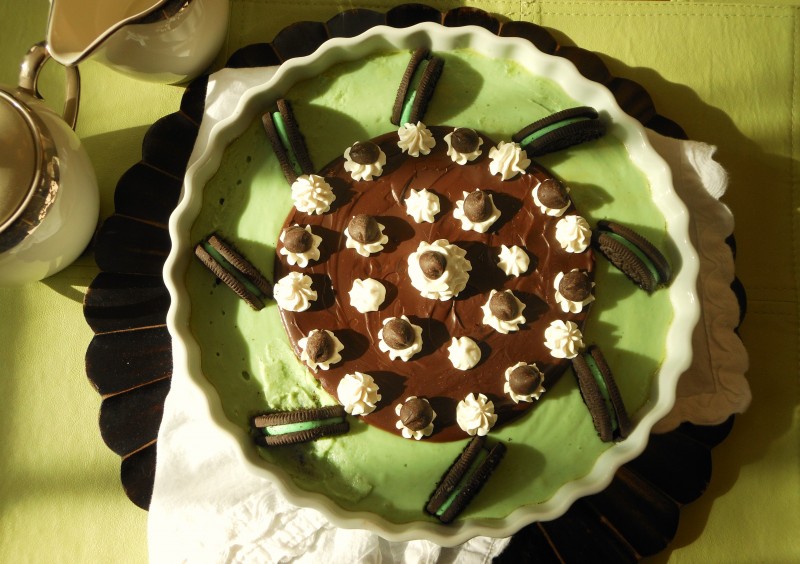
Grasshopper Pie--Bird's Eye ViewVegan Grasshopper Pies are a varied lot.  Refrigerated, frozen, made from mint ice cream…made from spinach(!), they cover the gamut.

My brand new recipe created in celebration of St. Pat’s Day is as much like the traditional icebox pie as I could make it, complete we Creme de Menthe and Creme de Cacao (don’t worry: both are vegan!).

Click over to One Green Planet–how appropriate!–right HERE for the delicious recipe!

Happy St. Pat’s Day!

Blooming Platter Vegan Coca-Cola Cake with Fudgy Frosting

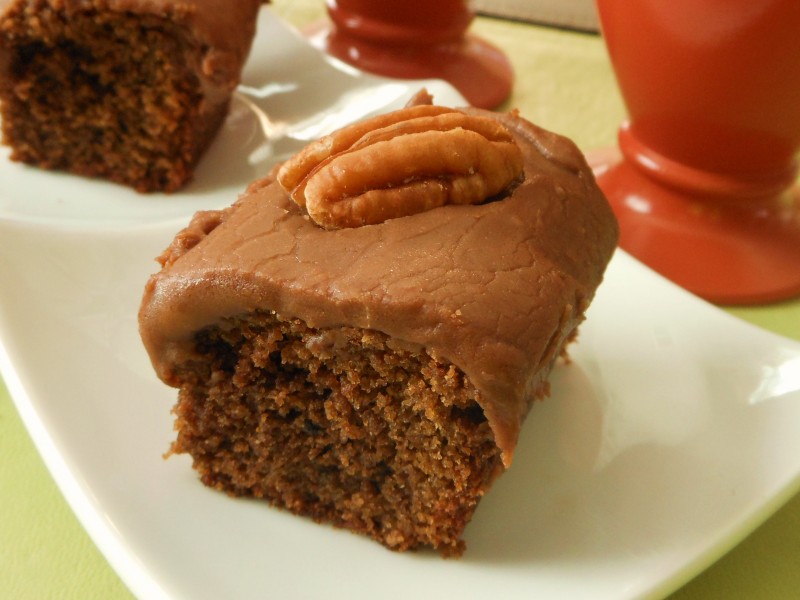
DSCN0758This Coca-Cola Cake with Fudgy Frosting is yet more evidence that I have been having powerful winter cravings for Southern comfort foods!

How fun that these obsessions have led to quite a few brand new vegan recipes that I am delighted to share with you.

But, if you are thinking, “Ick.  I would NEVER drink a Coca-Cola,” wait!  There are a number of organic brands with deeply spicy notes and complex flavor that would be a perfect upgrade to this southern staple.

Enjoy the latest, this addicting cake, complete with back story and organic cola recommendations, on the Go Dairy Free website, the definitive site for all things non-dairy.  Thanks to creator, Alisa Fleming!

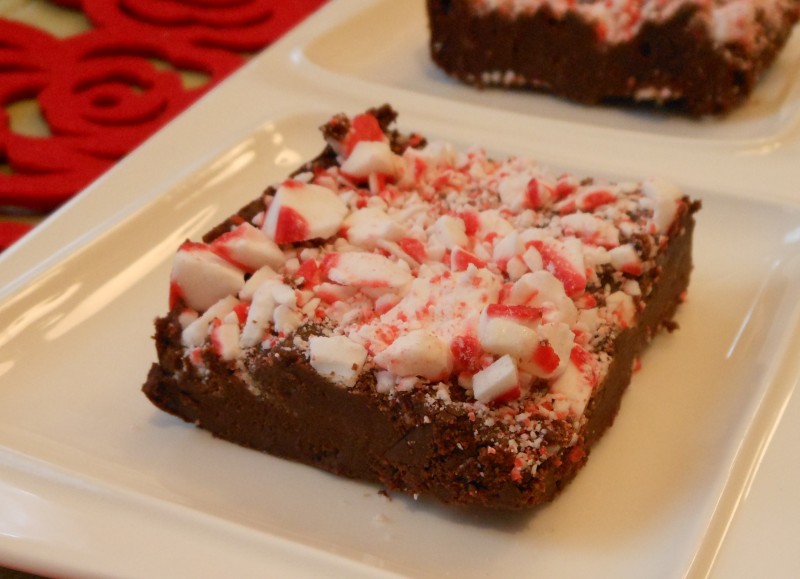
Vegan Fudge (with Optional Crushed Peppermint Topping for Christmas or Valentine’s Day)

Recipes for fudge abound.  But today’s cooks seem to opt for foolproof methods that either call for marshmallow cream or condensed milk (both non-vegan ingredients) to prevent that unappetizing and very disappointing sugar crystallization.

Though the area where I live has come a long way in terms of vegan grocery accessibility, we still don’t have vegan condensed milk that I know of.  I’m sure I could order it online, but when I get ready to make fudge, it isn’t with much advance warning.  No, it’s a response to an intense and irrepressible craving!

A couple of years ago, Jonesin’ for 7-layer Bars and racking my brain for a condensed milk substitute, it suddenly occurred to me that Cream of Coconut was about the same consistency and sweetness.  So, I substituted it, and it worked beautifully!  This year, craving some post-holiday holiday fudge–because I never got around to it before Christmas–I wondered if Cream of Coconut could be substituted for condensed milk in a simple fudge recipe.

Indeed it can!  And, though I love the taste of coconut, it is undetectable.  The fudge just tastes like deep, dense,-yet-silky chocolate with nuances of sea salt and vanilla.

For my fudge redux, I modified a recipe that I found online in a number of ways.  In addition to the Cream of Coconut substitution, I also used vegan butter and vegan chocolate: a no-brainer.  But then I also added 1/3 cup of cocoa for greater depth and density, a pinch of coarse sea salt because I love the way sugar and salt play together, and, though most fudge recipes don’t call for it, I added a spot of vanilla extract for a little bit of complexity.  And  I wouldn’t change a thing!

Because vegan chocolate is rather “dear,” I opted for 9 ounces (the size bag that I can purchase here)  instead of a pound of chocolate chips/chunks as the original recipe called for.  But, certainly, if you don’t mind spending about 10 bucks on the chocolate alone, use a pound or 18 ounces (2-9 ounce bags of chips) and the full can of Cream of Coconut, doubling the other ingredients as well.

Recipes calling for a pound of chocolate are typically made in an 8-inch square pan for a nice thick slab.  But, even though I only made about half of a typical recipe, I still used an 8-inch square pan and felt that, especially with a generous coating of crushed peppermint, the slab was plenty thick.  This candy is very rich!  But if depth is important to you for appearance, just use a 4 x 8″ or 5 x 9″ loaf pan.

Regardless, I think the results are fabulous and hope you agree!

9 ounces vegan semi-sweet chocolate chips/chunks

1/4 cup vegan butter

7 ounces Cream of Coconut (not coconut cream, milk, etc.; Coco Lopez is a common brand)

1/3 cup cocoa powder

1/4 teaspoon pure vanilla extract

1/8th teaspoon coarse sea salt

Optional: 3 to 5 ounces soft peppermint sticks, crushed

Oil an 8-inch square pan with non-stick spray or vegan butter and set aside.  In the microwave or in a double boiler, melt together vegan chocolate chips/chunks and vegan butter.  Remove the bowl or pan from the heat and whisk in Cream of Coconut, followed by cocoa powder, vanilla extract and coarse sea salt.  Pour fudge mixture into the prepared pan, lightly smoothing the top.  Let cool to room temperature and then either cover and refrigerate until cold and very firm, several hours or over night or, first, sprinkle the top with optional crushed peppermint, pressing lightly with your palm to adhere it to the surface, and then chill.  Slice into squares and serve immediately, refrigerating any leftovers.

The Best Vegan Flourless Chocolate Cake with Revolutionary Vegan Whipped Cream–my first recipe published on VegNews!

Okay, I didn’t call my Flourless Chocolate Cake with Whipped Cream the best.  Someone else did…

The Praise

When my new long-distance friend and fellow (amazing) Vegan Heritage Press cookbook author, Bryanna Clark Grogan (World Vegan Feast and others), was helping me test the recipes for this dessert, she served it to friends, one of whom said, “This is the best ——- cake I’ve ever eaten!”  That’s good enough for me!  And I trust it will be for you too.

The Back Story

Back in my pre-vegan years in Nashville, I did some moonlighting as a catering assistant for my dear friend Monica Holmes at her award winning Clean Plate Club.  She made what can only be described as a transcendent Flourless Chocolate Cake.  Since this type of cake contains no flour, the batter relies on eggs for structure and lift.

I knew there had to be a way to veganize it, but the recipes I’d researched, including from people I respect in the field, looked and sounded like vegan chocolate cheesecakes made with tofu or they contained beans and appeared a bit dry with a crackly top, or they actually included some flour.  I’m sure all are delicious, but they aren’t what I wanted.

The Cake

I wanted something as dense, moist, silky and rich as the original.  And that’s what I got, but not until I had baked the cake about 5 times (and made the cream about 7)!  At least. The first try was an unmitigated disaster.  But it had potential, and that just spurred me on to redouble my efforts.  Meanwhile, the generous Bryanna, in British Columbia, was doing the same with the recipe revisions I’d send her, and we were comparing notes.  Bry, I love you for many reasons, including your help with this feat o’ chocolate and cream!

My version of the cake is, indeed, based on tofu, but it has some “secret” ingredients responsible for its fabulousness which you are sure not to confuse with cheesecake.  It’s its own brand of wonderful.

The Revolutionary Whipped Cream

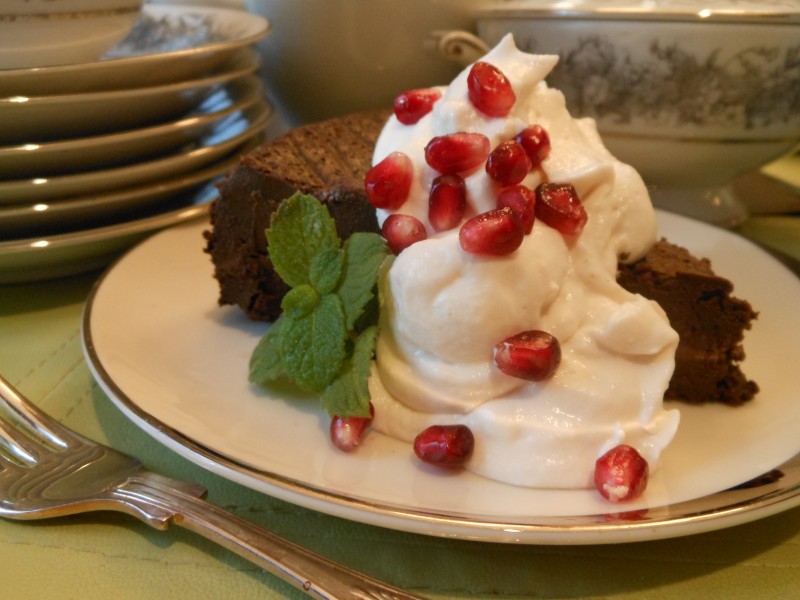
And the cream, well, it is truly revolutionary.  At least, I could find no similar recipes online.  As you can see in the photo, it is a beautiful thing to behold. Plus, it is fat-free, cholesterol-free, soy-free, gluten-free (if your extracts are gluten-free), and low calorie!  Not only that, but it is delicious and a breeze to make.

For a very long time, I had been thinking that there had to be a way to make homemade vegan whipped cream from one of the vegan creamers.  I love both savory and sweet cashew cream, but it is a little heavy and thick, calorie laden, and distinctively flavored.  Ditto coconut cream aerated in one of those n2o cartridge-powered whippers. 

My cream is delicious with a creamy-fluffy, even billowy texture, and a more neutral flavor (but by neutral, I don’t mean bland!).  You will love it on all of your desserts that call for a whipped topping. The base is coconut milk creamer.  But can you guess the secret ingredient that makes the magic happen?  Funny story about the coconut milk creamer: I purchased it, disappointed that my grocery store was out of soymilk creamer.  But what a happy accident!  It turns out that the recipe ONLY works with the coconut milk creamer.  With soymilk creamer, you get something akin to pastry cream instead.

The Recipe and Thanks to VegNews

Many thanks to the brilliantly talented and generous food editors et al at VegNews for publishing these recipes in “What’s Cooking” online.  Please click right HERE to be taken directly to their site for both.  And while you’re there, if you haven’t already, enjoy all the good things VegNews offers its readers on a daily basis.

Happy Thanksgiving

I’m posting this recipe now just in case you, like me, are offering chocolate for the first time for Thanksgiving.  But, personally, I think the winter holidays are the dessert’s time to shine, dressed up with a little pomegranate seed bling, as in the photo, or a bit of crushed peppermint.  In the summer, it has to be raspberries.

Happy Thanksgiving to you and yours!

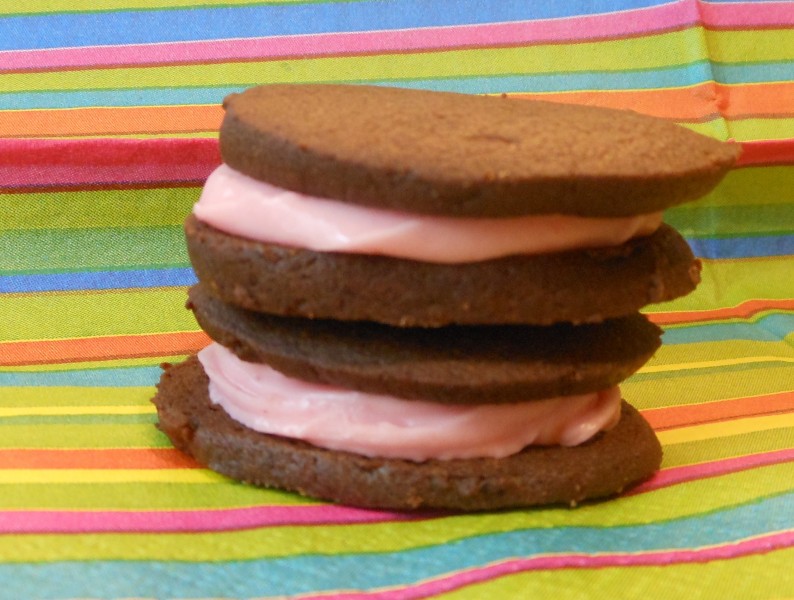
Vegan Chocolate Wafer Cookies Filled with Fresh Raspberry-Champagne Buttercream Frosting

Yield: approximately 2 dozen 1 3/4-inch wafers

This Raspberry-Champagne Buttercream Frosting is about the best thing, well, since sliced cookies.  Seriously, it had omnivores requesting the recipe and laying the compliments on thick!

It is as delicious on vanilla cupcakes–heck, it’s delicious on the end of your finger!–and it is in these not-too-sweet chocolate wafers, with their perfect balance of crispness and tenderness.

Coincidentally, while looking for commercial chocolate wafers to encase this buttercream (remember “Famous” brand?), I noticed that Oreos now come filled with a berry cream.  If the combination is good enough for Oreos, it’s definitely good enough for me!  And by the way, this recipe for homemade wafers is very close to what I remember of the taste and texture of Famous wafers, though a tad thicker.

The Chocolate Wafer Cookies are adapted from Alice Medrich’s Pure Dessert by SmittenKitchen.com and veganized by me (just a matter of substituting vegan butter for butter and soymilk for whole milk).  The frosting is The Blooming Platter all the way!

1 1/2 cups unbleached all-purpose flour or white whole wheat flour (I always use the latter)
3/4 cup unsweetened cocoa powder
1 cup plus 2 tablespoons sugar
1/4 teaspoon salt
1/4 teaspoon baking soda
14 tablespoons (1 3/4 sticks) vegan butter, slightly softened
3 tablespoons soymilk (plain or unsweetened)
1 teaspoon pure vanilla extract

1 recipe Fresh Raspberry-Champagne Buttercream Frosing

Combine the flour, cocoa, sugar, salt, and baking soda in the bowl of food processor and pulse several times to mix thoroughly. Cut the butter into about 12 chunks and add them to the bowl. Pulse several times. Combine the soymilk and vanilla in a small cup. With the processor running, add the milk mixture and continue to process until the mixture clumps around the blade or the sides of the bowl. Transfer the dough to a large bowl or a cutting board and knead a few times to make sure it is evenly blended.

Form the dough into a log about 14 inches long and 1 3/4 inches in diameter. Wrap the log in wax paper or foil and refrigerate until firm, at least one hour, or until needed.

Position the racks in the upper and lower thirds of the oven and preheat the oven to 350°F. Line the baking sheets with parchment paper. Cut the log of dough into slices a scant 1/4-inch thick, on a slight bias if you choose, and place them one inch apart on the lined sheets (cookies will spread just a little). Bake, rotating the baking sheet from top to bottom and back to front about halfway through baking, for a total of 12 to 15 minutes. The cookies will puff up and deflate; they are done about 1 1/2 minutes after they deflate.

Cool the cookies on the baking sheets on racks, or slide the parchment onto racks to cool completely. These cookies may be stored in an airtight container for up to two weeks or be frozen for up to two months.

Note: These cookies should crisp as they cool. If they don’t, you’re not baking them long enough, says Medrich — in which case, return them to the oven to reheat and bake a little longer, then cool again.

Related Posts Plugin for WordPress, Blogger...