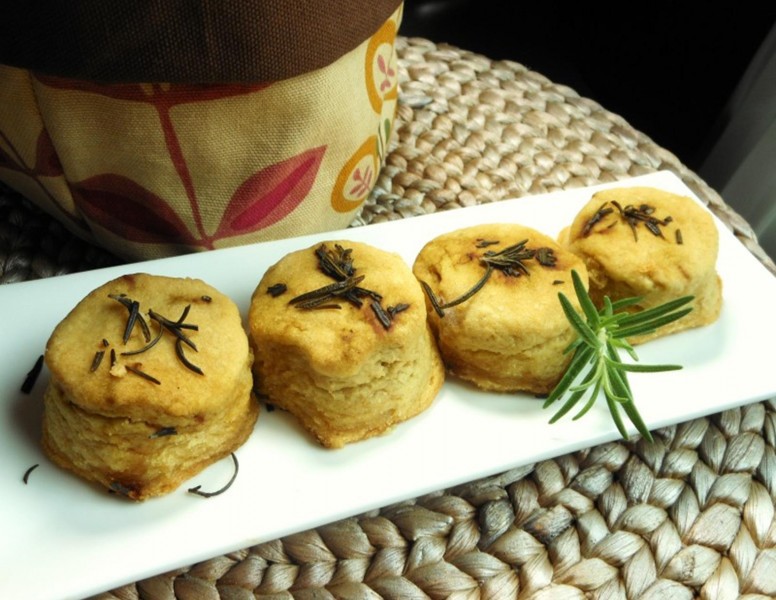
Flaky Vegan White Bean Biscuits with Rosemary Butter

Yield: 18 biscuits

(These would be delicious with my Vegan Tempeh and Turnip Green Soup!)

White Bean Biscuits with Rosemary Butter

These savory biscuits will be a welcome addition to your breadbasket any time an easy, but extra-special, bread is the order of the day…or night!


With a can of white beans in the pantry, but not in the mood for anything I could think of to make with them—and craving some comfort food due to gray, drizzly weather—I set about brainstorming.  I love sweet potato biscuits and it occurred to me that pureed white beans would be a very similar consistency to mashed sweet potato.


So I jumped online hoping that I wouldn’t find that someone had beaten me to the punch.  I may have missed something, but all I could find were recipes for white bean cookies and cakes.  Eureka!


To create my dough, I combined recipes for my favorite vegan biscuits and a recipe for sweet potato biscuits, though I think the latter can be a bit too heavy.  So I manipulated the proportions a bit.  The results are meltingly tender and the biscuits pull apart in luscious flaky layers!  I attribute this, in part, to the inclusion of both vegetable shortening and (vegan) butter—frozen!— but also to my folding method which mimics that of making puff pastry.  Like folding a business letter, my method is much simpler than puff pastry, as no butter is distributed between the layers.

The rosemary butter topping is optional, but delicious, making these biscuits a to-die-for breakfast item or accompaniment to a meal.  Be forewarned, though, they might overshadow the main dish!

1-15.5 ounce can white beans, rinsed and drained
2 cups unbleached all-purpose flour + about 5 tablespoons more (for rolling out)
1/4 teaspoon sea salt
1 tablespoon baking powder
1 teaspoon baking soda
3/4 cup unsweetened soymilk (or milk)
1/4 cup frozen vegetable shortening, cut into 1-inch chunks
1/4 cup frozen vegan butter, cut into 1-inch chunks + 3 additional tablespoons (or butter)
1 tablespoon finely chopped fresh rosemary

Preheat oven to 400 degrees.  Place white beans in a food processor and process until smooth.  Add 2 cups flour, sea salt, baking powder and baking soda.  Pulse just until mixture is well combined.   Add frozen shortening and 1/4 cup frozen butter, and pulse until uniformly distributed and about the size of small peas.  Drizzle in soymilk and pulse a few more times until the dough comes together.   Dough will be a bit sticky. (See below for hand-mixing directions.)


Dust a bread board or other pastry surface (including your countertop!) with a couple of tablespoons of flour, transfer dough onto it, and knead the flour into it, adding a couple more tablespoons as necessary.  Dust board with about 1 tablespoon more flour if necessary and pat out dough into a rectangle about 3/4-inch thick.   Fold like a business letter or puff pastry by folding in one short side 2/3 of the way across the surface, and then folding the opposite short side back across.  Pat out the dough into a 3/4-inch thick rectangle again, turn a quarter turn and repeat the folds.  Repeat the entire folding and patting process about 4 times.  After patting out the dough for the last time, cut with a 2-inch biscuit or cookie cutter, gently combining and re-rolling scraps.


Meanwhile, melt the remaining 3 tablespoons of butter in a large cast-iron skillet.  Pour off all but about a tablespoon and reserve in a small cup or bowl.  Add chopped rosemary to the reserved butter and set aside.  Lay each biscuit into the skillet and then flip it in order to butter both sides, leaving each biscuit in the skillet and placing them close together.  Bake for 12 minutes, brush the tops with reserved rosemary butter, and bake for an additional 3 minutes.  Serve immediately.  Store leftovers in an airtight container in the refrigerator.  Reheat for a few minutes at 350 degrees, wrapped in foil.


Hand-mixing directions: if you prefer to mix the dough by hand, mash the beans with a potato masher until smooth.  Then spray a box grater with non-stick spray and grate both the shortening and the butter into the flour mixture so that it is still very cold when you incorporate it.  As you fold and pat the dough, be sure not to let the warmth of your hands melt the frozen shortening and butter.


Serving note: if you were admiring the “bread bag” in the photo, all of the credit belongs to Emily Crell, owner of the former Forbidden City in VA Beach.  She made some out of solid fabric for her daughter and son-in-law’s new restaurant, Braise, (in partnership with Chef Bobby Huber) and when I admired them, she made me a set of four “just because.”  What is so ingenious about the design is a little flat removable pouch filled with dried rice that sits at the bottom.  You simply remove it, heat it in the microwave for a couple of minutes, replace, and pile breads or biscuits on top to stay warm at the table.  Just as remarkable is the fact that she has never seen our house nor asked about color and style, yet she picked a mid-century modern-inspired pattern (my favorite period in design) in the exact palette of our home!


Countdown to Thanksgiving–Day #5: Vegan Fresh Pumpkin, Pecan and White Bean Shooters (or Dip or Spread)

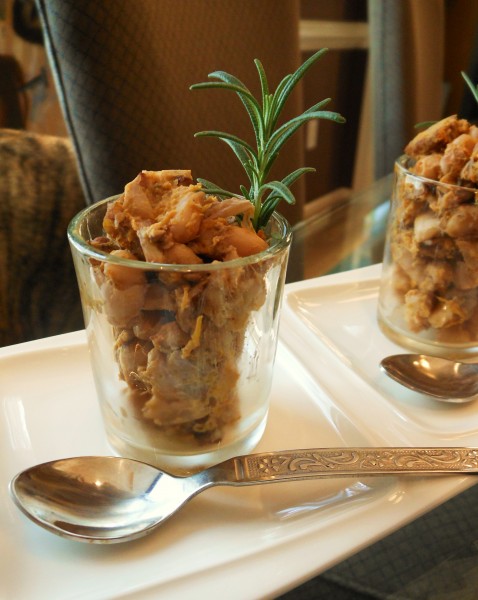
Pumpkin, Pecan, and White Bean SpreadThis is the perfect little nibble to stave off I-don’t-think-I -can-wait-any-longer pre-Thanksgiving Feast hunger pains!

I recently created this dip or spread and love serving it as a “shooter” with tiny little spoons a friend brought me back from a trip to India.  But any small spoon will do–or mini-spreader with a side of crostini.  My serving secret?  My “glasses” are actually votive holders!

Food  just doesn’t get much more delectably fall-like than this simple spread, so it is perfect for Thanksgiving.  You really can taste the contribution of each autumnal ingredient: fresh(!) pumpkin, pecans, white beans and sage.  Be sure to cook the pumpkin ahead of time so it’s cooled and ready to go when you are.  (See my easy microwave directions below.)

Bind it all together with your favorite vegan creaminess–sour cream, mayo, or unflavored cashew cream–and you have a fabulously flexible shooter, dip for raw veggies or crackers, spread for a bagel, or even a filling for non-traditional quesadillas, stuffed peppers, etc.

(Where’s Minnie?  Can anyone spot our female brindle Dane who is never far away when food is out?)

2 tablespoons olive oil

1 cup pecan pieces

Sea salt

1 cup diced onion

2 large cloves garlic minced

2 tablespoon dry rubbed sage

2 cans white beans, rinsed and drained

1 cup diced cooked fresh pumpkin (see super simple microwave directions below)

4 to 5 tablespoons vegan sour cream, mayo, or cashew cream

Accompaniments: raw vegetable strips or slices or crackers

Heat olive oil in a large cast iron skillet over medium-high.  Add pecans and a pinch of salt, and toast, stirring continually, for a couple of minutes.  Add onion and a pinch more salt, and continue sauteing and stirring for 2 to 3 minutes.  Add garlic and sage and continue for another minute.  Stir in beans, pumpkin and vegan sour cream or mayo and heat through, stirring continually.  Serve warm with the accompaniment of your choice.

How to Microwave a Fresh Pumpkin (The Time-Pressed Woman’s Way)

1-2 pound pumpkin

Wash your pumpkin, pierce several times all-over with a sharp knife, place on a microwave-safe dish, and microwave on high for about 7 -10 minutes.  Check for tenderness, by piercing with a knife.  It if goes in easily, the pumpkin is ready.  Allow to cool, then slip off the skin, ct in half, and remove seeds and pulp.  If you prefer, you can halve and deseed the pumpkin first, but I find it puts up more resistance that way.

Vegan Maharaja Mung Beans and Kale (with Sweet Potato Stack Option!)

Maharaja Mung Beans and Kale (with Sweet Potato Stack Option)Yield: 6 servings

This Indian stew-like melange is so flavorful and satisfying that it is absolutely divine on its own, perhaps served with basmati rice, some cashews and maybe a little fresh cilantro.  However, I can attest to it being luscious eaten cold right out of a carton!

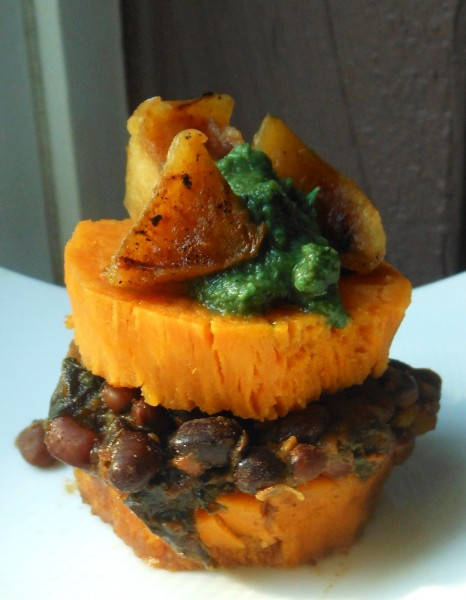
For an exquisite–but super-easy presentation–use it as the filling in my Sweet Potato Stack.  Though drizzling an Indian dish with maple syrup may seem out of character, there is something about the hint of maple combined with the other ingredients that is absolute autumnal perfection!

Maharaja Mung Beans and Kale :

6 cups water

Sea salt

2 cups mung beans (rinse, pick over, bring to a boil, let sit for 30 minutes and then simmer 45 minutes more)

1 tablespoon olive oil

1 small onion, diced

1 bunch kale, thick stems removed, and leaves torn into bite size pieces

2 cloves garlic, minced

1 teaspoon ground cumin

1 teaspoon cumin seeds

1 teaspoon turmeric

1/2 teaspoon ground cardamom

1/2 teaspoon curry powder

1/2 teaspoon Amchur (dried mango) powder (optional; you may substitute lemon zest, but it’s not quite the same)

1/4 teaspoon ground cloves (or mace)

1 tablespoon coriander seeds

1 teaspoon mustard seeds

2 large Roma tomatoes, diced

1/4 cup thick coconut milk

In a covered 4-quart saucepan, bring water and salt to simmering over medium-high heat.  Add mung beans, turn off heat, let sit for 30 minutes, and then return heat to medium-high, place lid ajar, and simmer beans for about 45 minutes or until almost all of liquid is evaporated, but beans are still very moist.

Meanwhile, heat olive oil in large cast iron skillet over medium-high.  Add onion and a pinch of salt and saute, stirring frequently, for about 2 minutes.  Add kale by handfuls, stirring and sauteeing until slightly wilted before adding the next handful.  Stir in garlic and all remaining ingredients except tomatoes and coconut milk and saute, stirring, until heated through.  Stir this mixture thoroughly into the mung beans followed by tomatoes and coconut milk.  Heat through, stirring often, and serve immediately as is or in the Sweet Potato Stack.


Sweet Potato Stack:

Yield: 4 appetizer servings of 2 stack per person

2 slender sweet potatoes, baked (in a conventional oven or microwaved), cooled enough to handle, skin removed, and each sliced into about 8 1/2-inch slices

Generous 1/2 cup Maharaja Mung Beans and Kale, heated

4 teaspoons maple syrup

Garnish: 4 tablespoons chutney or the topping of your choice (I used 4 teaspoons prepared mint chutney plus 8 teaspoons chopped grilled apples because I had both on hand)

Optional: tiny pinches of sea salt as a “finishing salt”

Place 2 sweet potato slices on each plate.  Top with rounded tablespoons of mung bean mixture and remaining 8 sweet potato slices.  Drizzle each stack with about 1/2 teaspoon of maple syrup and then top with about 1 1/2 teaspoons of chutney or 1/2 teaspoon of prepared mint chutney and a teaspoon of chopped grilled apples as in the photograph.

Vegan Savory Mexican Black Bean Cupcakes with Sweet Potato Frosting Made Go Dairy Free’s “Big List of Ghoulishly Good Dairy-Free Halloween Recipes” for 2013!

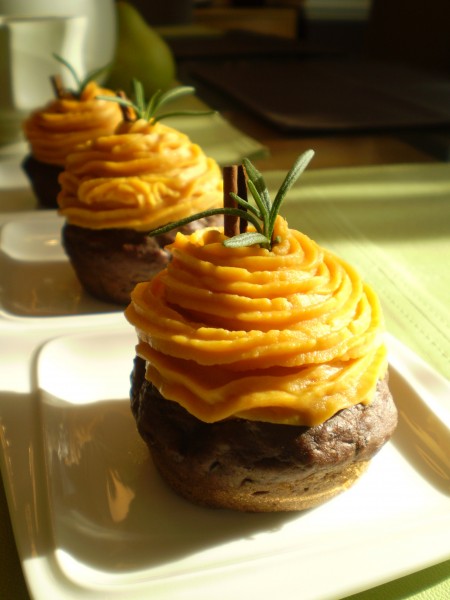
OLYMPUS DIGITAL CAMERAI am so excited for my Vegan Savory Mexican Black Bean Cupcakes with Sweet Potato Frosting to have made “The Big List of Ghoulishly Good Dairy-Free Halloween Recipes” for 2013 on the Go Dairy Free website!

I created this recipe last Halloween and I’ve never run across anything else like it before or since.  Beautiful, but simple, these savory cupcakes are like eating your deliciously moist sides and bread all in one festive little package.

For the rest of the list of beverages, snacks, savories, and sweets, click HERE.

Happy Halloween!


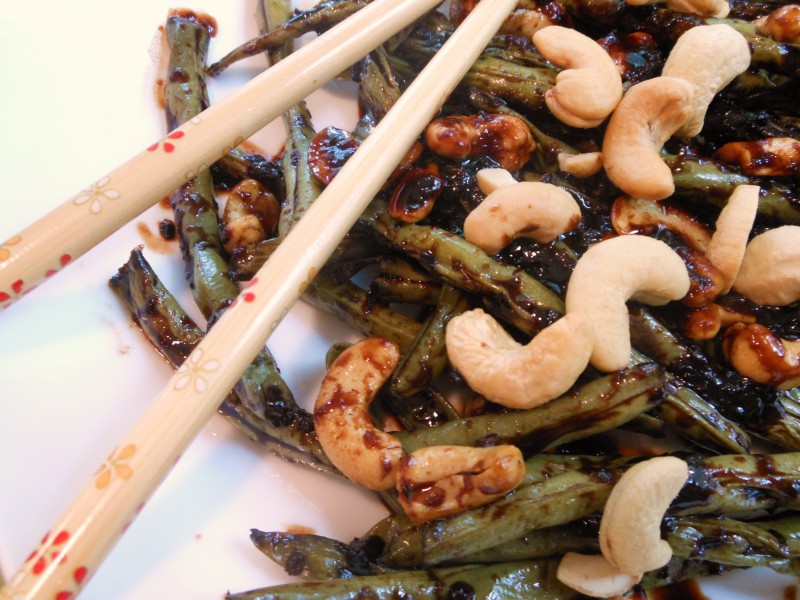
Vegan Szechuan String Beans with Chinese Black Bean Sauce and Cashews

DSCN2025Yield: 2 servings (easily doubles)

This quick, vibrant colored and flavored dish becomes a meal with the addition of tofu or tempeh cubes added during the last two to three minutes of cooking.

It’s my homemade version of one of my favorite dishes in Chinese restaurants.  My secret ingredient?  Chinese Black Bean Sauce!

1/2 pound fresh green beans, ends trimmed, lightly salted, and grilled over medium high in a grill pan for about 15 minute, turning periodically, or until lightly charred all over and very tender

1 tablespoon canola oil

2 teaspoons fresh grated ginger

3 medium garlic cloves, minced

1/4 cup soy sauce (I use a “lite” variety for less sodium)

1/4 cup rice wine vinegar

1 tablespoon sake (or mirin)

2 tablespoons Chinese Black Bean Sauce (available on international aisle of most grocery stores)

1/4 to 1/2 teaspoon Sriracha or your favorite hot sauce

1/4 cup water

1/4 cup lightly roasted and salted cashews (or halves and pieces) + a few more for garnish

While green beans are grilling, heat oil in a cast iron skillet (or wok) over medium-high.  Add ginger, and stir fry for about 1 medium, stirring continually, just to soften and turn slightly more golden.  Lower heat if cooking to fast.  Add garlic, and stir fry for 30 seconds, still stirring continually.  Add remaining ingredients except green beans and cashews and cook, stirring continually until thickened, about 2 to 3 minutes.  Add green beans and cook another 2 to 3 minutes or until beans are well coated and have absorbed some of the sauce.  Avoid over-cooking or the sauce will become too syrupy and tar-like.  During the last minute, stir in 1/4 cup cashews.  Transfer to a platter or a shallow bowl and serve with additional cashews for garnish.  This dish is fun and quite easy to enjoy with chopsticks.

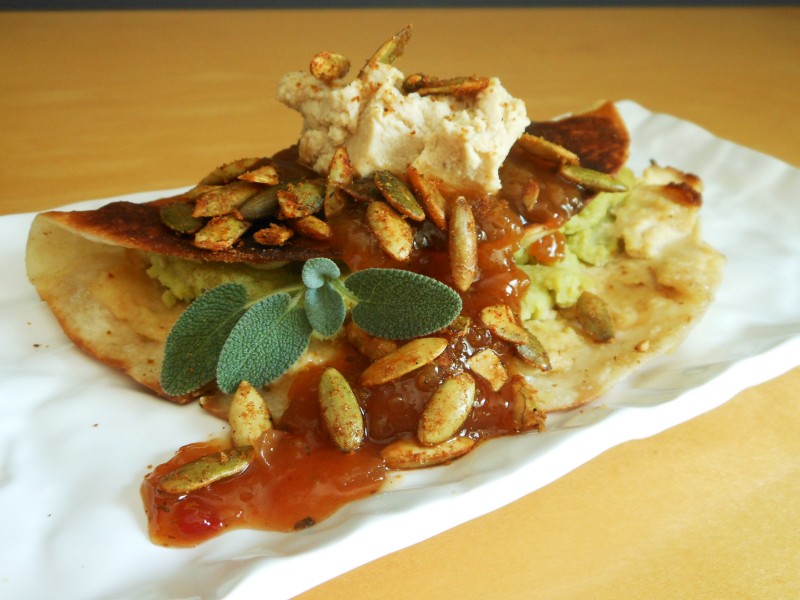
Vegan Smashed ‘Buttah Bean and Homemade Goat “Cheese” Quesadillas with Smoky Nooch-Roasted Pepita Garnish

DSCN2000With fresh Smashed ‘Buttah Beans in the fridge following a trip to the farmer’s market, some of my new homemade goat cheese on hand for another purpose, some freshly made Smoky Nooch-Roasted Pepitas, AND some south’ren salsa that came as a gift, the creation of this super easy quesadilla was all but inevitable.


Yield: 1 serving (easily multiplies)

1/2 teaspoon vegan butter  (I use Earth Balance)

1-6 to 8-inch whole wheat or flour tortilla

1/4 cup smashed butter beans (I whip cooked butter beans with vegan butter, fresh minced sage, and sea salt and pepper to taste)

1/4 cup + 2 teaspoons Vegan Goat “Cheese” (recipe follows)

1 tablespoon salsa, prepared or homemade  (for this recipe I like a southern-inspired variety like Georgia Peach and Vidalia Onion)

2 teaspoons Smoky Nooch-Roasted Pepitas

Garnish: fresh sage sprig

To make each quesadilla, melt 1/2 tablespoon vegan butter in a cast iron skillet over medium high.  Spread half of  tortilla first with 1/4 cup goat cheese then with butter beans.  Fold in half and saute 2 minutes on each side or until golden brown.  Top with remaining 2 teaspoons of goat cheese, salsa, and pepitas.  Garnish with a sprig of fresh sage and serve immediately.  (Note: you may top with 2 teaspoons of vegan sour cream if you prefer.)

Vegan Goat Cheese

14 ounces extra firm tofu

2 tablespoons light miso

2 tablespoons beer

2 tablespoons nutritional yeast

Optional: 1/8 teaspoon garlic powder

Sea salt to taste

Process all ingredients in the bowl of a food processor until completely combined and creamy-stiff.  Chill, covered, in refrigerator until read to use/serve.  (When serving as an appetizer, may be formed into balls or logs and rolled in finely chopped cashews or parsley.)


Inaugural Blooming Platter “Vegan Q & A Tuesday” with Bryanna Clark Grogan + Bryanna’s Indian-Spiced Lentil Salad

Based on Actor’s Studio host’s James Lipton’s famous “Q & A”–after the Proust Questionnaire–“Vegan Q & A Tuesday” is The Blooming Platter’s new first Tuesday feature on a creative force in the vegan culinary world.  Read more about “Q & A Tuesday” HERE.

Bryanna cropFeatured Force: 

Bryanna Clark Grogan

(See below for Bryanna’s Indian-Spiced Lentil Salad recipe.)

Vegan since 1988, author World Vegan Feast & 7 more vegan cookbooks, Bryanna has devoted over 40 years to the study of cooking & nutrition.  She developed the recipes for Dr. Neal Barnard’s Program for Reversing Diabetes, & contributed recipes to Howard Lyman’s No More Bull!Cooking with PETA. She has appeared at Vegetarian SummerFest, Vegetarian Awakening, Portland VegFest, McDougall Celebrity Chef Weekend, VidaVeganCon, & Seattle VegFest. She also runs a small library branch and likes to bellydance & read mysteries. She lives on Denman Is., Bc, Canada, with her photographer/baker husband Brian, dog Phoebe, & cats Ringo & Sadie. She has 4 grown kids, 2 stepsons and 7 grandchildren.

 1.  What is your favorite culinary word?

It would have to be “Umami”– the Japanese word for “The Fifth Flavor”, which means, more or less, “the essence of deliciousness”.  Isn’t that wonderful?

2.  What is your least favorite culinary word?

“Superfood”—there are no “superfoods”!  It’s a marketing ploy. 

3.  What about cooking turns you on?

I think part of it is the creativity and inventiveness, which often leads to a wonderful dish or meal. Sometimes I wake up thinking about some idea for a dish that I want to make. One can compare it to painting, but we cooks can enjoy eating our creations!  There is also the mystery—how will it turn out?  Will it live up to expectations?  And, in addition, there is the pleasure of discovery—learning the science of cooking, how ingredients work together, what methods improve the result, etc.

4.  What about cooking turns you off?

Hmmmm… that’s a tough one.  The clean-up, perhaps?

5.  What cooking or dining sound or noise do you love?

There are many. The “snap” of breaking celery or snap peas; the sizzle of breaded marinated tofu sliding into hot olive oil; knife on wooden cutting board as one chops onions, etc.; the “glug” of wine being poured into a sauce; the quiet clinking of dining utensils during a lull in the dinner conversation, when guests are enjoying their food so much that they cease to converse.

6.  What cooking or dining sound or noise do you hate?

Slurping!

7.  What makes you curse in the kitchen?

Cutting myself; spilling something messy, such as oil or tomato sauce; finding out I turned on the wrong burner; burning something.

8.  What cooking profession other than your own would you like to attempt?

Rather than being a cookbook writer, from the limited amount of teaching workshops I’ve done, it might be very satisfying to be a cooking teacher.

9.  What cooking profession would you not like to do?

I would not like to do anything that entailed making the same thing, or few things, over and over.

10.  If heaven exists, what would you like to hear God say when you arrive at the pearly gates?

“One of the perks here is that you can have anything you like to eat, you won’t get fat, and you can have full access to the Heavenly Kitchens, if you like.”

Bryanna’s Indian-Spiced Lentil Salad
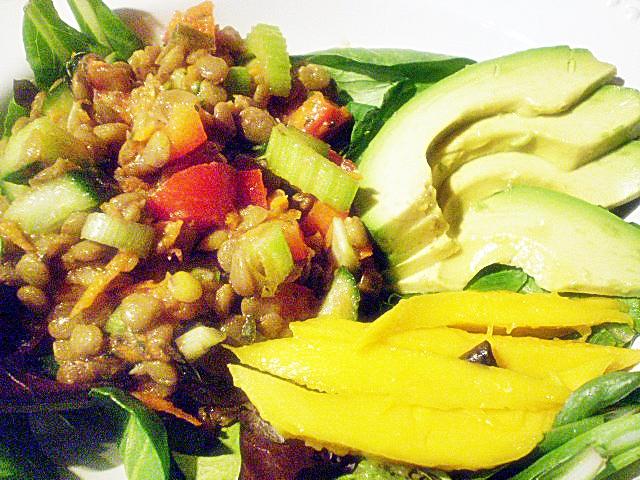
 Indian lentil saladServes 6

 5 1/2 to 6 cups cooked or canned brown lentils, drained (or 2 cups dried)

4 small carrots, peeled and grated

6 large green onions, chopped

3 stalks celery, with leaves, chopped

1 red bell pepper, seeded and diced

1 medium cucumber, diced (I use the English type that you don’t have to peel)

DRESSING:

1 cup Mango Salsa (see homemade recipe and notes below recipe)

3/4 cup Low-Fat Oil Substitute for Salad Dressings or broth from cooking chickpeas

6 tablespoons olive oil

1/3 cup cider vinegar

1/4 cup fresh lemon juice

1 1/2 tablespoons brown sugar

1 tablespoon dried mint leaves (or 3 tablespoons fresh, chopped)

1 tablespoon dried cilantro leaves (or 3 tablespoons fresh, chopped)

2 teaspoons tandoor masala

1 teaspoon salt

 If you are starting with dried lentils (which do not need pre-soaking):

Pick over the lentils to remove debris or shriveled lentils, rinse, and drain. Cover with water or broth and boil for 2 to 3 minutes (to aid in digestion). Reduce the heat and simmer gently, covered, until tender. Depending on the variety and age, cooking time may take anywhere from 10 minutes to 1 hour.  They should be tender, but firm, so do not overcook them or let them get mushy.  Drain them well (handling gently) and cool completely, then measure out.

To make the salad:

Combine the first 6 ingredients carefully in a salad bowl.

Whisk the Dressing ingredients together well, or mix them briefly in a blender or with a hand immersion/stick blender.

Fold the Dressing into the salad. Cover and refrigerate. Try to bring the salad to room temperature before serving.

To serve, I pile it on top of some organic greens and garnish each serving with sliced fresh mango and avocado.

Nutrition (per serving): 397.3 calories; 32% calories from fat; 14.6g total fat; 0.0mg cholesterol; 625.7mg sodium; 1194.7mg potassium; 53.1g carbohydrates; 17.8g fiber; 12.3g sugar; 35.4g net carbs; 18.6g protein; 8.4 points.


EASY MANGO (OR PEACH)-TOMATO SALSA

3 cups diced fully ripened tomatoes, roughly pureed in a food processor or with a hand immersion/stick blender

2 cups diced fresh mango (or use ripe peaches instead)

1/4 sliced green onions

1 tbs minced jalapeno pepper, seeds removed (optional)

2 1/2 tsp. grated fresh ginger or one tsp ground ginger

1 tsp salt

1 1/2 tbs. lime juice

Mix ingredients together well and refrigerate until using in a covered container.


Commercial Mango or Peach and Tomato Salsas:

D.L. Jardine’s Peach Salsa

PC [President’s Choice, a Canadian brand] Mango and Lime Salsa

Pearson Farm Georgia-Style Peach Salsa

Victoria Fruit Salsa
 

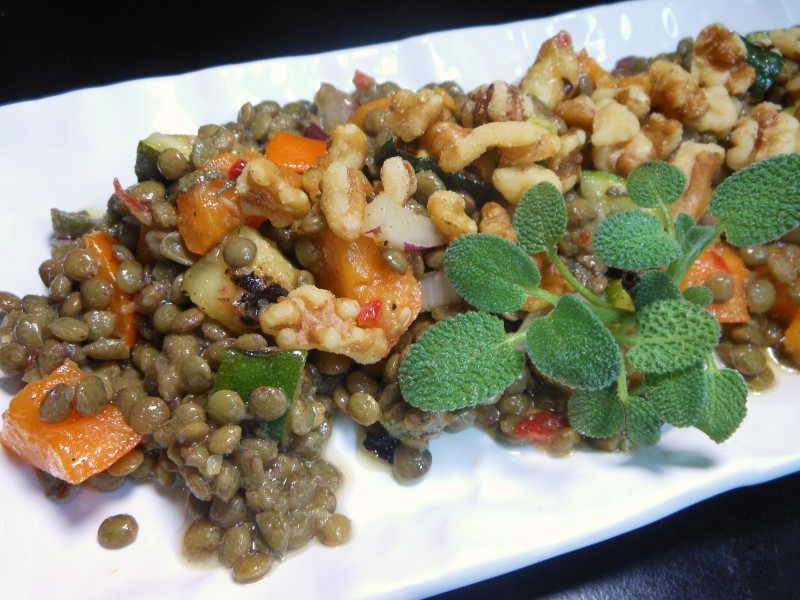
Vegan Lentil Salad with Grilled Zucchini, Roma Tomatoes, and Pepper Jelly-Sage Vinaigrette

DSCN1851Yield: 6 servings

I discovered a brand new and brilliant way to cook lentils, courtesy of America’s Test Kitchen: brine them to soften the skin and then bake them in a dutch oven so they don’t crash together and break apart while they simmer.  You can find their method HERE, along with some tasty salad ideas. (Note: I obviously didn’t use chicken broth.  I could have used vegetable broth, but water worked yielded lentils full of flavor.)

After trying that method, I had a beautiful bunch of them with which to do something.  I also had local red onion, zucchini and orange Roma tomatoes from my trip to the farm market.  There was nothing left to do but combine everything into a salad!

I wanted a special, but simple, dressing–some kind of vinaigrette–but I wasn’t sure what.  Scanning the door of the fridge, my eyes alighted on an unopened jar–a gift–of pepper jelly made here in Virginia.  Voila!  Then, mentally reviewing the herbs in the garden, sage somehow sounded perfectly earthy and just the right note to counter the heat of the jelly.  Voila again!  But it seemed like it needed one more “warm”  spice.  The barest hint of clove or mace was just exactly right.

This combination of ingredients makes this recipe the perfect celebration of late summer (salad) while looking forward to the cool months ahead (dressing) because I always think of pepper jelly and sage in conjunction with the festive flavors of the winter holidays.

3 cups cooked French lentils

1/4 cup diced red onion (if desired, cover with  soymilk and drain before using to remove a little of the bite)

2 orange Roma tomatoes, diced (red is fine; the orange ones were just so beautiful at the farm market)

1 6-inch zucchini, sliced in thirds lengthwise, lightly salted, grilled 2 to 3 minutes on each side, cooled, and diced (I used my Lodge indoor grill pan over medium-high)

Sea Salt to taste (don’t be stingy!)

Freshly ground black pepper to taste

Pepper Jelly-Sage Dressing (recipe follows)

In a large bowl, toss together all ingredients except dressing.  Check for seasoning and adjust if necessary.  Drizzle with dressing and gently toss to evenly distribute.  Serve immediately, or cover and refrigerate to allow flavors to marry before serving.

Pepper Jelly-Sage Dressing:

1/4 cup pepper jelly (I use a locally made brand)

2 tablespoons apple cider vinegar

1/2 teaspoon mustard

6 tablespoons olive oil

Pinch sea salt

Pinch freshly ground black pepper

Pinch garlic powder

Tiny pinch of ground clove or mace (a bare hint is all you want but it adds a little somethin’-somethin’!)

3 tablespoons fresh sage, minced or chiffonade (I like the latter, simply stack and roll 3 to 4 leaves and thinly slice into tiny ribbons)

In a small bowl, whisk together pepper jelly, vinegar, and mustard.  Whisk in olive oil in a slow stream and keep whisking until it emulsifies (thickens and comes together).  Add salt, pepper, garlic powder and clove or mace to taste and then whisk in sage.


Vegan Eggplant Stack with White Beans in Beet Greens Pesto and Grilled Zucchini-Rosemary Salsa

DSCN1689I love teaching, but I also love summer when I can treat myself (and sometimes other teacher friends also on summer break) to lunches like this!

Don’t get me wrong: our cafeteria manager goes out of her way to make sure I have nutritious, fresh food to enjoy  every day (usually, hummus with lots of raw veggies, or creamy baked sweet potatoes and cooked greens).  But I’ve never seen anything like my Eggplant Stack in the lunchroom!

Born of ingredients from the farmer’s market, along with some white beans, this recipe is one that is scrumptious as is, but can be adapted a million different ways.  My baked breaded eggplant is the base for your own imagination to take flight.

The trick to uniformly golden brown breaded eggplant slices that require no egg wash and no frying is a light coat of vegan mayo in place of the wash (which also adds great flavor!), and breadcrumbs that are toasted stovetop before  being adhered to the eggplant.  This America’s Test Kitchen trick prevents the eggplant from getting done before the coating gets brown enough.

If you prepare it as pictured, the key to this dish is to have my Beet Green and Roasted Almond Pesto and my Zucchini-Rosemary Salsa (recipe follows) made athead so the dish goes together quickly.  Although, you have a half hour while the eggplant bakes to make the pesto and salsa if need be.

*2-8 inch  eggplants, ends trimmed, sliced into 1/3-inch slices (approximately 8 slices total, 2 to 3 per person)

3 to 4 tablespoons vegan mayonnaise (about 2 teaspoons per slice )

Approximately 2 cups Panko bread crumbs, toasted in a dry skillet for about 5 minutes, stirring frequently, or until golden brown, and transferred to a shallow bowl or cake pan

1/2 cup diced yellow or red onion

2-15.5 ounce cans white beans, rinsed and drained

Sea salt

1/4 cup Beet Green Pesto

Approximately 1 cup Zucchni-Rosemary Salsa (recipe follows)

Garnish: basil or rosemary sprigs

Preheat oven to 450 degrees.  *Taste a little of the raw eggplant and, if bitter, lightly salt the both sides of the slices and arrange them on a paper towel-lined baking sheet.  Let sit for 30 minutes, then rinse and pat the eggplant dry.  Also rinse and dry the baking sheet, and either line it with Silpat or coat it well with non-stick cookng spray.  Arrange the eggplant slices on the sheet, an inch or so apart.  Spread about 1 teaspoon of vegan mayo on tops of all eggplant slices, and then place each, mayo-side down, in bowl of crumbs, pressing crumbs gently to adhere, and patting on more crumbs if desired.  Place crumb-side down on baking sheet.  Repeat with more mayo and crumb son opposite sides.  Spray tops of eggplant lightly with non-stick spray and bake approximately 30 minutes.  Cover loosely with foil if they start to get too brown.

While eggplant cooks, heat olive oil in large cast iron skillet over medium-high.  Add onion and a pinch of salt, and saute, stirring frequently, for about 3 minutes or until softened.  Add beans, stir to combine well, and heat through.  Add Beet Green Pesto, and do the same.  To serve, place two to three eggplant slices on each serving plate, top with 1/4th of the beans, dividing between slices, and then with 1/4th of the Zucchini-Rosemary Salsa.  Delicious served warm or at room temperature.  Garnish with a sprig of basil or, to stay truest to the dish, rosemary.

Grilled Zucchini-Rosemary Salsa 

This quick and breezy Mediterranean-flavored salsa is the embodiment of summer and made entirely from a very few ingredients almost entirely gathered up at my go-to farm stand.

Besides topping the Eggplant Stack, I recommend it over pasta or simply served on crostini as a kind of bruschetta or with pita chips.

2-6 inch zucchini sliced lengthwise into quarters

Sea salt

2 large cloves garlic, minced

1 tablespoon minced fresh rosemary

16 cherry tomatoes, quartered (cut smaller if your tomatoes are larger than cherries)

1/3 cup finely diced yellow or red onion

1 teaspoon olive oil

2 teaspoons fresh lemon juice

Plenty of sea salt and freshly ground black pepper to taste

Optional: pinch red pepper flakes

Oil a grill pan and heat over medium-high.  Lightly salt zucchini and lay in pan, grilling two to three minutes on each side or until nice grill marks develop and zucchini is crisp-tender.  Cool just until it is easily handled, and then dice.  Combine zucchini and all remaining ingredients in a non-reactive bowl, being sure to add garlic and fresh rosemary to the grilled zucchini while it is still warm, and toss gently to completely combine.  Serve immediately or chill, covered until serving time.

Related Posts Plugin for WordPress, Blogger...