Vegan Thai Chick’n Croustade
(quick & easy with prepared crust)
and Cucumber Salad Topping

Yield: app. 6 servings

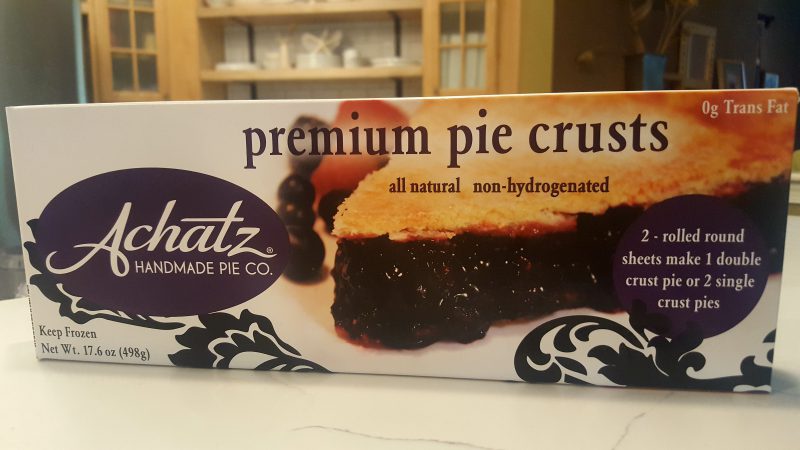
1 vegan pie crust, prepared or homemade (I use Achatz brand, available at Whole Foods)

1/4 cup naturally vegan Thai peanut sauce, prepared or homemade (I use a prepared brand from the grocery store)

1 package Tofurky Slow Roasted Sesame Garlic Chick’n, cut or torn into bite-size pieces

3/4 of a large red bell pepper, but into 12 thin slices (reserve remainder)

1/2 of medium red onion, cut into thin slices (reserve remainder)

Garnish: roasted and lightly salted peanuts or cashews and cilantro or Thai basil sprigs

Cucumber Salad (recipe follows)

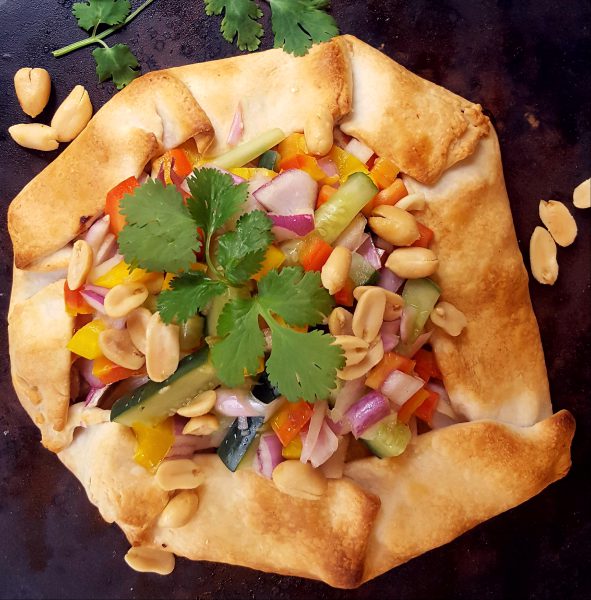
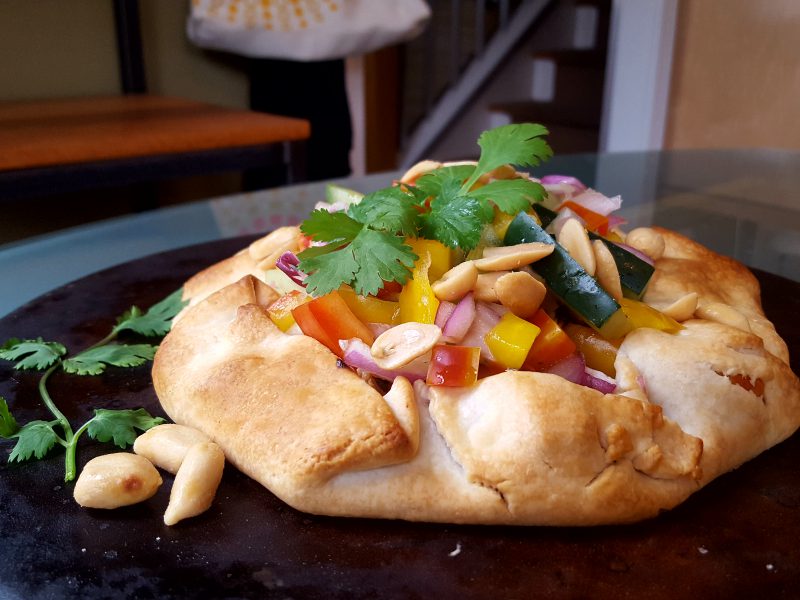
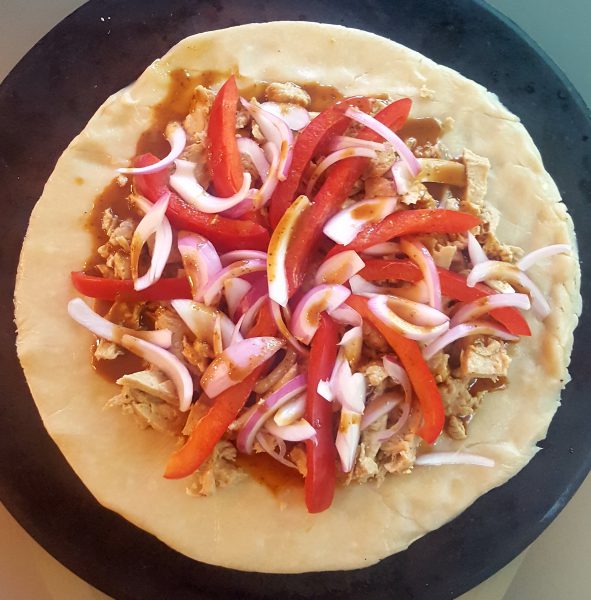
Preheat oven to 450 degrees.  Line a baking sheet with parchment paper or Silpat or use a terracotta baking stone.  Lie pie crust on prepared baking pan or baking stone, Spread 3 tablespoons peanut sauce in center to within 1-inch of edges.  Sprinkle evenly with Chick’n pieces and then arrange bell pepper strips in a pinwheel over the top and sprinkle evenly with red onion slivers.  Drizzle remaining 1 tablespoon of peanut sauce over the top and then fold in edges of crust, crimping and pinching as you go.  Bake for 20 to 25 minutes or until golden brown.  Remove from oven and serve garnished with peanuts and cilantro sprigs.  Serve cucumber salad on the side or piled on top, which is my preferred method.

Cucumber Salad

1 8-inch cucumber, sliced lengthwise and then crosswise into 1/4-inch pieces (I leave the seeds in for nutrition, but remove with a spoon if desired)

Reserved red bell pepper, diced

Reserved red onion, cut into thin slices and then 1-inch pieces

3 tablespoons rice vinegar

1 tablespoon natural sugar (I use demerera)

Sea salt and freshly ground black pepper to taste

In a medium bowl, combine all salad ingredients.  Check for seasoning, adjust as necessary, and refrigerate in an airtight container, stirring occasionally, until serving time.

Croustade just prior to folding, crimping, and cooking

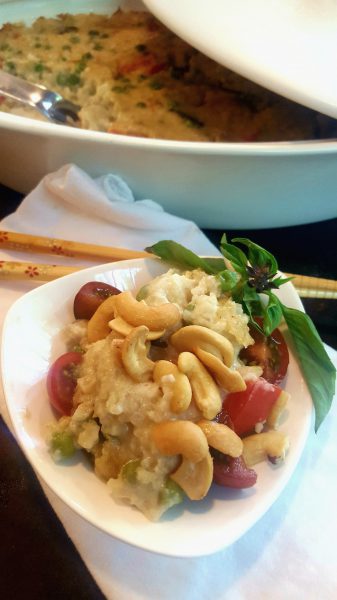
Vegan Thai Savory “Rice” Pudding


Yield: 6 Servings

Calories: app 217/serving without cashew garnish  (app. 1,300 for entire recipe)

I love rice as much as the next gal.  BUT, it contains far more calories and starch than I can justify in my 1,500-1,800 calorie daily diet.  Thank goodness that someone far smarter than me started the “riced” cauliflower movement.  I love all of the “riced” vegetables and even made a previous version of this dish with a combination of them, but I wanted the lighter color and more pure flavor of the cauliflower by itself.  I would have loved for the dish to be even more white in color, but cauliflower turns slightly yellowish when cooked.  But it is still beautiful, nutritious, and delicious.

I think I got it just right and hope you agree.

10 ounces cauliflower florets, steamed until tender (I steam it in the microwave for about 4 minutes on high)

1 can coconut milk

2 tablespoons cornstarch

1/4 cup vegan fish sauce (sold as “vegetarian” in Asian Markets or you can make your own)

1 tablespoon coconut oil, divided (you can substitute any vegetable oil, BUT this dish made with coconut oil is indescribably more flavorful, as I tried it both ways)

1 pound riced cauliflower (I’m always in a rush, so I purchase it, but you can make your own by mincing cauliflower in the food processor until it reaches the texture of rice)

1/4 cup red bell pepper, cut into thin strips and then 1-inch pieces

1/2 cup sliced onion

1 cup sliced mushrooms

1 cup fresh peas or frozen peas thawed

1 large clove garlic, minced

1 teaspoon soy sauce

Garnish: roasted and lightly salted cashew halves and pieces; sprigs of Thai basil, mint, and/or cilantro

Preheat oven to 350 degrees.  Oil a shallow casserole dish, about 9 x 13″, with 1 teaspoon coconut oil.  In a food processor, puree cooked cauliflower.  Add coconut milk, cornstarch, and fish sauce and puree again until smooth.  In a large skillet, heat approximately 1 teaspoon coconut oil over medium heat. Add riced cauliflower and gently saute, stirring frequently, until tender.  Transfer to a large bowl.  Return skillet to heat and melt remaining teaspoon of coconut oil.  Add bell pepper and onion and saute, stirring, until they lose some of their crispness.  Add mushrooms and cook until moisture is released and evaporated.  Add peas, garlic, and soy sauce and saute, stirring, just until peas are heated through.  Add veggie mixture to the bowl of riced cauliflower and pour the pureed cauliflower-coconut mixture over the top.  Stir to combine thoroughly and transfer to prepared casserole dish.  Bake for 45 minutes or until top is firm.  Serve topped with a few cashews and sprigs of Thai basil, mint, or cilantro.


Vegan Bang-Bang Tofu


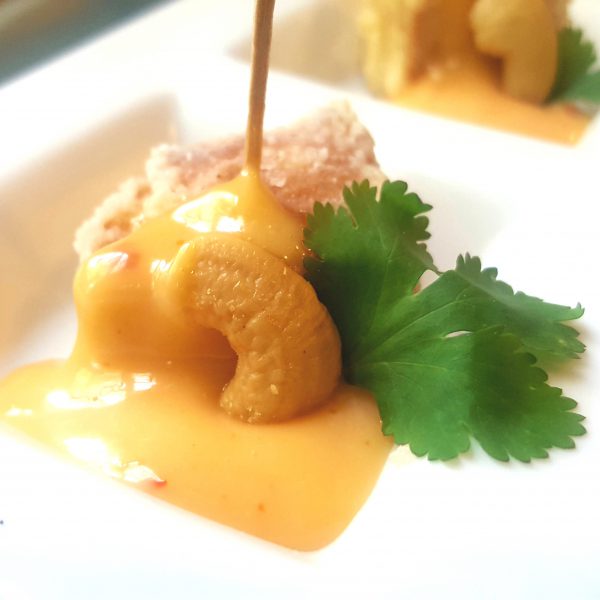
It doesn’t matter how you serve this dish–taco, appetizer, etc.–you will love it. In fact, you might want to just eat spoonfuls of the delectable sauce by itself.

Note:  We own a Waring Pro fryer, which is surprisingly affordable (cheap!), and I highly recommend.  

Bang-Bang Tofu

Bang-Bang Sauce (recipe follows)

Crispy Fried Tofu (recipe follows)

Optional garnishes: cilantro sprigs, lightly salted cashew halves, snipped chives or green onions; or small flour or corn tortillad and shredded cabbage if serving as tacos

To serve, either toss the cubes of fried tofu with some of the sauce and sprinkle with the garnishes of your choice; do the same, but serve in a soft taco shell with some shredded cabbage; or serve as an appetizer with a toothpick in each tofu square,  a little sauce on the side,  and the garnishes of your choice.  Be sure to prepare just before serving so that the sauce does not make the crispy tofu soggy.

Bang-Bang Sauce

2 cups vegan mayonnaise

1 cup Asian sweet chili sauce

1 tablespoon demerrera sugar

1/4 teaspoon garlic powder

1/4 teaspoon onion garlic powder

1 teaspoon sriracha sauce or to taste

In a medium bowl, whisk together all ingredients.  Cover and refrigerate.

Crispy Tofu

1 pound extra firm tofu, cut into 1-inch cubes

1 cup unsweetened soymilk curdled with 2 teaspoons rice vinegar + 1/4 teaspoon salt

3/4 cup cornstarch

Heat 2 to 3 inches vegetable oil to 375 degrees in deep heavy-bottomed pot.  Place both the curdled soymilk and the cornstarch in separate shallow bowls. Working with 1/4 of the tofu at a time, dip the pieces first in the curdled soymilk and then coat with the cornstarch. Fry for 3 minutes or until golden brown. Drain on oaper towels.  Keep warm in a preheated 170 degree oven (or lowest temperature).

Vegan 4-Ingredient Thai Chicken and Cream Cheese Roll-ups
Quick-and-Easy

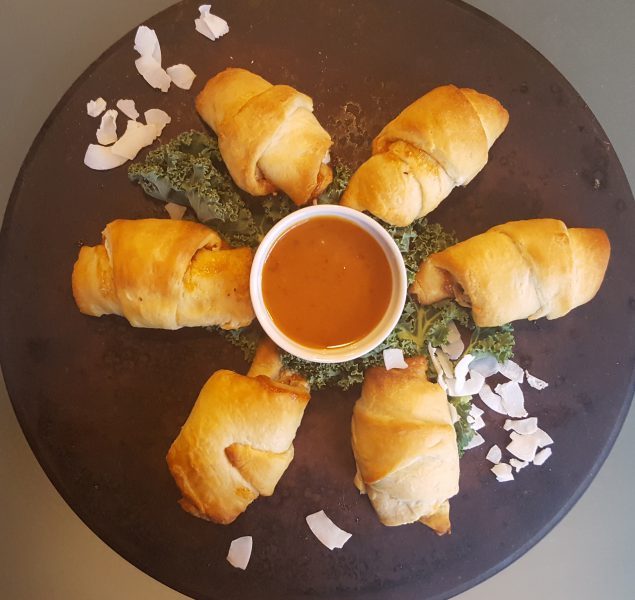
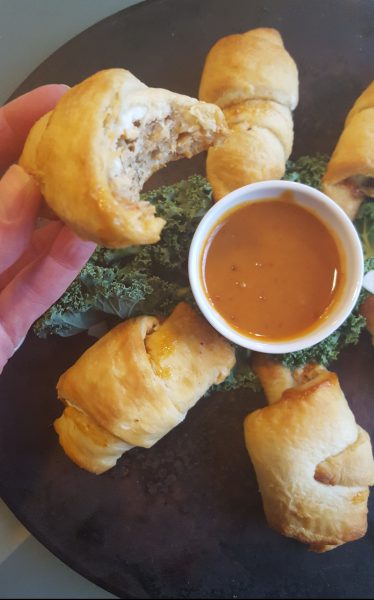
These simple retro-contemporary apps are like cute little packages, and they are so quick, easy, and satisfying.  Though they are best warm, they are even delicious cold.  I know because I have brought them to school for lunch 3 days this week and my days don’t leave time to heat my lunch.

I am not sure why I even had Pillsbury Crescent Rolls in the fridge–vegan Pigs-in-a-Blanket?–but I did and I was craving my Vegan Thai Chicken Bites.  However, I had no puff pastry and no cashews.  So, I adapted.  I used the same sesame-garlic Tofurky Slow Roasted Chick’n and a dab of commercial Thai peanut sauce in both, but added a layer of vegan cream cheese to the roll-ups, and omitted the cashews.  Delish.

For presentation at home, I arranged them on a leaf of kale and sprinkled coconut shavings over the top.  But, believe me, they are also irresistible out of a Tupperware carton.

1 can Pillsbury Crescent Rolls

Approximately 1/3 cup vegan cream cheese, softened

1 box sesame garlic Tofurky Roasted Chick’n

Approximately 3 tablespoons commercial or homemade peanut sauce + extra for dipping

Optional: fresh kale leaves and coconut shavings

Preheat oven to 375 degrees.  Line a baking sheet with parchment paper or Silpat (silicone baking sheet) or spray with nonstick spray.  Unroll crescent roll dough and separate triangles, laying them a couple of inches apart on baking sheet.  Spread with about 2 teaspoons of vegan cream cheese, top with about 1/8th of the chick’n, drizzle with about 1 teaspoon of peanut sauce, and roll up beginning with wide side of dough triangle opposite point.  Bake for approximately 15 minutes or until golden brown.  Let cool enough to handle and then serve immediately on an optional bed of kale sprinkled with coconut shavings and a dish of extra peanut sauce for dipping.


Easy, Fast, Intoxicating Vegan Dan Dan Noodles
with 0 Calorie Noodles(!)

Yield: 2 servings (easily multiplies)

Vegan friends, prepare to have your pasta-loving lives changed.

Recently, I fell in love with vegan Dan Dan Noodles, both at V Street in Philadelphia and at Forbidden Bistro, our favorite Chinese restaurant here in Virginia Beach.

The problem for me and the reason I had probably never ordered Dan-Dan before is not finding vegan noodles, but all of the calories in any kind of noodle. The dish at V Street was the perfect “gateway” though, as it was a dimuntive tapas portion.  So when I noticed them on  the Forbidden Bistro menu,  I talked myself into ordering them, but I made more than one meal out of their dinner entree.

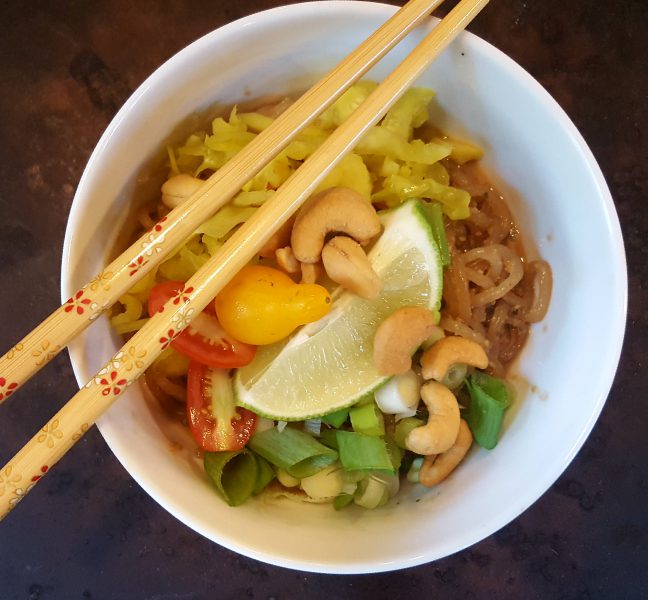
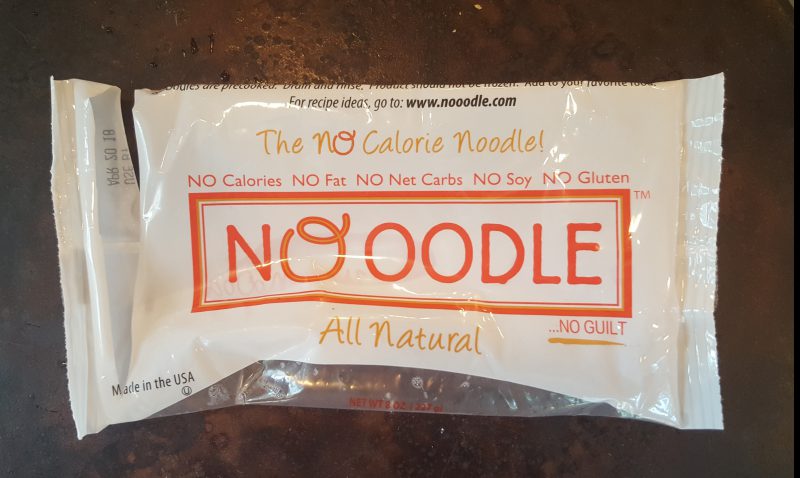
As for solving the problem of noodles and all of their calories, enter the amazing No-oodles, a thin, slightly curly, tofu-free shirataki. They have O CALORIES. That’s right. None. Nada. Zip.  Feel free to use any brand of shirataki in this recipe, including the type made with tofu, which has a few calories.  But I prefer the No-oodles, as their size and shape seems more Dan Dan-like than fetuccine-like.

Locally, I found No-oodles last weekend at a small, niche natural market called Organic Depot. After you read the list of what No-oodles don’t include–dairy, gluten, carbs, calories, etc.–you will wonder what they do include. And that is simple: water, yam flour, and lime.  Somehow, they are delicious and don’t break down when simmered.  But they lack nutrition of any kind, so you obviously have to be sure to enjoy them with accompaniments that are full of vitamins, minerals, and protein.

Dan Dan is traditionally served with julienne cucumbers, scallions, and lime.  But I subbed other ingredients that I had on had for the cuke: tricolor pear tomatoes and a delicious naturally fermented curry-flavored sauerkraut from Whole Foods that included cabbage, carrots, and cauliflower.  A vegan Kimchi would be really nice too.

I researched recipes and ultimately decided to tweak one I found online from Food and Wine.  It, and the others, called for frying the peanuts for the sauce, which sounds delicious  ut messy.  So I simply chose already roasted peanuts, the same amount of oil, and skipped the frying step because oil isn’t a problem for me when the noodles have no calories.  Though I put peanuts in the sauce, as called for by tradition, I garnished tge dish with a few cashews because I love them so.

Honestly, I could eat this dish every day.  And it’s so easy, quick, and healthful that there’s no reason not to.  Hmm…

Note: if you want to make Dan Dan Noodles with Tofu, cut 14 ounces of firm or extra firm tofu into cubes and marinate in sauce for an hour or so before removing with a slotted spoon, sauteing in an oiled skillet–or baking/broiling–and spooning over the completed dish.

low

Dan Dan No-oodles

1/4 cup peanut oil (vegetable oil will work in a pinch)
1/2 cup roasted and lightly salted peanuts (or cashews)
1 small jalapeño, stem, ribs, and seeds removed (wash hands after) or 1 teaspoon Asian fire oil (hot, spicy oil)
1 large garlic clove, halved
1/2 teaspoon minced ginger
2 1/2 tablespoons soy sauce
2 tablespoons water
1 1/2 tablespoons rice vinegar

1 tablespoon fresh cilantro leaves or 1 teaspoon dried (optional)
1 tablespoon Sriracha chili sauce
1 tablespoon sugar (I like coconut sugar in this dish)
1 teaspoon Asian sesame oil
Sea salt to taste if needed (I don’t feel the dish needs extra salt, but it depends on your peanuts)
2-8 ounce packages No-oodles or Shirataki (if the latter is made with tofu, some calories will be involved), drained
Garnish (choose any or all): Julienne cucumber, Asian-compatible sauerkraut (I use a curry variety with cabbage, carrot, and cauliflower from Whole Foods) or Kimchi, sliced scallions, lime wedges, sesame seeds, lightly roasted and salted cashews, sprigs of mint or cilantro

Simply place all ingredients except pasta and garnishes in a food processor–I used my small processor for one recipe–and process until smooth.  Scrape into skillet and warm over low or medium heat.  Add No-oodles, stir gently, and simmer until noodles are heated through.  Serve in bowls topped with the garnishes of your choice; go for contrasts in color and texture.  Enjoy with chopsticks.

Vegan Coconut Cream-Mandarin Orange Cheesecake Extraordinaire with Spicy Peanut-Gingersnap Crust
+ a Plain Cheesecake Option

Are you ready?  Ready for the best cheesecake that will ever pass your lips (if I do say so)?  If so, then keep reading.  And if you could care less about the back story and want to get straight to the heart of the matter, by all means, scroll down to the recipe below.

True confession: my first attempt at veganizing my dear friend and inspired culinarian, Yvette Hetrick’s, cheesecake was an eipic fail.  According to prevailing wisdom, one should never make a dish for the first time for company.  But I did.  And while it was beautiful and edible and our friends were very gracious, it was in no way up to my high standards.

There were so many issues. For starters, the chili-infused gingersnap crust was delicious but overcooked.  In addition the top cracked, though not resulting in terrible craters; the mandarin orange compote/jam swirled into the batter never set (I’m not sure how it would even in a dairy version) and the cheescecake around it was underdone; and Y’s beautiful concentric circles of mandarin orange sections deocrating the top made it difficult to cut.  However, the worst infraction was it’s dark color and strangely “off” taste.

Disappointed but driven, I did what I always do: I researched, I ruminated, I re-imagined, and I cherry-picked the best aspects of a number of cheesecakes, both vegan and not, and tried it again, this time with stellar, can’t-top-this results.  And I served it again to the same friends who raved.

To solve the overcooked crust issue, I made it exactly the same, only I froze it rather than baked it before filling.  To prevent the top from cracking, I baked the cheesecake at a lower temperature–325 instead of 350 degrees–and, as before, I let it cool completely in the oven with the door partially open.  And to make sure it cooked through, instead of swirling a purchased–and bitter–orange jam into the batter, I made my own compote and used it to top the cheesecake which solved the underdone issue as well as the difficult-to-slice issue of decoration.

Regarding the dark color and “off” taste, I decided that, though I love coconut sugar and demerera sugar as much as the next gal–in fact, it’s all I bake with–a beautiful white, delicate, clean-tasting cheesecake calls for white granulated sugar. Sorry.  But that’s just the long and short of it.  The rich color and deep flavor of other less processed “brown” sugars simply results in a vastly inferior product.

So, now, with  no fruther ado, I present to you my little slice of paradaise.
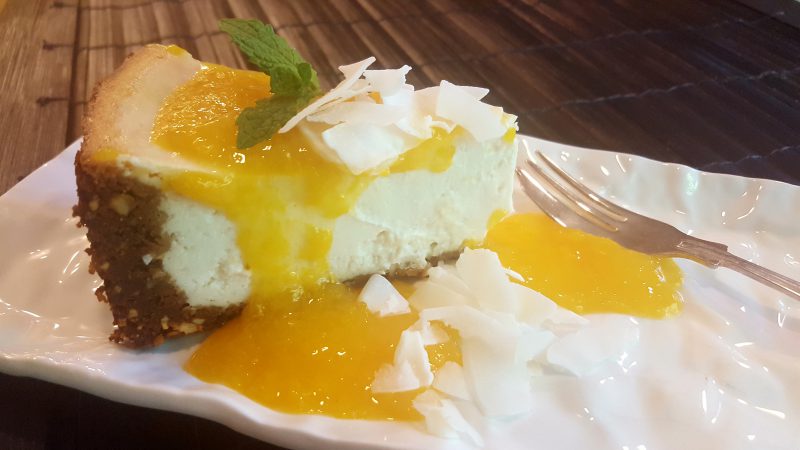
Note:  to make the best plain cheesecake you’ve ever eaten, simply prepare a traditional graham cracker crust, substitute plain soy or almond milk for coconut milk, and omit orange liqueur, orange zest and optional coconut extract.  Never fear, this cheesecake is delicious with no topping at all, but feel free to top with any flavor compote or other concoction you choose.

Crust:

4 cups whole gingersnap cookies (the crispy/crunchy kind)

1 cup spicy peanuts (or your favorite spicy nut)

1/4 cup granulated sugar

1/2 cup vegan butter, melted

Pulse cookies in a food processor until coarse crumbs are formed.  Add nuts and sugar and continue pulsing until finer crumbs are formed.  Drizzle in butter and pulse just until moist clumbs are formed.  Distriubte mixture into the bottom of an 8- or 9-inch springform pan and press evenly onto the bottom and 2 inches up the sides of the pan.  Freeze while you prepare filling.

Filling:

14 ounces firm tofu, drained

16 ounces vegan cream cheese (I use Tofutti brand)

1 cup granulated organic white sugar

3 tablespoons cornstarch

1 cup thick coconut milk (I use So Delicious Culinary Coconut Cream purchased at Whole Foods)

Juice of 1/2 large lemon

Zest of 1/2 large orange

1/4 cup orange liqueur (e.g. Grand Marnier or Triple Sec)

1 teaspoon vanilla extract

1 teaspoon almond extract

Optional: 1 teaspoon coconut extract (for a more pronounced coconut flavor)

Topping–Mandarin Orange Compote:

2-10.5 ounce cans mandarin oranges

1/4 cup orange liqueur

Zest of 1/2 of large orange

2 tablespoons cornstarch

Garnish:

Shaved coconut, fresh mint sprigs, and optional whipped coconut cream or Coco-Whip

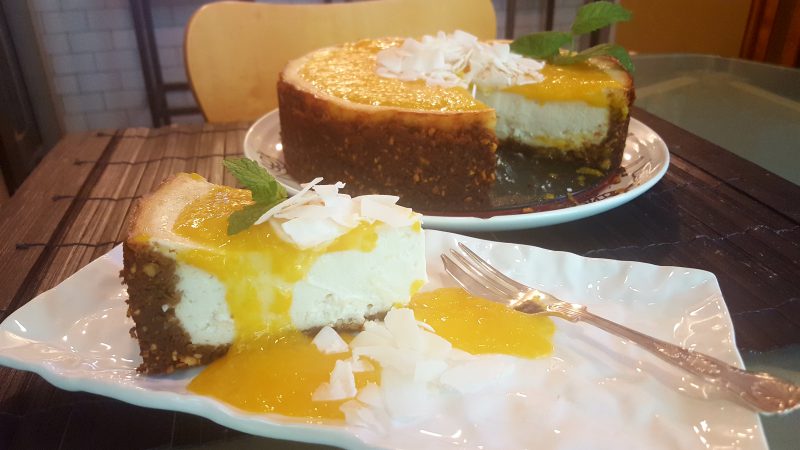
Preheat oven to 325 degrees.  Rinse and wipe out bowl of food processor.  Process tofu and cream cheese until smooth.  Add all remaining filling ingredients and continue processing until creamy and silky smooth.  Pour into frozen crust and gently smooth top.  Place cheesecake on a baking sheet and bake for 1 hour and 20 to 30 minutes or until set, very lightly browned around edges, and slightly jiggly only in the very center.  Turn off oven, open oven door halfway, and allow to cool completely in the oven which will take several hours.  Cover and chill for a couple of hours.

Meanwhile make Mandarin Orange Compote.  Drain 1 can of oranges, reserving juice in a small bowl, and place the orange sections in a medium saucepan with remaining can of oranges in juice.  Add orange liqueur and orange zest and bring to a simmer.  Simmer for 2 to 3 minutes, stirring frequently.  Whisk cornstarch into reserved orange juice and slowly pour into simmering mixture, stirring continually.  Simmer a couple more minutes, remove from heat, transfer to a heat-proof bowl, and refrigerate until very cold.

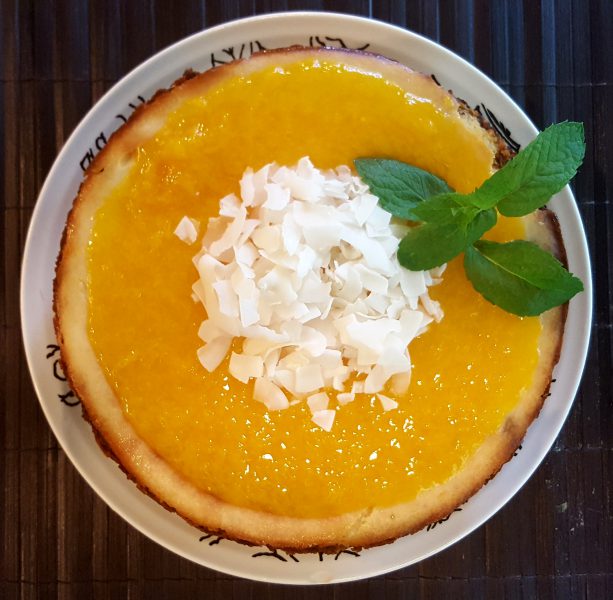
Run a knife around the edge of the cheesecake, remove it from the pan and place it on serving platter.  Spread half of compote evenly over the top of the cheesecake, mound shaved coconut in the center, and add a sprig of mint or two.  Serve in slices with an additional mint sprig if you choose, and pass remaining compote.  If you really want to gild the lily, also pass a bowl of whipped coconut cream or a prepared product like Coco-Whip.
Vegan Flexy Sexy Asian Slaw
(with popcorn, my fave new slaw ingredient)

Yield: 2 to 4 servings

My brand new vegan slaw is “flexy” because you can use your favorite vegetables and mix it up differently every time; and “sexy” because it is so light and healthy that it looks good on everyone.  Plus, you’ll have to admit, the martini glass presentation is James Bond meets West Elm sexy.

Simply keep the proportions as provided and then have your way with this slaw which is perfect for a light lunch.  Serve it however you choose, but a clear stemmed glass and chopsticks make it so pretty and fun to nibble.

1 tablespoon vegan mayonnaise

Juice of 1/2 medium lime or lemon

1 tablespoon rice wine vinegar

1 1 /2 teaspoons soy sauce

1 1 /2 teaspoons granulated sugar (I like coconut sugar)

Optional: 1/8-1/4 teaspoon hot sauce (I like Sriracha)

2 cups sliced, diced, spiralized or julienne colorful, crunchy vegetables (I used a broccoli slaw mix that included purple cabbage and carrots)

2 cups prepared “skinny” popcorn (air popped and very lightly salted or seasoned)

1/2 cup diced tomatoes (I like tri-color cherry tomatoes)

1/4 cup raw cashews

1 teaspoon fresh minced basil (an Asian variety like Thai or Vietnamese is especially nice

1 teaspoon fresh minced or torn mint leaves

Sea salt and freshly ground pepper to taste

Garnish: fresh basil or mint sprigs, a few cashew halves

In a small bowl, whisk together first 6 ingredients to make dressing.  In a medium-large bowl, gently toss together remaining ingredients except garnish.  Drizzle dressing over, toss again, Divide into serving dishes and garnish as desired.  Serve immediately.

Best Vegan Quick-and-Easy Pad Thai Lite
with Spiralized Veggie Noodles

Yield: 2 servings (easily multiplies)

I love Pad Thai–heck, I adore all Thai food–but I rarely let myself make or order it because it packs a wallop in the calorie department.

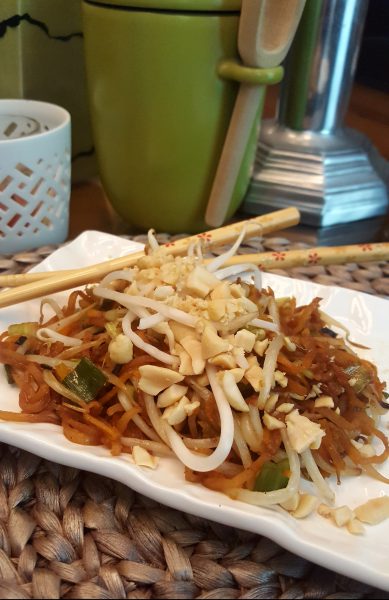
But last weekend, I was in Whole Foods, and saw a beautiful rainbow of spiralized vegetables. I chose the butternut squash and the turnip and brought them home. I roasted them together in a 450-degree oven with a tiny bit of oil, but then I wasn’t sure what to do with them.

But when my friend shared her homemade Asian fusion birthday dinner with me via Facebook last night, I woke up with thoughts of Pad Thai on my mind. After some beautiful days in the 60s, it is suddenly in the 90s here and I didn’t want to be in the kitchen long. So I whipped up a quick version that I would eat again and again. See if you agree.

1 tablespoon rice wine vinegar

2 tablespoons vegan fish sauce

2 to 3 tablespoons sugar (I used coconut sugar)

1 tablespoon vegetable oil

1 1/2 cups bean sprouts

2 large green onions sliced, both white and green part

2 cups roasted or steamed spiralized vegetables (I used a combination of butternut squash and turnip)

1/2 large lime

2 tablespoons chopoed roasted and lightly salted peanuts

In a small bowl, whisk together first three ingredients. Pour oil into large skillet and heat over medium-high. Add bean sprouts and stir fry for a minute or two followed by green onions. Add spiralized vegetables and stir fry for another minute or two. Divided between two plates and sqeeze the juice of one quarter of the large lime over each. Top each with one quarter cup remaining bean sprouts and one tablespoon of chopped peanuts. Serve immediately with chopsticks.

Next Level Vegan Ramen

This is not your mama’s Ramen.

And it is also not so much a recipe as an approach…

A few weeks ago shopping at a local Asian market, the checkout person generously tucked four packages of Ramen-type dry noodle soup packages into my box of purchased items. And the soup turned out to be vegan. On its own, it is flavorful, if a little salty, and a bit one-note in color and texture, not to mention of questionable nutritional value.

But, stay tuned…

Yesterday, hungry for lunch–I turned out not to need dinner–and with a fridge full of fresh ingredients left over from a dinner party, I changed all that.  The dinner party meal was Southwestern, but the raw ingredients could have just as easily been Asian.

To kick up a basic bowl of Ramen into a truly beautiful, vitamin-packed, and hydrating dish–company-worthy even–as I did, just follow or adapt my quick and easy formula:

To a basic Ramen package consisting of dry noodles and seasoning packets calling for 2 cups of water:

Double the water, add seasoning packet(s), loosely cover, bring to a simmer, add noodles, and simmer for 3 minutes. During last minute, add 2 big handfuls of greens (tender baby kale, spinach, etc.) and stir to combine.

To serve, ladle into one or two pretty bowls and top with any or all of the following:

  • Several good shakes of vegan fish sauce (sold as vegetarian)
  • Shredded raw purple cabbage
  • Shredded raw carrot
  • Thinly sliced raw radish

Thinly sliced rae yellow, orange, or red bell peppers

  • Raw bean sprouts
  • Sliced raw green onions
  • Lightly roasted and salted cashews or peanuts
  • Fresh cilantro, mint, and/or Thai basil sprigs
  • Fresh lime wedges

Serve with chopsticks for the most satisfying quick meal ever.


Related Posts Plugin for WordPress, Blogger...