Holiday (Leftovers) Hummus

If, after Thanksgiving and Christmas–or whatever winter holidays you celebrate–you can’t look another Brussels sprout in the face, you might want to try this tasty redux.

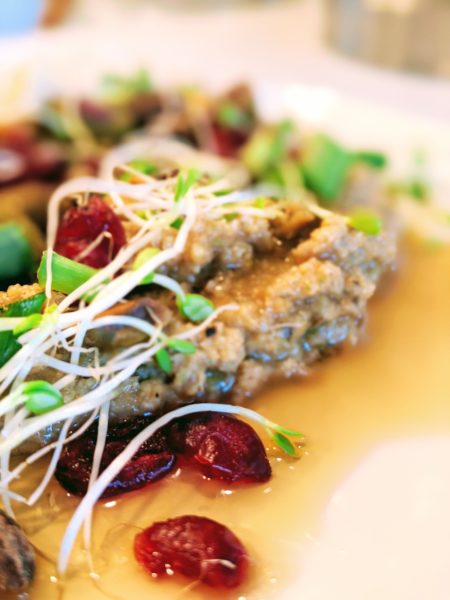
To make this quick and very light lunch or appetizer, I simply processed together about a half cup each roasted Brussels sprouts and roasted cauliflower, 2 tablespoons unsweetened non-dairy milk, 1 teaspoon olive oil, 1 teaspoon maple syrup, 1 teaspoon fig infused balsamic vinegar, a tiny bit of onion powder, and sea salt and freshly ground black pepper to taste.

To serve, I swirled it on a plate and topped it with a couple tablespoons each dried cranberries and pistachios, 1 tablespoon maple syrup, sea salt and a few sprouts.

It was delicious and satisfying on cucumber slices. And it looked festive without looking like a rehash of holiday meals and hors d’oeuvres.

vegan #veganrecipes #veganfoodshare #veganfoodporn #plantbased #plantbasedrecipes #plantbasedfoodshare #plantbasedfoodporn #hummus #veganappetizer #plantbasedappetizer #veganlightlunch #plantbasedlightlunch

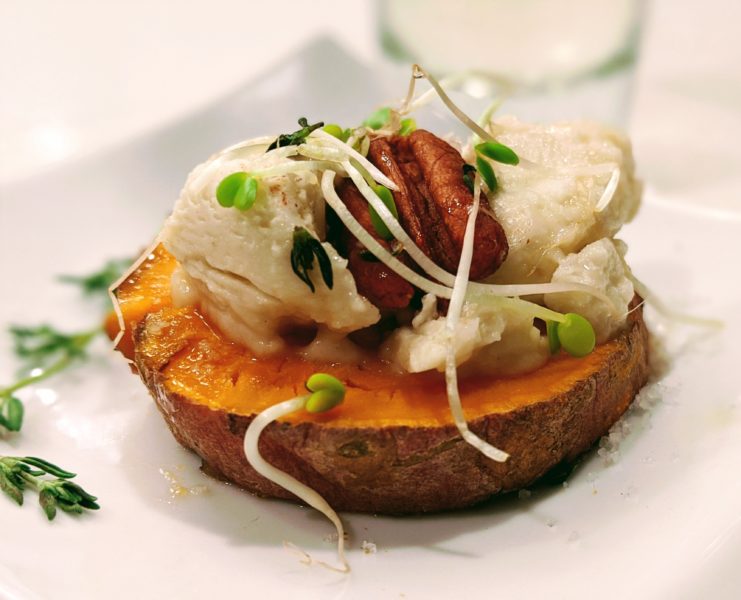
Sweet Potato Bruschetta with Cream Cheese, Toasted Pecans, Fresh Thyme & Maple Syrup

Yesterday, on Facebook, I posted all of the pretty pictures of the food from our 4th annual Christmas Cheer Open House. But what I didn’t share was my sweet potato bruschetta fiasco.

Depicted is what I intended to serve, which I prepared for myself this evening as a snack with a glass of Pinot Grigio. It was as delicious and pretty as I had hoped it would be. Darn it.

I had baked about five glorious foil-wrapped sweet potatoes in the oven on Tuesday in preparation for our open house yesterday. But then I forgot about them and let them sit overnight.

Research indicated that after 2 hours, I could reheat them to 160 degrees and kill any bacteria that might have grown, but after that, there could be a concentration that would not be killed by the heat and would be toxic.

Over the fence I tossed them and I had to create a new appetizer, which thankfully proved to be a hit.. (I will share it in another post.) Later, we saw a squirrel eating a piece of one of them on the fence, so all was not lost.

If you would like to try this stupid-simple appetizer, all I did was slice warm baked sweet potatoes and top with a dab of plant-based cream cheese, a toasted pecan half, sprouts, fresh thyme, a tiny drizzle of maple syrup, and a sprinkle of sea salt. Out of this world and so nutritious!

#vegan #veganrecipes #veganfoodshare #veganfoodporn #plantbased #plantbasedrecipes #plantbasedfoodshare #plantbasedfoodporn #appetizers

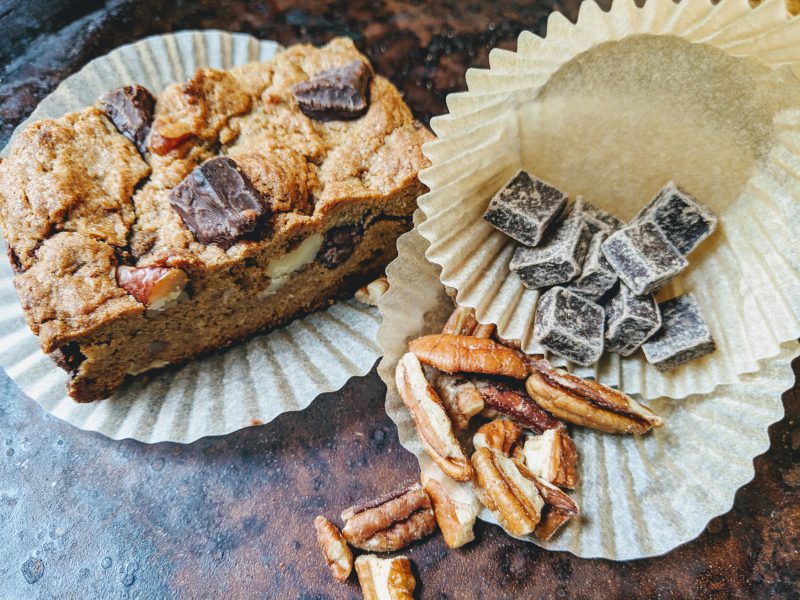
The BEST Vegan Blondie’s with Chocolate Chips and Nuts

I am excited to share this recipe with you because, in vegan baking, the basics–like Blondies–just have to be just right. And I have experimented endlessly to dave you the trouble.

As an egg replacement, I highly recommend Neat Egg, a new product to me, which I found at Kroger.

3/4 cups firmly packed brown sugar, light or dark
1/2 cup vegan butter, melted
1 cup plus 2 tablespoons all-purpose flour
1/4 plus 1/8 teaspoon baking soda
1 vegan egg substitute (I like Neat Egg)
1/2 teaspoon vanilla extract
1/2 cup vegan chocolate chips or chunks
1/4 cup chopped pecans or walnuts

Preheat oven to 375 degrees and grease and flour a 5 by 9″ loaf pan. Place all the ingredients in a medium to large mixing bowl and whisk until a thick batter forms. Fold in chips or chunks and nuts. Spoon batter into prepared pan and spread evenly to fill, but avoid packing down. Bake until light brown around edges and a toothpick inserted in the center comes out almost clean, about 23 minutes. Avoid over-baking. Remove from oven and let cool slightly, invert onto a rack, and cool completely. To serve, cut into squares or rectangles with a serrated knife.

vegan #veganrecipes #veganfoodshare #veganfoodporn #plantbased #plantbasedrecipes #plantbasedfoodshare #plantbasedfoodporn

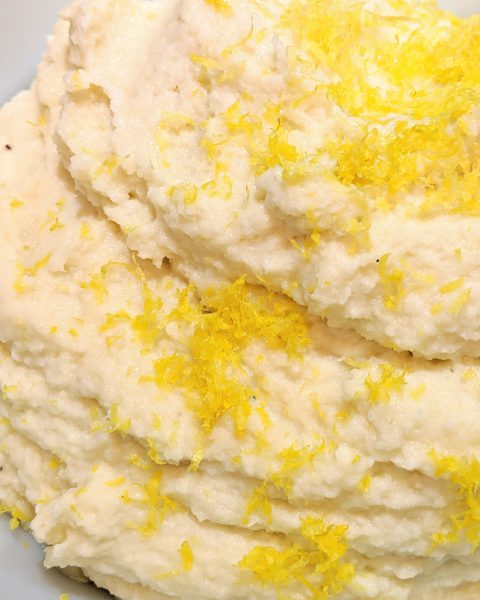
PERFECT Vegan Pureed Cauliflower (tips and recipe)

Yield: 2 to 3 servings

My secrets (and recipe) for PERFECT Vegan Cauliflower Puree–better than mashed potatoes! Rave reviews at last night’s Starlight Supper Club…

1) cook only until tender; avoid overcooking
2) after cooking, even if you steam the cauliflower in a bag, drain it well on paper towels
3) for 12 oz raw cauliflower, use 1 tablespoon vegan butter and 1 tablespoon vegan cream cheese; don’t omit the cream cheese!
4) fold in the zest of one quarter or more I have a large lemon–this is a game-changer!

12 ounces raw cauliflower florets (I used the steam-in-bag microwave variety)
1 tablespoon vegan butter
1 tablespoon vegan cheese
Sea salt and freshly ground black pepper
Zest of one quarter or more of a large lemon to taste
Optional: 1/2 teaspoon minced rosemary sizzled in 1 tablespoon melted vegan butter

Cook cauliflower just until tender, drain if necessary, and drain again on paper towels. Break up any large florets and process with vegan butter, vegan cream cheese, and salt and pepper to taste. Reheat if necessary and fold in zest just before serving. Drizzle with optional rosemary butter.

#vegan #veganrecipes #veganfoodshare #veganfoodporn #plantbased #plantbasedrecipes #plantbasedfoodshare #plantbasedfoodporn

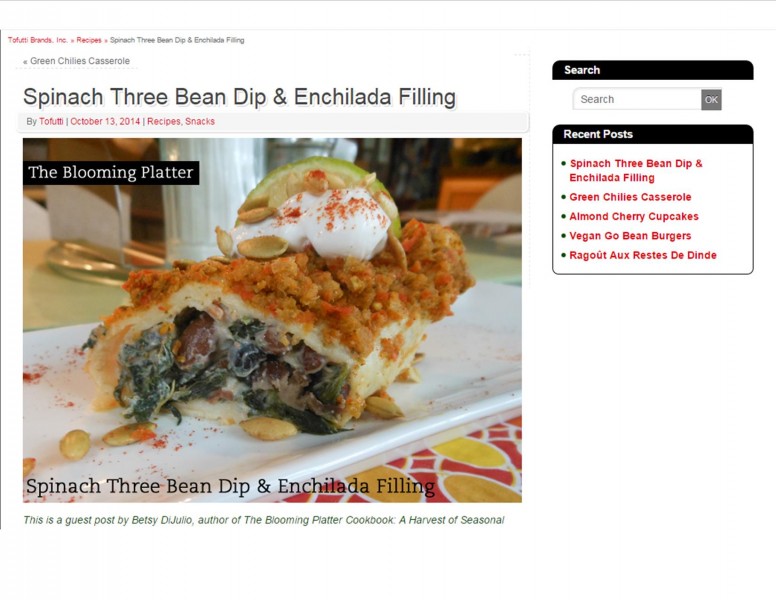
Vegan Spinach-Three Bean Dip and Enchilada/Bell Pepper Filling–A Hit with Non-Vegan Teens!

Tofutti Enchiladas

This dip has always been a hit with my National Art Honor Society students since I introduced it a few years ago, wanting to serve them something tasty, but nutritious at our after school meetings.  We had our first meeting of the year about 10 days agao, and the officers specially requested it.

There was some left over, as we had a LOT of food for the induction ceremony and kick-off.  So, I rolled scoops up inside tortillas and some inside a halved red bell pepper; spooned homemade, slightly chunky enchilada sauce over the top of each; and baked them about 20 minutes (30 for the peppers) for some of the best enchiladas around!

They are perfect for a family dinner, but they reheat beautifully for satisfying lunches.  All you need is a microwave.


Vegan Spinach-Three Bean Dip or Enchilada/Bell Pepper Filling:


1 1/2 cups Tofutti Better Than Sour Cream

1 1/2 cups vegan mayonnaise

1 tablespoon ground cumin

2 envelopes (1 box) dry vegetable soup mix

2-9 or 10 ounce boxes frozen spinach, thawed, and moisture squeezed out

1 can black beans, rinsed and drained

1 can pinto beans, rinsed and drained

1 can white beans or dark red kidney beans, rinsed and drained

Pinch coarse sea salt to taste

In a large bowl, stir together all ingredients, separating strands of spinach with your fingers as you add it. Check for salt and add a pinch to bring out flavors if desired. Serve cold with your favorite dippers.  Or, roll up inside tortillas, place in an oiled pan, top with your favorite homemade or prepared salsa verde or enchilada sauce, bake about 20 minutes and serve topped with more Tofutti Better Than Sour Cream and the garnish if your choice.  I like a slice of lime and a few toasted pepitas.  Note:  you can use any beans you prefer, even all of one kind.  To make stuffed peppers, stem, seed, and half a red bell pepper, mound slightly with the filling, top with the enchilada sauce, and bake for about 30 minutes or until peppers are tender.  Cover with foil if sauce in the bottom of the pan starts to scorch.


On the 6th Day of Christmas…Vegan Peppermint Fudge!

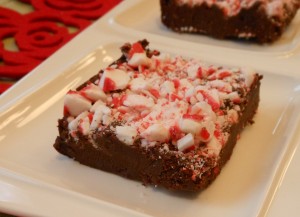
Peppermint FudgeThis is about the most festive–and tastiest, not to mention easiest–candy going!   Peppermint Fudge is so nice to have on hand in the fridge when friends and family stop by.  And it looks so beautiful on the fanciest of tables.  But, once the mixture is chilled, I’m guessing–though I’ve not tried it yet–you could roll the mixture in little balls and then into very finely crushed peppermint for an even more formal truffle.

What I have done when I was in a rush is add just a drop of peppermint extract to the chocolate mixture, forgo the peppermint topping and stand some peppermints up in a pretty glass next to the platter of fudge.

This year, I went to three stores and could not find those “chalky”  peppermint sticks (not the slick ones), but I needed to run into the Dollar Tree for a few things and there they were at the checkout.  So, if you have a Dollar Tree in your area, check there.

Cut the pieces small, this is some very rich fudge!  The secret?  (Vegan) coconut cream (available with cocktail mixers in the grocery store) replaces non-vegan condensed milk!  And I use a mixture of both melted vegan chocolate and cocoa.  Yowza!


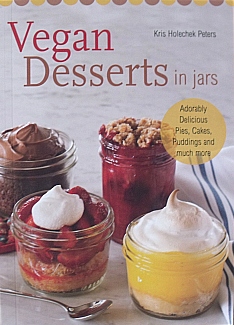
Vegan Cookbook Review: “Vegan Desserts in Jars” by Kris Holechek Peters

Vegan Desserts in Jars 2If you don’t have time to read this review, I’ll cut to the chase: I would certainly purchase for myself or as a gift this colorful little book of diminutive treats  baked and served in canning jars.  But, lucky me, I received a complimentary  review copy.  Available as a paperback or on Kindle, it will delight all the bakers on your holiday list.

Perhaps known best for her blog, www.nomnomnomblog.com, Peters is also the author of four cookbooks, including Have Your Cake and Vegan Too.  Her casual, peppy, and conversational writing style makes for a fun, quick read of  Vegan Desserts in Jars front material and both its chapter and individual recipe introductions.

Don’t be surprised by how thin this little paperback is.  At only 124 pages, it nonetheless serves up some 75 tempting recipes and lots of tantalizing color photos.  I, for one, appreciate a small focused cookbook.  Over my years of cooking, I have found that it is the rare cookbook from which I have made more than a handful of recipes.  And, other than my Joy of Cooking, which fit the bill as an introductory cookbook covering all the basics when I was a kid, I tend to shy away from encyclopedic tomes.

With nine chapters, from no-bake treats to cakes, pies, pastry and much more, it was difficult to decide what to bake first for this review.  Ultimately, I decided to go fairly basic with ingredients I had on hand and chose chocolate cakelettes.  Many of the adorable sweets in this book are made with fresh summer ingredients like berries and peaches.  Sure, they are available year-round in grocery stores, but as a seasonal cook, I will make myself wait until summer rolls around again.

I found the “Basic Chocolate Cake” recipe to be a  keeper.  *It makes 6 cakelettes in 4-ounce canning jars that rise up nice and high begging for a swirl of frosting on their perfect little domes.  I had recently purchased a set of 12 canning jars for a few dollars at my local Kroger so I was ready to go when the mood struck.  I plan on giving this first batch of festive little treats to the office staff at the high school where I teach.  BUT I plan on asking for the jars back so that I can reuse them in the future.

If I were serving these individual cakes at home, I would make as is.  However, if making them again to give as gifts, I would probably fill the jars half-full–and make a dozen instead of six–so that I could fit the lids on.  They would still be ample  desserts, but would be more easily transportable, staying fresh to boot.

Also, my oven seems to bake pretty true to temperature, but I found that I needed to cook the cakes just a couple of minutes longer than the longest baking time specified.  The simple wooden pick test will make sure yours are perfect.  Perhaps, though, I needed to bake mine a bit longer because I can’t leave any recipe alone, including my own!  To this batter, I added 1/4 cup of the new PB2 (powdered, lower fat calorie peanut butter that you mix with water) to the batter and a glug of Creme de Cacao (maybe 1 to 2 tablespoons).  Though the recipe was just lovely as published–I tasted the batter, of course–my additions were a delicious twist.  So you might keep that in mind when you’re making this (or any) chocolate cake recipe!

Under “About the Author” in the back of the book, I read that Peters “practices lots of yoga.”  She’d have to in order to “balance” the calorie damage done from testing the tantalizing treats in this book!

*Note that I just used the book cover as a photo to accompany this review because the lighting for photography is catch as catch can this weekend and my cakes baked up just as shown on the back left, only mine puffed up even higher.


Review: New Reformulated Nayonaise and Nayonaise–Whipped Vegan Mayo

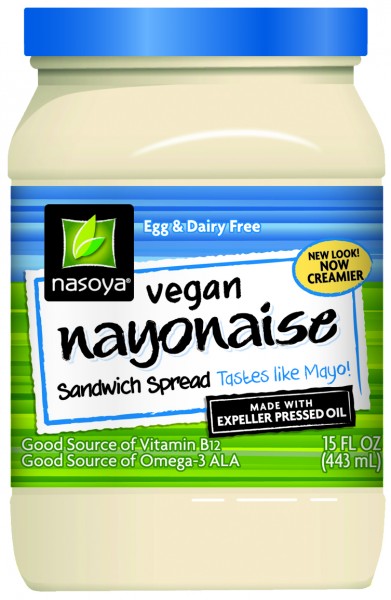
NayonaiseRecently, the kind folks at Nasoya–whose tofu I purchase frequently–generously sent me samples of their newly reformulated Nayonaise and Nayonaise–Whipped vegan mayo/sandwich spread.

I refrigerated it for a couple of days so that I could conduct a taste test, enjoying it as I would actually eat it.  During that test, because I wasn’t mixing it with other food, I took TINY tastes, but I took quite a few in order to accurately compare these products to my standard Grapeseed Vegenaise (Note: when I reference Vegenaise below, it is the Grapeseed variety.)

If, as a cookbook author (The Blooming Platter:  A Harvest of Seasonal Vegan Recipes, 2011), I have learned anything, it is that people’s palates are as different as the people themselves.  So, I would be very hesitant to suggest that one product tastes “better” than another.  Rather, I prefer to share what I perceive as differences, and encourage you to taste and decide on a preference for yourself.  Plus, I think where one was brought up has more than a little to do with one’s preference!

All three products have a list of benefits as long as your arm!  So, please visit the Nasoya website for complete nutrition information on Nayonaise as well as recipes.  One benefit on the Nayonaise scorecard worth mentioning here is that it contains 10% of the recommended daily allowance of B-12 and is a good source of Omega-3 ALA.
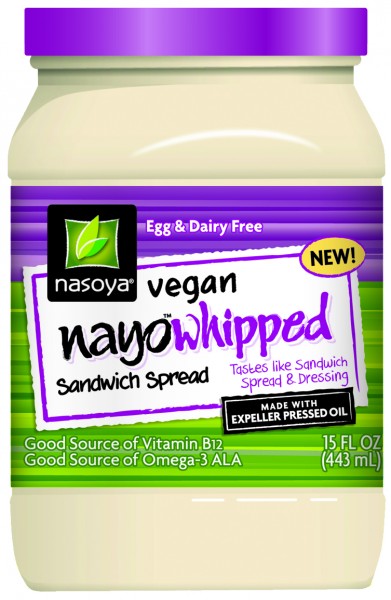
Nayonaise--WhippedBut, in general, I focused on color, taste and texture in my informal test.  However, those of you counting calories might appreciate knowing that Nayonaise has less than half as many calories as Vegenaise: 40 vs. 90 per tablespoon.

In terms of color, Vegenaise is the whitest.  So if pure color is important to your recipe, I would recommend it.  Both Nayonaise varieties have a pale warmth to their color, with the Whipped version having the most.  This is likely due to the inclusion of turmeric, paprika and garlic powder in the ingredients of both Nayonaise products.

In terms of taste, I found Vegenaise to be the most neutral.  Again, the turmeric, paprika and garlic powder no doubt give the Nayonaise a more distinctive flavor.  Distinctive is not necessarily better–or worse– just a little more pronounced, so I would make a decision based on how I planned to use it.

To my palate, Vegenaise has decidedly tangy-salty notes (though the lowest amount of sodium), while I found tanginess with just a hint of sweetness to be the most pronounced characteristic of Nayonaise and tangy-sweetness to be the most pronounced of Nayonaise–Whipped (which has just 5 more mg. of sodium than Vegenaise).    The differences in “tang” can no doubt be explained, in part, by the fact that apple cider vinegar (a fairly mild vinegar, as vinegars go) is the 4th ingredient listed on the Vegenaise label, while plain vinegar is the third ingredient listed on the Nayonaise labels.

It has been many years since I tasted non-vegan mayo but, based on my best recollection, I would suggest that Vegenaise perhaps has more in common with Hellman’s mayonnaise while Nayonaise with a sandwich spread like Miracle Whip.  I always felt that Miracle Whip tasted like it contained pickle relish, and I detected the same hints from, especially, the Nayonaise–Whipped.  I love pickle relish, but not necessarily in every recipe that calls for mayonnaise, so I would choose accordingly.

And, finally, in terms of texture, while all were creamy, I would say that Vegenaise is fluffier than Nayonaise, including the Whipped variety, which I didn’t find appreciably different in texture than the non-whipped.  Nayonaise contains Xanthan Gum and Guar Gum which probably accounts for what I can only describe as a consistency similar to a condensed canned soup before it is heated, a texture I didn’t perceive in Vegenaise.

So, that’s it: the results of my quickie taste test.  Thanks, again, to Nasoya for sharing their new take on Nayonaise with me so that I could share it with you.  We now have two new options for slathering on our fresh tomato sandwiches this summer!

Classic Vegan Gingerbread Cake

DSCN0753Yield: 1 9-inch bundt cake

I think  I am obsessed with veganizing Cook’s Country/Cook’s Illustrated recipes!

My latest redux is their Classic Gingerbread Cake.  And it is special!

It may well be the moistest and most deeply  and complexly flavored cakes you will ever enjoy.  I credit the Guinness Stout and the fresh grated ginger, among other things.

Find my recipe HERE at One Green Planet!


Related Posts Plugin for WordPress, Blogger...