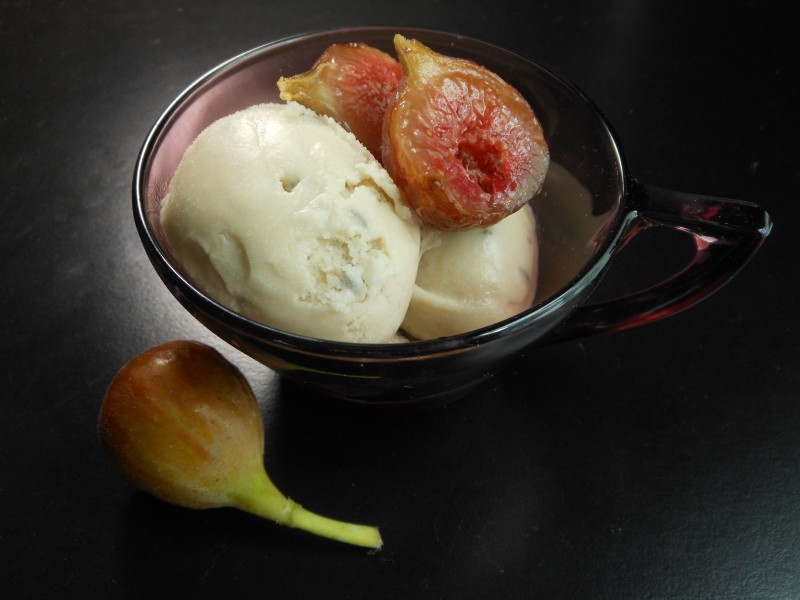
Luscious Vegan Lavender and Creme de Cacao Ice Cream (with optional Fresh Figs)

DSCN1830

Yield: 1 1/2 quarts

A perfect ending to a perfect party!

Every year for the last four, my husband and I have hosted our annual Julia Child Birthday Bash on the Saturday night nearest to her birthday.  This year, the party was on August 10.

At around 7:30 each year, 10 or so of our foodie friends gather for a potluck celebration like no other!

This year, while I toyed with a birthday cake in honor of the ‘ole gal, I opted for this Provençal-inspired ice cream instead.  And I think everyone was glad I did!

2 tablespoons arrowroot powder (thickens without crystallization)

1 cup unsweeteened soymilk

2 cups soy creamer

1/2 cup natural sugar

Pinch sea salt

1 tablespoon dried organic lavender buds

1 teaspoon vanilla extract

1 tablespoon Creme de Cacao

Garnish: fresh fig halves

In a small cup or bowl, whisk together arrowroot powder and 1/4 cup soymilk.  In a 1-quart saucepan, combine remaining 3/4 cup soymilk, soy creamer, sugar, salt, and lavender, and cook over medium heat until mixture begins to boil.  Remove it from the heat and immediately whisk in arrowroot mixture causing the mixture to thicken considerably.  Stir in vanilla and Creme de Cacao. Pour into a medium bowl, straining if desired (I don’t).  Cool the custard to room temperature, cover, and chill for at least 3 hours.  Freeze in an electric ice cream maker (mine is a Cuisinart) according to manufacturer’s directions.  Transfer to a covered freezer-safe carton, and freeze until stiffened.  Serve garnished, if desired, with fresh fig halves.

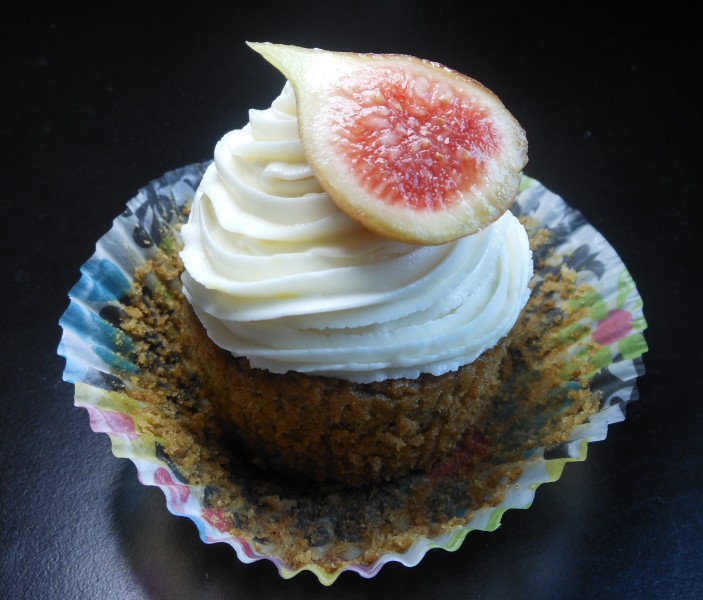
Vegan Fresh Fig Cupcakes with Vegan Lemon-Brandy Buttercream Frosting

DSCN1847

Yield: 1 dozen cupcakes

These may possibly be the moistest cupcakes you will ever put in your mouth!

A pint of fresh figs from a local farm market that needed used fairly quickly resulted in these beautiful confections.  The lemon in the buttercream frosting  provides a subtle but bright contrast to the cinnamon-scented fig cupcakes, while the brandy flavoring (use real brandy if you have it–my husband forbids me, jokingly–sort of–to use his)  accents their ripe, earthy fruitiness for the perfect summer wedding of flavors.

Vegan Fresh Fig Cupcakes

1 cup soymilk (unsweetened or plain)

1 tablespoon apple cider vinegar (I have used rice wine vinegar in a pinch and it works just fine)

1 1/2 cups white whole wheat flour (this is what I keep on-hand, but unbleached all purpose is fine)

3/4 cup + 2 tablespoons natural sugar

1 teaspoon ground cinnamon

1 teaspoon baking soda

1/2 teaspoon baking powder

1/4 teaspoon sea salt

1/3 cup walnut oil or canola oil

1/2 teaspoon vanilla extract

18 to 20 small-medium fresh figs, stemmed, and pureed in a food processor

Vegan Lemon-Brandy Buttercream Frosting (recipe follows)

Garnish: 12 fresh fig halves

Preheat oven to 350 degrees.  Line 12 muffin cups with paper liners.  In a small cup or bowl, whisk together soymilk and vinegar to make a vegan “buttermilk.”  When it curdles, whisk again and set the mixture aside.  In a large bowl, whisk together the flour, sugar, cinnamon, baking soda, baking powder, and salt.  Make a well in the center of the dry ingredients and add the soymilk mixture, oil, and vanilla extract.  Stir just until all ingredients are well combined and no lumps remain.  Stir in the fig puree until completely combined.  Fill muffin cups no more than 3/4 full and bake for 20-22 minutes or until a wooden pick inserted in the center comes out clean.  Cool completely on a wire rack, and then remove cupcakes from tin.  Place frosting in a pastry bag (mine came from the Dollar Tree!) fitted with a star-type tip, and pipe on top of cooled cupcakes in concentric circles, spiraling high.  Top with a fresh fig half just before serving.

Vegan Lemon-Brandy Buttercream Frosting

1/2 cup vegetable shortening

1/2 cup vegan butter

4 cups powdered sugar, divided

2 tablespoons soymilk (unsweetened or plain)

1 teaspoon vanilla

1 teaspoon brandy flavoring

Zest of 1/2 large lemon

In the bowl of an electric mixer, cream together shortening and vegan butter.  With mixer on low, beat in half of powdered sugar and half of soymilk.  Repeat.  Beat in vanilla, brandy flavoring, and lemon zest, and then turn mixer to high and whip until creamy-fluffy.


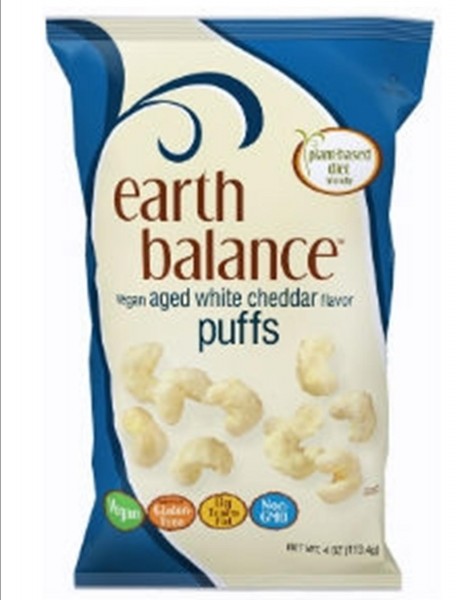
Guilty Pleasure: Earth Balance Vegan “Aged White Cheddar Flavored Puffs”

Earth Balance Aged White Cheddar PuffsCome on, admit it: every so often you find yourself fantasizing about cheese puffs.  You do.  I know you do!

A year or so ago, I heard a tantalizing rumor: that Earth Balance made a vegan cheese puff product.  However, we are not always on the cutting edge of vegan culinary developments here in my beloved state and it wasn’t until this summer that I actually saw them in a display at The Heritage, our main health food store in Virginia Beach.  (They are available at Whole Foods, and Organic Depot, as well as some health food markets.)

I had to exercise serious control to only purchase one bag.  One bag (4 servings) that I devoured on the way home!

Is vegan junk food an oxymoron?  In truth, these tasty puffs–admittedly a little homely looking–aren’t total junk.  They don’t have tons of nutritional value, but they are vegan, gluten-free, non-GMO, low-fat, absent of any trans-fat, and contain a little fiber and protein.

Do I eat them on a weekly basis?  No!  But will I occasionally indulge?  You betcha!

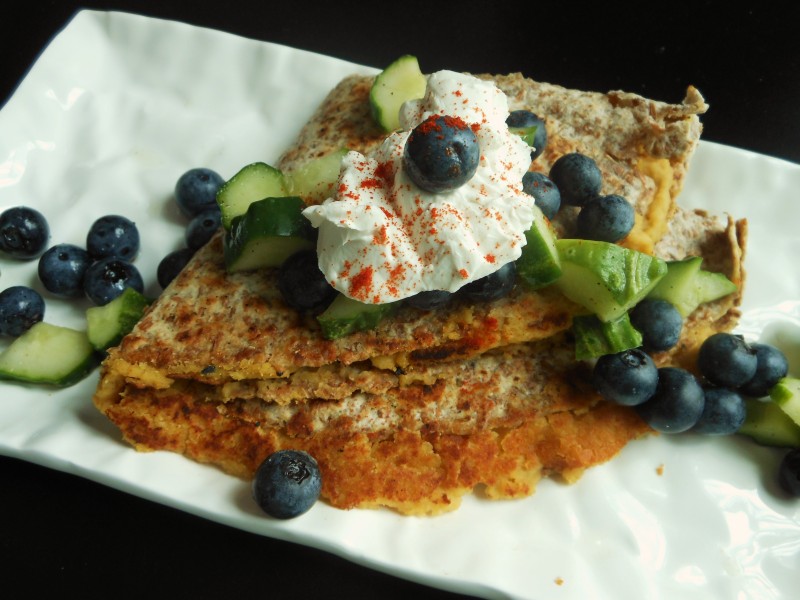
Vegan 5-Ingredient Quesadillas with Garlic Hummus and Cucumber-Blueberry Salsa

DSCN1822

To call this quick-fix meal a recipe is a bit, of an overstatement.  It is, perhaps better described as a “formula,” though that doesn’t sound awfully appetizing.

So, let’s just call it a terribly tasty “idea” that can be adapted in a multitude of ways in your kitchen.

I simply spread half of a sprouted grain tortilla with some homemade in-your-face garlic hummus that a friend of Joe’s sent home with him.  Rich is an unlikely cook by some estimations, but a gifted one just the same; and he shares my appreciation for bold flavors, though he is scarcely vegan!

Next, I folded the tortilla over the filling, grilled it in a non-stick pan, and then folded it over again, topping it with the world’s easiest salsa, a dab of vegan sour cream, and a sprinkling of smoked paprika.

Here’s all you need for 1 fantastic Quesadilla (easily multiplies):

1-8 inch tortilla (I like Ezekial sprouted grain tortillas, available at health food stores and some grocery stores)

1/3 cup garlic hummus, homemade or prepared (or your favorite kind)

1/4 cup Cucumber-Blueberry Salsa (“recipe” follows)

Garnish: 1 tablespoon vegan sour  cream and a sprinkle of smoked paprika

Spread half of tortilla with about 1/3 cup hummus.  Fold tortilla over hummus and grill in a cast iron skillet sprayed with non-stick spray for 2 to 3 minutes or until golden brown on each side.  Fold over again, place on serving plate, top with Vegan Cucumber-Blueberry Salsa, a dollop of sour cream, and a spoonful of Cucumber-Blueberry Salsa.  Serve immediately.

Vegan Cucumber-Blueberry Salsa

Combine equal parts diced cucumber (I use the pickling variety, but use what you like) and fresh rinsed and dried blueberries.  Toss with sea salt, freshly ground black pepper and garlic powder to taste.  For best flavor, chill several hours or overnight before serving.

Vegan DIY Decor: Fashion Accessory Repurposed as Wall Art

As some of you may know, I am privileged to write a monthly column for the Virginian-Pilot newspaper called “DIY Decor.”

Always vegan, of course, these projects often involve repurposing items we all have in our homes.  I don’t always post them here, as they aren’t always published by Pilotonline and, hence, there is nowhere to link to, but they did pick up THIS ONE and I think you might love it!  (Click on the link or the image to go to the story for all the details and the how-to.)

It started with a necklace that a student gave me as a “thank you” at the end of the year.  I love it, but it is bold and I will probably wear it infrequently, so it ended up as a piece of wall art that I also love for my “girl cave” (upstairs den).  And, I can still access the necklace when I have just the right place to wear it.

Enjoy!

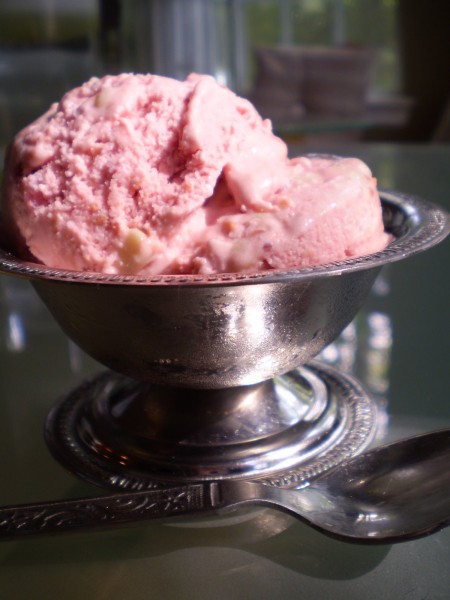
Vegan Sour Cream-Raspberry Ice Cream with White Chocolate Chips

OLYMPUS DIGITAL CAMERAAt your farm market this morning, be sure to pick up a pint of raspberries for this luscious treat that is super simple to prepare.

Made with Tofutti Better than Sour Cream, it boasts the perfect sweet-tart balance with a consistency I describe as (vegan) butter, wrapped in (vegan) cream, wrapped in silk!

Team Tofutti loved it so much, they posted the recipe on their site, and you can quickly access it by clicking HERE.

Happy Summer Saturday!

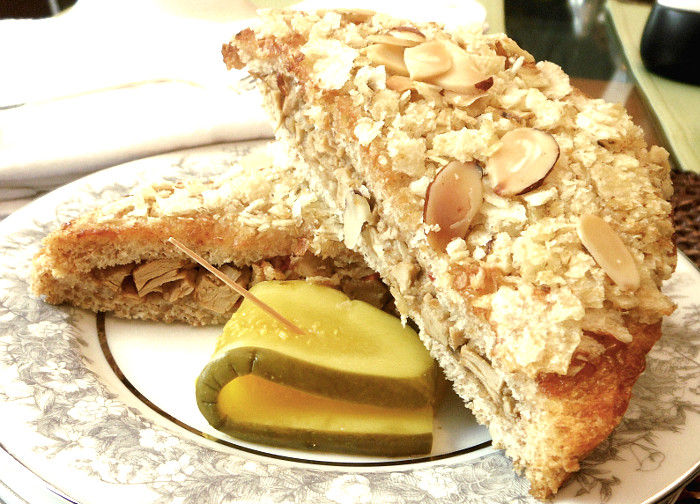
Vegan Potato Chip-Encrusted Baked “Chicken” Salad Sandwich–Think Vegan Chicken Casserole in Sandwich Form

Potato Chip-Crusted Chicken Salad SandwichesYield: 8 sandwich halves

You can take the girl out of the Deep South, but you can’t take the Deep South out of the girl…

This crunchy-creamy cleaned-up community cookbook classic is a delectable vegan chicken casserole in sandwich form It telescopes me right back to my teen years in Mississippi where my dear Mama’s culinary curiosity–though a different style than mine and not vegan–inspired my love of the kitchen while producing some seriously good eats like this sandwich that is as pretty as it is yummy.

For the recipe and more of the back story, click HERE to visit One Green Planet, who generously published it just this week!

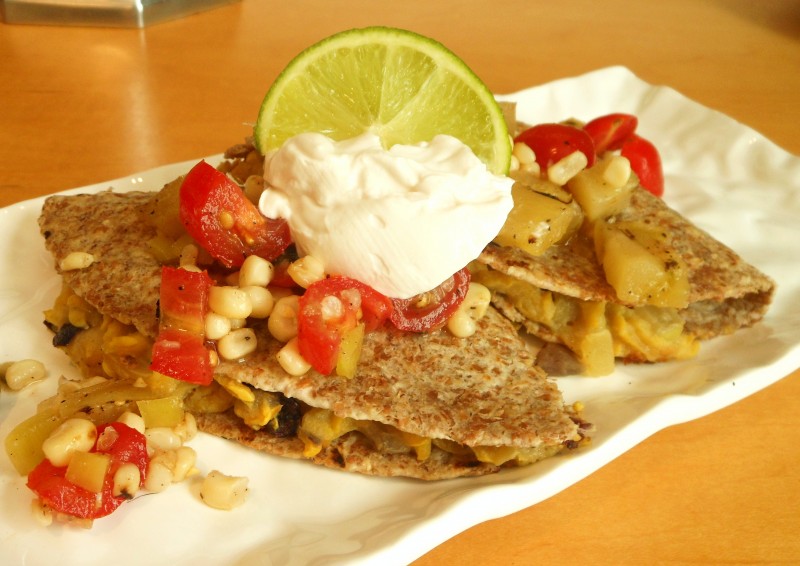
Vegan Cheesy Yellow Squash Quesadillas Topped with Grilled Green Tomato and Charred Corn Salsa

DSCN1692Yield: 4 Quesadillas

I am still visiting my family in Mississippi, and was reminded that this is another recipe that I hadn’t shared before I left Virginia.  Reminded because it calls to mind one of my father’s signature sayings.

I have never been a particular fan of yellow squash.  It’s not that I don’t care for it; I just don’t “wake up screaming for it,” as my Papa would say.  But it is beautiful in the farmer’s markets right now–or perhaps in your own back yard!–and I wanted to take advantage of it.

I bought one, but I wasn’t sure what I wanted to do with it until I remembered my cheesy Zucchini, Onion and Yellow Squash Gratin dish and the Grilled Green Tomato and Charred Corn Salsa I had already made.  So, I decided to combine the two notions and take my yellow squash in both a southwestern and a cheesy direction (the latter inspired by, but different from, the Gratin).  Boy, am I glad I did, and I hope you will be too!

You won’t believe how creamy, cheesy, tasty and rich this yellow squash filling is!  Tucked into a toasty tortilla and topped with my Grilled Green Tomato and Charred Corn Salsa, it is the epitome of summer feasting, southwestern style!


1 tablespoon olive oil

1/2 cup diced yellow onion

Sea salt

1/2 teaspoon garlic powder

2-8 inch yellow squash, trimmed and grated (I use the grater blade of my food processor for this task; it makes the most perfect firm strands)

1/4 cup nutritional yeast

1/4 cup flour (I used white whole wheat because that is what I keep on hand)

1/2 cup unsweetened soymilk

2 tablespoons light miso (any vegan kind will do, though the darker the flavor, the deeper the flavor)

Freshly cracked black pepper

4-8 inch whole wheat or wheat tortillas (I used Ezekial sprouted grain tortillas, which I loved, but they had so much flavor on their own that I felt they competed just a little)

Topping: Grilled Green Tomato and Charred Corn Salsa (recipe follows)

Garnish: vegan sour cream and lime slices or wedges

Heat oil in a large cast iron skillet over medium-high.  Add onion and a pinch of sea salt and saute, stirring frequently, about 3 minutes until softened.  Stir in garlic powder and grated squash and continue cooking, stirring frequently, for another 2 to 3 minutes or until squash is crisp-tender.  Stir in nutritional yeast until well combined, followed by flour.  Add soymilk and miso, and cook, stirring frequently, until miso is incorporated, and the mixture is thickened, heated through, and the flour no longer has a raw taste, about 3 minutes.  Season to taste with sea salt and freshly cracked black pepper.  Remove filling to a bowl, wipe out skillet, and coat generously with non-stick cookng sprary.  Spread half of two tortillas with squash filling, fold tortillas over the filling and toast in skillet for 2 to 3 minutes on each side, or until golden brown.  Remove quesadillas to serving plates and repeat with remaining filling and tortillas.  Serve topped with salsa, vegan sour cream, and lime slices or wedges.


Grilled Green Tomato and Charred Corn Salsa

Yield: 2 cups (easily doubles)

Normally, I would add diced onion and some chopped cilantro to a salsa like this, but it didn’t seem to need it; in fact, I was afraid both the onion and cilantro would overpower the sweet char of the grilled green tomatoes and corn.

1 large green tomato, cut into 1/3-inch slices

2 ears fresh corn, stripped, and broken in half

Sea salt

12 cherry tomatoes (cut smaller if your tomatoes are larger than cherries)

1 banana pepper (mild) or jalapeno (half or whole, depending on your heat tolerance), stemmed, seeded, and very finely chopped (consider wearing gloves to seed jalapeno and wash hands)

1 large clove garlic, minced

1 to 2 teaspoons fresh lime juice

Sea salt and freshly ground pepper to taste

Oil a grill pan and heat over medium-high.  Lightly salt tomato slices and lay into pan, grilling for 2 to 3 minutes on each side or until nice grill marks develop and tomato slices become crisp-tender.  Remove to a cutting board and allow to cool while you grill corn.  Lightly salt corn and grill about 3 minutes on 4 sides or until lightly charred all over.  Cool.  Dice tomatoes and place in a medium non-reactive bowl.  *Cut corn off cob and add to tomato along with remaining ingredients.  Toss to combine and chill, covered.  Delicious with chips–of course!–or as a topping over quesadillas, beans, a thick soup, etc.

*Note: the easiest way I have found to cut corn off the cob is to place a short sturdy glass or small bowl upside down in a larger bowl.  Working with one half-cob at a time, stand it up on its cut end and run your knife vertically down the cob, allowing the kernels to be captured in the bowl.  Voila!  Or should I say “Ole!”
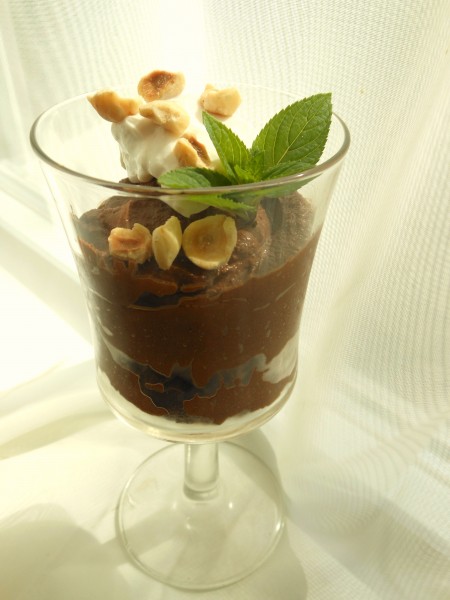
Vegan Chocolate-Plum Butter Mousse–A Transcendent Flavor Combination with Just 4 Ingredients!

DSCN1677Yield: 4 servings (easily doubles)

Honestly?  You absolutely can’t believe how delicious the marriage of chocolate and the deep, fruity flavor of plums is in this quick and easy four-ingredient mousse (which can be served as a tart by spooning it into a pre-baked shell).

This is a four-seasons treat since it is made with plum butter instead of fresh plums.  (Incidentally, fruit butters are misnomers, as they contain no dairy.)  But, since it is mid-summer, you might garnish it with fresh plum slices along with the mint, whipped topping, and hazelnuts.

That is, if you don’t consume it all before it makes it into the glasses!

10 ounces vegan dark chocolate, melted (I used chocolate chips and melted them in two 1-minute increments in the microwave, whisking after each)

1/4 box extra-firm tofu, drained and patted dry

1/2 cup vegan soy creamer (I used French Vanilla)

1/2 cup plum butter (I used Bauman’s  brand–which may be ordered online–made in small batches in Pennsylvania Dutch country from only plums, sugar or white grape juice, lemons, oranges and cinnamon)

Optional garnish: your favorite vegan whipped topping and/or chopped nuts (I like hazelnuts for this dessert) + mint sprigs

In a food processor, combine all ingredients, processing until smooth, scraping down the sides of the bowl as necessary.  After about a minute, the mousse will be light and fluffy.  After about another minute it will become somewhat denser and darker, yet still silken and fluffy.  Choose our preference.  Divide the mixture among 4 stemmed glasses or small ramekins and enjoy immediately or chill until serving time.

Note:  For individual baked crustless tarts, divide mixture among 4 ramekins coated lightly with non-stick spray and bake in the center of oven for 15 to 20 minutes or until set, but still glossy.  Check after 15 minutes, as tops should not be dry and starting to crack.  Allow to cool before serving, or cover and place in refrigerator until serving time.  Serve chilled.  Garnish if desired.

Related Posts Plugin for WordPress, Blogger...