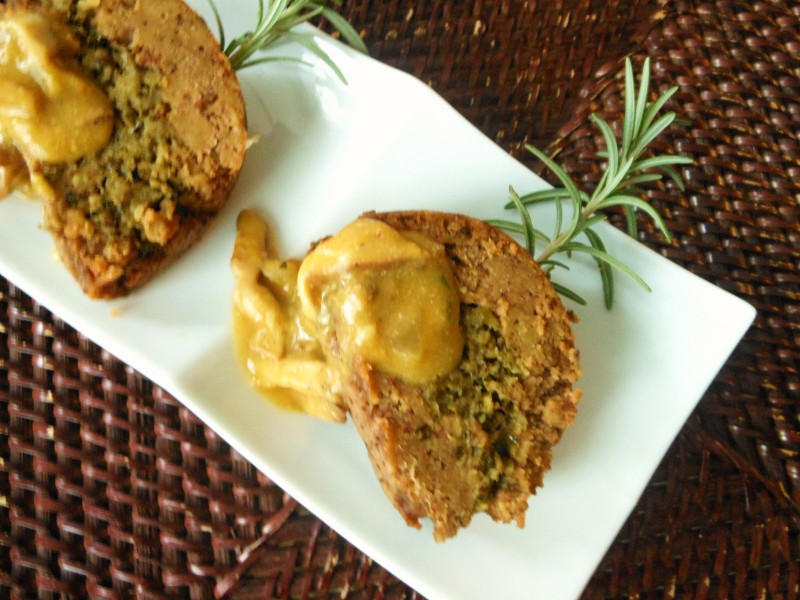
Take a Stand…A Vegan Stuffed Standing Rib Roast, That Is!

DSCN2380You will love my whimsical and novel take on a standing rib roast.

When I got the idea–in response to my aunt serving an actual standing rib roast for her holiday meal–I could find no other vegan standing rib roasts online, so I had fun creating my own.

Baked in a bundt pan with rosemary sprig “bones,” my version was just featured on the inimitable Nava Atlas’s Veg Kitchen website.   “Like” VK on Facebook HERE.

It takes just a little more time in the kitchen than what most of us would prepare for a weekday meal, but it is perfect for a holiday–say, Easter or, of course the winter holidays–or a dinner party.

Just follow the link to my tasty and easy, but impressive, recipe for Vegan Standing Rib Roast with Shiitake and Kale Filling and Shiitake Gravy with your tongue firmly in your cheek!


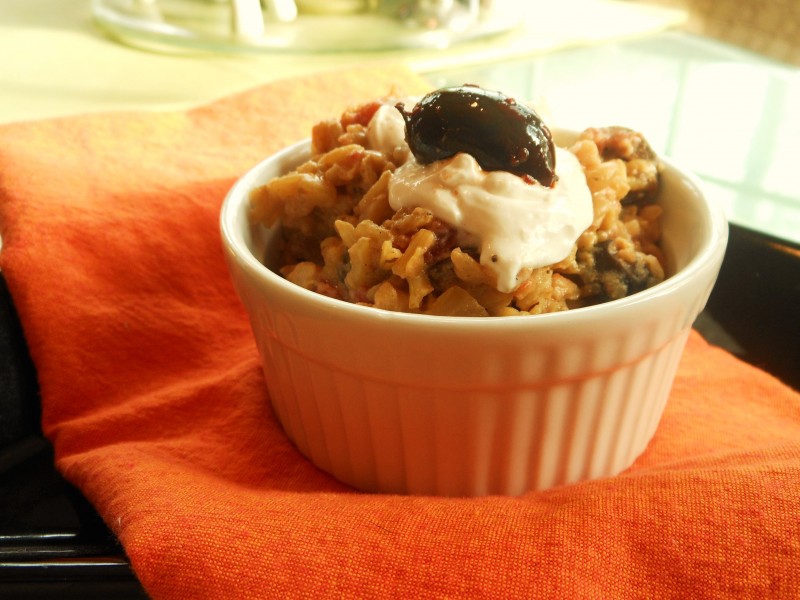
Creamy Vegan Green Chili Rice Casserole (my first “commissioned” recipe–thanks Tofutti!)

Green Chili Rice CasseroleI have some exciting news that I haven’t been able to share until now because I’ve had to be so neglectful of The Blooming Platter since just before Valentine’s Day.

Though it and you are never far from my mind, our school district decided we would make up snow days on three Saturdays, with the first one being February 15.  I made sure my students and I had a great day–they are the best!–but that full day of school on the weekend created a domino effect of scrambling to re-prioritize.  Not only did I host a Valentine’s dinner party that night–with a different (but delicious) menu than I’d originally planned since I had only a few hours to get it all together–but three major freelance writing projects to juggle this past week.  I am NOT complaining–I feel very grateful–but I am explaining why even my Blooming Platter Facebook page sent a message saying basically, “Hey, where are you?”

Here’s the news:  recently, the good folks atTofutti hired me to develop a recipe made with one of their products!  They explained that, unlike with my other guest posts/recipes on their sites, my name wouldn’t appear with it, as they would own it, but that was fine with me.  I am just happy for them to share this tasty and easy recipe with their customers/readers.  

After scanning their recipe files, they determined that they were a little low on rice dishes.  I actually don’t make, order out, or even eat many rice “dishes,” though I serve and order Basmati rice with, say, Indian food or Jasmine rice with Thai.  But when I do prepare rice dishes, it has to be either a salad (like my Thai-inspired black rice salad) or something warm and creamy.  Since it is February, I chose the latter.  

Of the company’s products that are widely available in our area–namely Better Than Cream Cheese and Better Than Sour Cream–I chose the former which, along with the rice, seemed the perfect match-up for something Mexican/Southwestern inspired.  These days, with time at a premium (see aforementioned Saturday School among other things), I also wanted something virtually hands-free.  After a lot of brainstorming. some research, and a little experimentation with cooking method and time, voila!, this Creamy Vegan Green Chili Rice Casserole was born.

Though this spicy side dish spends an hour in the oven–it is made with slower cooking brown rice–all of that time, except for uncovering it and a quick stir, is completely hands-free.

I would love it if you would visit the Tofutti site and “like” the recipe HERE though I’ve included it below.  Olé!

1 tablespoon olive oil

1 medium yellow onion, diced

1/8 teaspoon sea salt

2 large cloves garlic, minced

1/2 cup long grain brown rice

1-4 ounce can diced mild green chilies, drained (about 1/3 cup if you prefer to roast and dice your own chilies)

1/3 cup pitted, sliced black olives

1 cup diced tomatoes (or 1-10 ounce can diced tomatoes, plain or spicy, such as a lime and cilantro variety)

1/2 cup (4 ounces) Tofutti Better than Cream Cheese

2 tablespoons nutritional yeast

1/2 teaspoon ground cumin

1 vegetable bouillon cube

1 cup water

Preheat oven to 350 degrees.  Oil a 7 to 8-inch souffle dish or the equivalent and set aside.  Heat olive oil in a large cast iron skillet over medium-high.  Add onion and salt and saute, stirring frequently, for 3 minutes.  Add garlic and saute, stirring, for another minute.  Add rice and cook, stirring very frequently, for 3 minutes or until rice begins to turn golden brown.  Lower heat if cooking too quickly.  Add green chilies, olives, and tomatoes, stir to combine and heat through.  Add Better Than Cream Cheese, nutritional yeast, cumin, and crumbled bouillon cube.  Stir until cream cheese is melted and completely incorporated; then stir in water until completely incorporated.  Transfer mixture to prepared baking dish and bake, covered, for 30 minutes.  Remove cover and cook an additional 30 minutes, stirring well halfway through.  Serve immediately as a side dish.  It is also delicious as a filling for stuffed bell peppers.

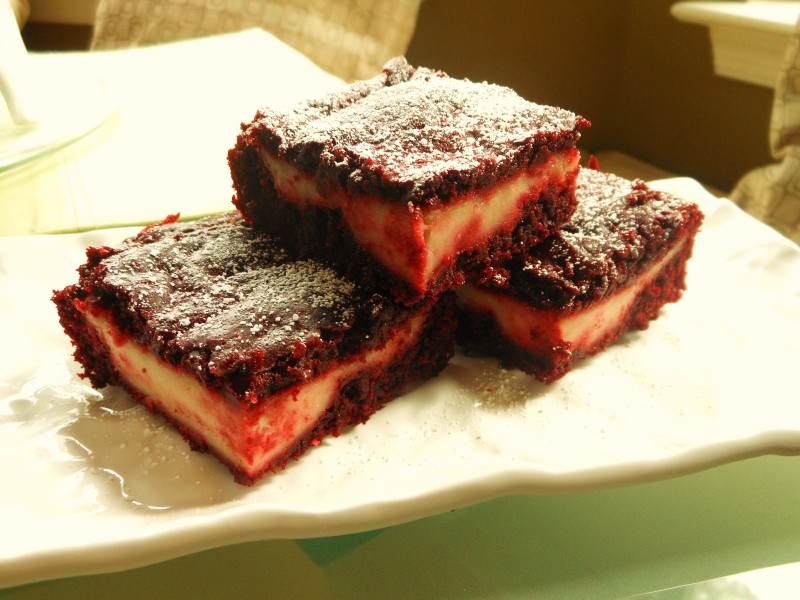
Vegan Red Velvet Brownies with “Cream Cheese” Layer or Swirl

Red Velvet Brownies with Cream Cheese Layer 1Yield: 9 to 16 brownies

Red Velvet is darn near sacred to me.  My aunt’s version of the cake with her unique Colonnade Frosting (off-limits now because both cake and frosting are only vegetarian) and drips of bittersweet chocolate over the top is one of the defining tastes of my childhood.  

Because of that, Red Velvet was also the groom’s cake chosen for our wedding and the wedding cake I made for my dear friend and food writer Donna Reiss when she married Art Young.  For my go-to vegan version of the cake or cupcakes, I use the recipe in Vegan Cupcakes Take Over the World.  However, not content to stop there, I created outrageously scrumptious vegan Red Velvet Pancakes and Red Velvet Shortbread Cookies (endorsed by Better Homes & Gardens) a few years ago and, recently, Red Velvet Ice Cream and a mixed-media artwork titled, “She Wore Red Velvet.”  

One of the last remaining Red Velvet challenges was brownies.  I started by searching Red Velvet Brownies online.  When I found versions that looked like the ideal in my mind, I consulted the recipes.  The recipe I ultimately chose was not vegan, so I veganized it, making significant changes to the brownie batter–some melted vegan semisweet chocolate chips, some non-dairy milk, a bit of pureed tofu (critical to the texture and density I sought) and leavening–and even more to the cream cheese layer.  My first attempt incorporated a scaled-down version of my cheesecake batter which contains tofu and vegan cream cheese and bakes up beautifully as a full-size cheesecake.  But it baked up a bit rubbery as a thinner layer.  So, next I tried cashew cream, which I loved, but with which I had to experiment a couple of times to get the look I was after.

Ultimately, I hope you agree that the resulting brownies are beautiful, delicious, textural marvels.

Happy Valentine’s Day to you and yours!

“Cream Cheese” Layer (my quick sweetened cashew cream):

2 cups raw cashews

4 cups boiling water

*1/4 cup confectioner’s sugar (plus additional for sprinkling if making layered brownies)

1/2 teaspoon vanilla

1/4 teaspoon almond extract

1/8 teaspoon salt

Pour boiling water over cashews, cover, and let sit for an hour.  Reserve 2 tablespoons of the cashew water, drain, and place the cashews into bowl of food processor with the reserved water and remaining ingredients.  Process about 10 minutes until smooth and significantly lightened in color and texture.  Remove to a small bowl and rinse bowl, lid and blade of food processor.  *Though I typically bake with natural sugar, the confectioners sugar keeps the cashew cream a lighter color.

Brownie Layer:

1/2 cup vegan butter

1/4 cup vegan semisweet chocolate chips

2 ounces extra firm tofu, drained

1 cup unbleached all-purpose flour (I use white whole wheat)

1 cup natural sugar

1/4 cup unsweetened cocoa powder

1/2 teaspoon baking powder

1/4 teaspoon baking soda

1/4 teaspoon salt

1/2 cup non-dairy milk

1 ounce (2 tablespoons) red food coloring (natural recommended, e.g. India Tree True Red)

1  teaspoon vanilla extract

1 teaspoon apple cider or white distilled vinegar

Preheat oven to 350 degrees and spray an 8-inch square baking pan with non-stick spray.  In a medium bowl or saucepan, combine butter and chocolate chips and melt in microwave or over medium heat on top of the stove.  Pour into bowl of food processor, add tofu, and process a couple of minutes or so until very smooth.  In a medium bowl,  whisk together flour, sugar, cocoa powder, baking powder, baking soda and salt.  Make a well in the center and pour in non-dairy milk, food coloring, vanilla, and vinegar, along with butter-chocolate-tofu mixture from food processor.  Whisk until well combined and then stir 50 strokes with a wooden spoon.

To bake, choose which type of brownie your prefer…

For Layered Brownies (pictured):  Spoon half of batter into prepared pan and gently smooth top to cover bottom of pan.  Dollop “cream cheese” layer over brownie layer and smooth to cover.  Dollop remaining brownie batter on top of “cream cheese” layer and gently smooth to cover.  (An offset spatula is nice for these tasks.)  Drag a knife or skewer (my preference) in long zig-zagging motions through all layers not to create swirls, as the top will remain solid red, but to insure that layers are “locked” together.  Bake for 30 minutes or until top is set and a toothpick inserted in the center comes out clean, but a little moist. Cool on a wire rack. Slice, sprinkle with confectioners sugar, and serve; or cover until serving time.  Alternative serving suggestion:  frost with vegan cream cheese frosting and, if desired, drizzle with melted and slightly cooled dark vegan chocolate.

For Swirled Brownies:  Spoon half of batter into prepared pan and gently smooth top to cover bottom of pan.  Dollop “cream cheese” filling and remaining brownie batter in a tight checkerboard pattern over the bottom brownie layer. Drag a knife or skewer (my preference) in long zig-zagging motions, about an inch apart both vertically and horizontally, through all layers to create swirls.  Bake for 30 minutes or until top is set and a toothpick inserted in the center comes out clean, but a little moist. Cool on a wire rack. Slice and serve; or cover until serving time.
Almost Fat-Free Vegan Pureed Potato-Kale One-Pot Soup

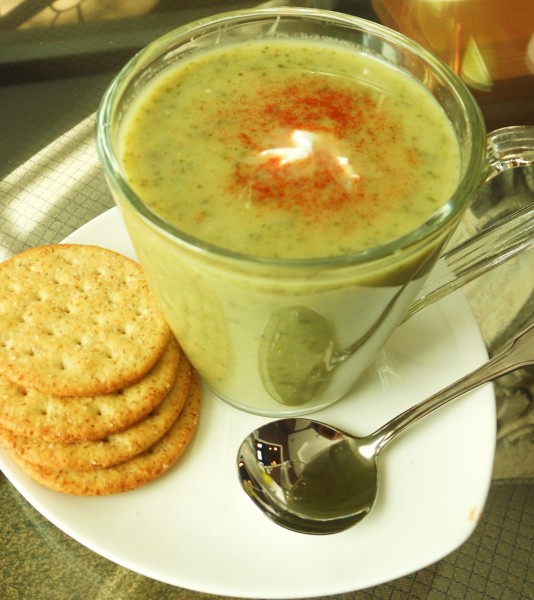
Pureed Potato-Kale SoupYield: 8 cups

This has been an especially cold winter, which I actually like.  As such it has been the impetus for quite a few greens-based soups.  This one,served steaming hot, is perfect for a cold winter day.  But the reverse is also true: served cold in a hot day, it is the ultimate tasty and healthy vichyssoise. Besides all of the flavor-packed nutrients, each baking potato has 3.9 grams fat for a total of 7.8 grams total in this entire pot of soup!

2 baking potatoes, cubed

2 cups vegetable stock (or 2 cups water + 2 bouillon cubes)

1 medium yellow onion, diced

2 large cloves garlic, halved

2 lightly packed cups coarsely chopped kale

1/4 cup nutritional yeast

1/2 cup So Delicious coconut milk creamer

Sea salt to taste

Freshly ground black pepper to taste

Optional garnishes: vegan sour cream and paprika or smoked paprika

Place potatoes and 2 cups vegetable stock in a 4-quart saucepan.  Bring to a boil over medium-high, reduce heat and simmer for 5 minutes.  Add onion and garlic, and simmer for 5 more minutes.  Add kale, and simmer for a final 5 minutes.  With a slotted spoon, remove solids to a food processor and process until smooth.  Whisk puree back into broth in saucepan along with nutritional yeast, creamer, salt and pepper to taste.  Reheat if necessary and serve hot, garnished if desired with a dollop of sour cream and a sprinkle of paprika or smoked paprika

For your Lunch BOX or Super BOWL: Vegan Roasted Pecan and Dried Apricot No-Chicken Salad

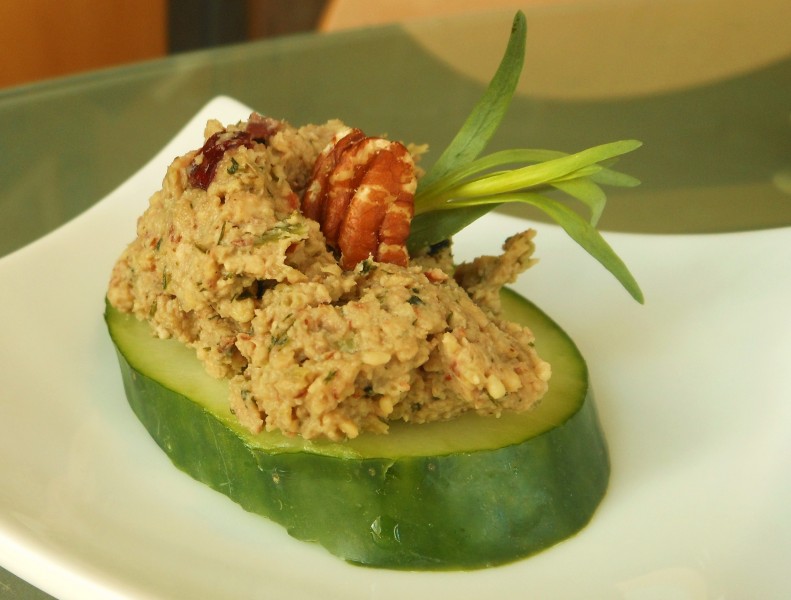
Roasted Pecan and Dried Apricot No-Chicken Salad 2Yield: 4 servings

I actually created this throw-it-all-in-the-food-processor-simple no-chicken salad recipe from ingredients I had in the house while I was “snowed in.”

But, now that the snow is melting and folks in many states will be headed back to school and work tomorrow, I wanted to post it as a delicious lunchbox option.  Also, though, with the Super Bowl tonight, it’s a delicious and nutritious spread for crackers and, as you can see in the photo, it dresses up nicely for a “fancier” cocktail party.

I have created many versions of no-chicken salad, some here on my blog and some in my cookbook.  This one is made with wholesome tempeh, roasted pecans, and dried apricots, and is delicious served as you would any chicken(less) salad: in a sandwich, on crackers, or on my low-calorie, highly nutritious preference: sliced cucumber.

1/2 cup pecan pieces

4 celery ribs, cut into 2-inch pieces

1/4 cup dried apricots, halved

1/8 teaspoon garlic powder

1/8 teaspoon onion powder

8 ounces tempeh (any kind), coarsely crumbled

4-5-inch stems fresh dill, leaves stripped

4-5-inch stems fresh tarragon, leaves stripped

1/4 cup vegan mayonnaise

Accompaniments: bread for sandwiches, crackers or sliced cucumber

Optional garnish: fresh dill sprigs and/or pecan halves or pieces

Roast pecans for a few minutes with a pinch of salt in a dry skillet over medium-high heat; transfer to bowl of food processor.  Add celery, apricots, garlic and onion powder, and pulse a few times until coarsely chopped.  Add tempeh to skillet in which pecans were roasted and roast, stirring frequently, just until it begins to turn golden brown in spots; transfer to bowl of food processor.  Add dill and tarragon, and pulse until all ingredients are finely chopped.  Add mayonnaise and pulse a few more times until mixture comes together.  Serve in a sandwich, spread on crackers, or as canapes perched atop slices of fresh cucumber.

Get Your Super Bowl On with A Platter of Vegan Buffalo Wings with Creamy Blue “Cheez” Dressing and Celery Sticks

I created this recipe in 2009 and have posted it for the Super Bowl each year since.  With their creamy blue “cheez” dressing and fresh, crunchy celery sticks, no one need miss out on this all-time sports bar favorite.  So roll up your sleeves, grab a stack of napkins, and enjoy the authentic taste of my spicy wings.


Vegan Cannelini Bean, Sweet Potato and Turnip Green Soup

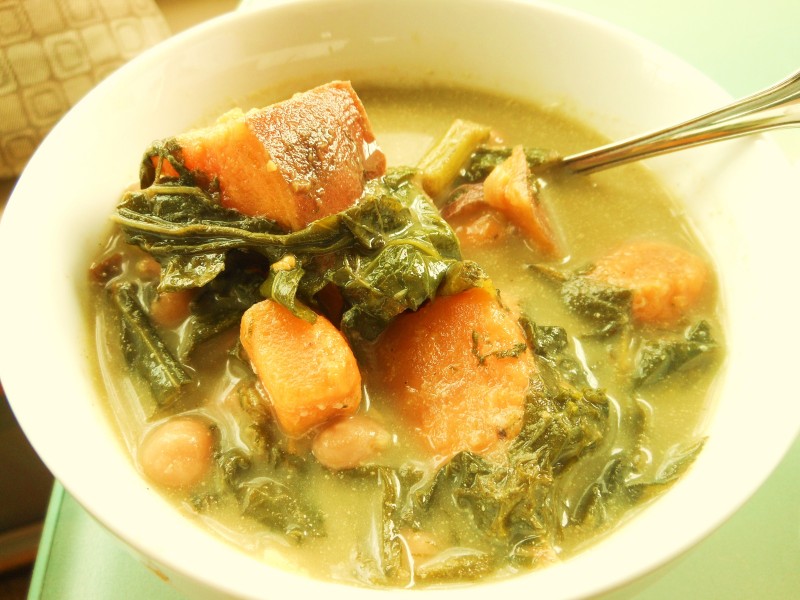
Sweet Potato, Chickpea and Turnip Green SoupYield: 4 to 6 servings

We are snowed in here under 10 inches in VA Beach!  And this soup was the perfect, warming lunch yesterday.  However, even if you aren’t blanketed in snow, you will love this beautiful nourishing soup.

4 cups vegetable stock (or 4 cups water + 4 veggie or “no-chicken” bouillon cubes)

2 bay leaves

1 large sweet potato, cubed

1 tablespoon olive oil

1 medium yellow onion, diced

Sea salt

Freshly ground black pepper

1 large garlic clove, minced

6 cups chopped turnip greens

1-15.5 ounce can cannelini beans, rinsed and drained

3-5 inch stems fresh dill

3-5 inch stems fresh tarragon

2 tablespoons nutritional yeast (optional)

2 tablespoons non-dairy creamer (I use So Delicious coconut milk creamer)

In a covered 4-quart saucepan over medium-high heat, bring the stock and sweet potato cubes to a gentle boil, reduce heat to a simmer and cook potatoes for 10 minutes.   Meanwhile, heat the tablespoon of oil in a large cast iron skillet over medium-high.  Add onion and a pinch of salt and pepper, and saute about 7 to 8 minutes, stirring frequently until beginning to turn golden brown.  Add garlic, and continue sauteeing, stirring continually, for another minute or two.  Stir into sweet potato and stock mixture, along with turnip greens.  Simmer, stirring continually, until greens have wilted.  Stir in beans, dill, tarragon and nutritional yeast, and simmer gently for about 15 minutes.  Stir in non-dairy creamer, remove bay leaves, dill and tarragon, adjust seasoning if necessary, and serve immediately.  Note: Avoid boiling soup after creamer has been added to prevent curdling.

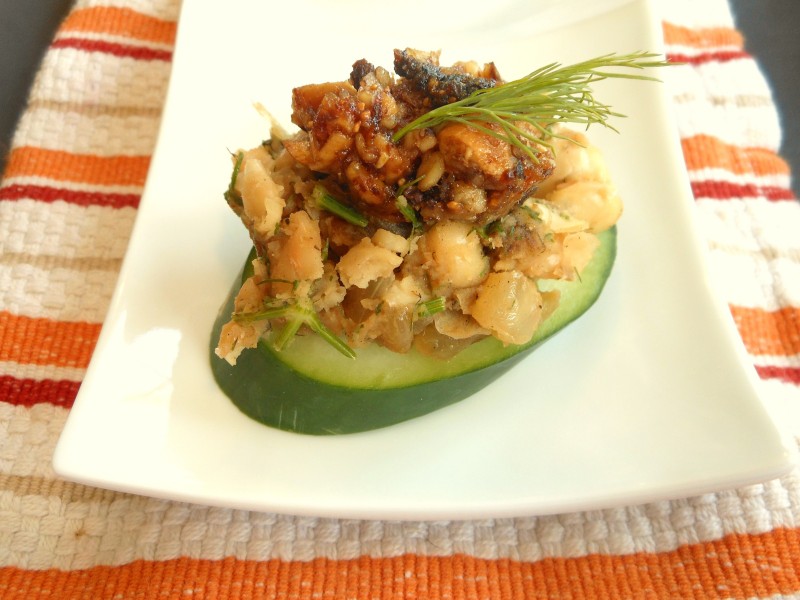
Sliced Cucumber Canapes (or Crostini) with Dill-Scented White Beans and Dried Fig, Olive, and Pine Nut Tapenade (A Yummy Food Blog-Canarias Recipe Competition Entry)

Dill-Scented White Beans with Fig, Olive and Pine Nut Tapenade


For our 10th anniversary, my husband and I took a Mediterranean Cruise, one of a number of life-changing trips to that magnetic part of the world from where his family hails (specifically, the Abruzzo region of of Italy).  I fell in love repeatedly, including with Santorini.

My dish, created especially for the Yummy Food-Canarias Recipe Competition, is an ode to one of the most memorable and simplest “meals” I have ever eaten.  We had spent the morning touring an ancient archeological dig on the island and had stopped at a cliffside vineyard overlooking  the stunning atoll.  There, in the wind-whipped courtyard, we were served wine, of course, accompanied by crisp fresh cucumber, olives and tomatoes.  That was it. Simple perfection.

Since it is January and tomatoes are not in season, I chose instead to celebrate the cucumber and the olives, adding my beloved figs and pine nuts plus a little lemony brightness along with herby dill-scented cannelini beans for protein .  The result is a simple little Mediterranean-infused bite-size meal.

Yield: 24 canapes or 8 servings

2 tablespoons olive oil

1 medium yellow onion, diced

Sea salt

Freshly ground black pepper

1 large garlic clove, minced

1-15.5 ounce can cannelini beans, rinsed and drained

1/4 cup loosely packed finely chopped fresh dill

16 dried Calmyra or Mission figs, stems removed, halved (I like to use 8 of each)

1/4 cup brine-cured pitted black and green olives, drained (I like some that are a little spicy)

3 ounces toasted pine nuts

1 teaspoon tamarind syrup (you may substitute pomegranate syrup or agave nectar)

Zest of 1/2 large lemon

Garnish: fresh dill sprigs

Cucumber slices (or toasted bread rounds/crackers)

Heat 1 tablespoon olive oil in a large cast iron skillet over medium-high.  Add onion and a pinch of salt and pepper and saute, stirring frequently, until onion begins to turn golden, about 8 to 9 minutes.  Reduce heat if necessary to prevent scorching.  Add garlic and saute, stirring constantly, for another minute.  Stir in beans and remaining tablespoon of olive oil, partially mashing the beans with the back of the spoon.  Add dill and remove from heat.

Process figs in a food processor, pulsing until coarsely chopped.  Add olives, and continue pulsing until both are finely chopped.  Add pine nuts and pulse a few more times or until all ingredients are very finely chopped.  Add syrup, lemon zest, and additional salt and pepper if desired, and pulse just to combine.

Serve a spoonful of the beans topped with a spoonful of the tapenade on cucumber slices, toasted bread or crackers.  Garnish with sprigs of fresh dill.

Alternative serving suggestion: spread the beans into a 1/2-inch thick disk on a serving plate, spread the tapenade over the top, garnish, and serve with cucumber slices (or toasted bread/crackers).

Flaky Vegan White Bean Biscuits with Rosemary Butter

Yield: 18 biscuits

(These would be delicious with my Vegan Tempeh and Turnip Green Soup!)

White Bean Biscuits with Rosemary Butter

These savory biscuits will be a welcome addition to your breadbasket any time an easy, but extra-special, bread is the order of the day…or night!


With a can of white beans in the pantry, but not in the mood for anything I could think of to make with them—and craving some comfort food due to gray, drizzly weather—I set about brainstorming.  I love sweet potato biscuits and it occurred to me that pureed white beans would be a very similar consistency to mashed sweet potato.


So I jumped online hoping that I wouldn’t find that someone had beaten me to the punch.  I may have missed something, but all I could find were recipes for white bean cookies and cakes.  Eureka!


To create my dough, I combined recipes for my favorite vegan biscuits and a recipe for sweet potato biscuits, though I think the latter can be a bit too heavy.  So I manipulated the proportions a bit.  The results are meltingly tender and the biscuits pull apart in luscious flaky layers!  I attribute this, in part, to the inclusion of both vegetable shortening and (vegan) butter—frozen!— but also to my folding method which mimics that of making puff pastry.  Like folding a business letter, my method is much simpler than puff pastry, as no butter is distributed between the layers.

The rosemary butter topping is optional, but delicious, making these biscuits a to-die-for breakfast item or accompaniment to a meal.  Be forewarned, though, they might overshadow the main dish!

1-15.5 ounce can white beans, rinsed and drained
2 cups unbleached all-purpose flour + about 5 tablespoons more (for rolling out)
1/4 teaspoon sea salt
1 tablespoon baking powder
1 teaspoon baking soda
3/4 cup unsweetened soymilk (or milk)
1/4 cup frozen vegetable shortening, cut into 1-inch chunks
1/4 cup frozen vegan butter, cut into 1-inch chunks + 3 additional tablespoons (or butter)
1 tablespoon finely chopped fresh rosemary

Preheat oven to 400 degrees.  Place white beans in a food processor and process until smooth.  Add 2 cups flour, sea salt, baking powder and baking soda.  Pulse just until mixture is well combined.   Add frozen shortening and 1/4 cup frozen butter, and pulse until uniformly distributed and about the size of small peas.  Drizzle in soymilk and pulse a few more times until the dough comes together.   Dough will be a bit sticky. (See below for hand-mixing directions.)


Dust a bread board or other pastry surface (including your countertop!) with a couple of tablespoons of flour, transfer dough onto it, and knead the flour into it, adding a couple more tablespoons as necessary.  Dust board with about 1 tablespoon more flour if necessary and pat out dough into a rectangle about 3/4-inch thick.   Fold like a business letter or puff pastry by folding in one short side 2/3 of the way across the surface, and then folding the opposite short side back across.  Pat out the dough into a 3/4-inch thick rectangle again, turn a quarter turn and repeat the folds.  Repeat the entire folding and patting process about 4 times.  After patting out the dough for the last time, cut with a 2-inch biscuit or cookie cutter, gently combining and re-rolling scraps.


Meanwhile, melt the remaining 3 tablespoons of butter in a large cast-iron skillet.  Pour off all but about a tablespoon and reserve in a small cup or bowl.  Add chopped rosemary to the reserved butter and set aside.  Lay each biscuit into the skillet and then flip it in order to butter both sides, leaving each biscuit in the skillet and placing them close together.  Bake for 12 minutes, brush the tops with reserved rosemary butter, and bake for an additional 3 minutes.  Serve immediately.  Store leftovers in an airtight container in the refrigerator.  Reheat for a few minutes at 350 degrees, wrapped in foil.


Hand-mixing directions: if you prefer to mix the dough by hand, mash the beans with a potato masher until smooth.  Then spray a box grater with non-stick spray and grate both the shortening and the butter into the flour mixture so that it is still very cold when you incorporate it.  As you fold and pat the dough, be sure not to let the warmth of your hands melt the frozen shortening and butter.


Serving note: if you were admiring the “bread bag” in the photo, all of the credit belongs to Emily Crell, owner of the former Forbidden City in VA Beach.  She made some out of solid fabric for her daughter and son-in-law’s new restaurant, Braise, (in partnership with Chef Bobby Huber) and when I admired them, she made me a set of four “just because.”  What is so ingenious about the design is a little flat removable pouch filled with dried rice that sits at the bottom.  You simply remove it, heat it in the microwave for a couple of minutes, replace, and pile breads or biscuits on top to stay warm at the table.  Just as remarkable is the fact that she has never seen our house nor asked about color and style, yet she picked a mid-century modern-inspired pattern (my favorite period in design) in the exact palette of our home!


Related Posts Plugin for WordPress, Blogger...