Yield: 4 to 6 servings
My friend, Jeff Dunn, to whom I gifted half of the recipe in a red-lidded carton tied with a bow, texted me that “The soup is Phenomenal!! I think this is my new favorite soup of all time.”
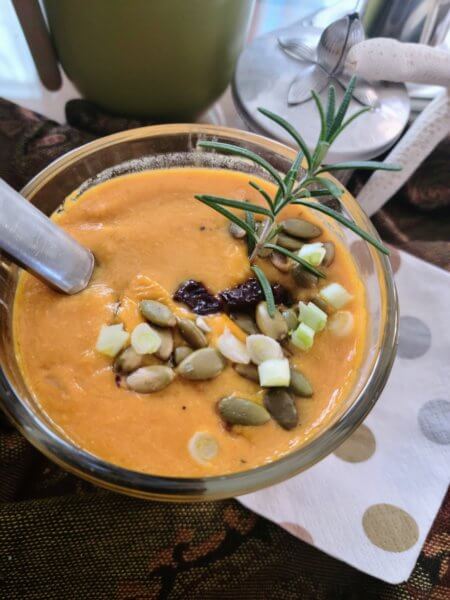
This is a rich,creamy, deeply flavored, and dramatically cleaned up version of a dairy-based beer Cheddar soup recipe I came across. It was made with lots of dairy, coconut milk, and no pumpkin, rather pumpkin beer.
While I didn’t taste that soup, I can’t imagine a tastier nor velvetier version than mine made with pureed pumpkin, coconut milk, the vegan beer of your choice, and a small amount of vegan Cheddar supplemented with cheesy and ultra-healthy nutritional yeast.
Pumpkin Beer Cheddar Soup
(vegan & plant-based)
Yield: 6 servings
1 medium-large yellow onion, diced
1/2 teaspoon sea salt
2 cloves garlic, minced
1/2 teaspoon garlic powder
1 1/2 tablespoons cornstarch
1 vegetable bouillon cube or 1 teaspoon paste
1-15 ounce can pureed pumpkin
1-15 ounce can coconut milk, lite or regular
12 ounces vegan beer (Google to identify vegan brands)
1 cup shredded vegan Cheddar
1/2 cup nutritional yeast
Ootional toppings: grated vegan Cheddar, sliced green onions, roasted and lightly salted pumpkin seeds or pecan halves, pomegranate arils, dried cranberries or cherries, sprig of rosemary, sage leaves, croutons, etc.
Cover bottom of large soup pot with water and add onion and salt. Place over medium heat and simmer, stirring frequently, until onion is soft. Add garlic and saute 30 seconds. Add cornstarch and stir well to combine. Add remaining ingredients, in order, stirring after each to completely combine. Simmer for 10 minutes or so until beer mellows and all flavors marry. Season with additional salt if necessary and serve topped as desired.