Have you ever made a sandwich in a waffle iron? You will never eat a plain sandwich again and no panini press is needed! It takes longer to heat up the waffle iron than it does to grill the sandwich and you can make two at a time!
This tasty one was filled with vegan cheese, halved cherry tomatoes, thinly sliced yellow onion, and baby kale leaves. The whole grain bread was spread with chutney and no calorie vegan mayo!
Not only is it tasty enough to eat on its own, but it goes together in a snap.
After only 10 to 12 minutes of baking, you can fill it however you choose. It is sturdy enough for whatever you put in it, but not too!
In the photo, I used red pepper hummus, tomato, red onion, and vegan parmesan cheese for a very filling lunch.
If you would rather take this in a sweet direction for a dessert, just omit garlic powder, and add a couple tablespoons granulated or brown sugar.
You may never need another crust recipe!
Press-In Tart or Pie Crust
1 1/2 cup old-fashioned oats (if you are GF, check package label for possible cross-contamination from gluten-containing grains; Quaker Oats produces a guaranteed GF oat)
Note: if making a dessert, omit garlic powder and any savory spices and add 2 tablespoons granulated or brown sugar
Preheat oven to 350°. Arrange tart pans on baking sheet. Place all ingredients in food processor and process until finally ground and mixture comes together. A little bit of dough, when pinched between your fingers, should hold together beautifully. Press dough evenly onto sides and bottom of pan(s). Bake about 10 to 12 minutes or until lightly golden brown. Fill as desired.
Note: to make an 8″ two-layer cake, double recipe; to make an 8″ three-layer cake, triple recipe
You will want to wrap yourself in this cooling, lusciousness whose cake layers are tender, moist, and perfectly complimented by the silky curd and creamy frosting, all of it boldly kissed with citrus.
My first two attempts at the perfect lemon cake layers resulted in gummy dense disks. But the third time’s the charm. The secret? Mostly, leaving out egg replacer and adding soda and more baking powder.
Luscious Lemon Layer Cake with Blood Orange-Lemon Curd and Lemon Cream Cheese Frosting (vegan & plant-based)
1/4 cup vegan butter, softened 1/4 cup vegetable oil 3/4 cup granulated sugar 1 teaspoon vanilla 1/2 to 1 teaspoon almond extract 1 cup + 2 tablespoons all purpose flour 1 teaspoon baking powder 1/2 teaspoon baking soda 1/4 teaspoon sea salt 2/3 cup non-dairy milk Zest and juice 1 large lemon (about 2 tablespoons juice) Blood Orange-Lemon Curd (recipe follows) Lemon Cream Cheese Frosting (recipe follows) Garnish: thin lemon slices
Grease and flour a 6″ round cake pan. Preheat oven to 350 degrees. Cream together butter, oil, sugar, vanilla, and almond extract. Add half of flour; all of baking powder, soda, and salt; and half of milk. Combine well with mixer on medium-low speed, scraping down sides of bowl as necessary. Repeat with remaining flour and milk, continuing to scrape down sides of bowl as needed. Add zest and juice and, with mixer on medium-low speed, incorporate completely into batter. Transfer into prepared pan. Bake for 25 minutes or until a wooden pick inserted in very center comes out clean. Cool 20 minutes in pan, run knife around edge, invert onto wire rack, and cool completely (or it will soften/melt frosting/curd). Slice cake in half horizontally using a serrated knife. Spread bottom half with frosting. Pipe a border or dam around edges to contain curd if desired, and spread about 1/4 curd inside. Top with second half and repeat. Frost sides and decorate with lemon slices.
Blood Orange-Lemon Curd (Note: this makes twice as much as you need for 6″ two-layer cake and exactly enough for 8″ two-layer cake. Double only if making 8″ three-layer cake.)
1/2 cup sugar 1 tablespoon cornstarch Pinch sea salt Juice and zest 1/2 blood orange Juice and zest 1/2 large lemon 1/2 cup non-dairy milk
Whisk together in small saucepan over medium heat. Simmer, continuing to whisk until very thick. Cool and then chill thoroughly. (Will thicken more as it cools.)
Lemon Cream Cheese Frosting
1/4 cup vegan butter 1/4 cup vegetable shortening 1/4 cup vegan cream cheese Zest and juice 1 large lemon 1 teaspoon vanilla 1/2 to 1 teaspoon almond extract 3 cups powdered sugar (or more to reach desired consistency, as vegan butters and cream cheeses have varying moisture content)
Cream together all ingredients except powdered sugar. Add 1 cup powdered sugar, blend in on low speed, increase speed, and continue beating until fluffy. Repeat with remaining 2 cups powdered sugar, adding more if necessary to reach desired consistency for spreading/piping. Chill until ready to use.
My crunchy oil-free batter is gluten-free because it requires no flour. That’s right: I mix GF nutritional yeast with dill pickle juice and spices before battering and baking these crispy cubes. I love my spice blend, but substitute other spices to suit your mood. Crunchy-on-the-outside and tender-on-the-inside, these nuggets are nutritious and delicious on their own, but even more mouth-watering with a dipping sauce.
16 ounces extra-firm tofu (wrap in paper towel, place on a rack over a bowl, weight–I place the carton on top with a heavy canned good inside–and drain while making batter)
1/2 cup dill pickle juice
1 cup nutritional yeast
1/2 teaspoon each of the following spices (or to taste; feel free to change proportions or substitute): celery seed, ground coriander, garlic powder, onion powder, smoked paprika, tumeric
Sea salt and freshly ground black pepper to taste
Dipping Sauce: equal parts vegan mayo and sweet chili sauce, whisked together (I use Walton Farms no-calorie mayo from Harris Teeter)
Optional garnish: sliced green onions
Preheat oven to 425 degrees. Spray baking sheet liberally with non-stick spray. In tofu carton or small bowl, whisk together dill pickle juice, nutritional yeast, and spices. Unweight and unwrap tofu and blot again with paper towel. Slice in half horizontally and then into quarters the long way and thirds the short way, making 2 tiers of 12 cubes. Working with a few cubes at a time, place in batter, turn to coat, and place about 1.5 inches apart on prepared baking sheet. Bake 20 to 25 minutes or until golden and crispy. Avoid burning around edges. Serve immediately with dipping sauce, garnished if desired.
Note: in the photo, I decorated the top of the sauce with 3 dots of Sriracha
If it is extra hot, as it is here in Southeastern Virginia this July, pop these babies in the freezer for a bit before serving. They will cool you right down and perk you right up.
A note about the garnish: I sprinkle my tarts with mini white chocolate chips, but if you don’t have any, just sprinkle with a little powdered sugar for a bit of color contrast. The little bites of white chocolate are nice, but probably not worth making a special purchase. If you use the powdered sugar, be sure to dust the tarts just before serving.
1/2 cup pecans, plain or toasted
1/2 cup shredded coconut (I like unsweetened)
1/4 to 1/2 cup dates or dry figs, stemmed (this may sound like a big difference, but it depends on how moist the fruit is)
Pinch sea salt
Vegan Chocolate Mousse (recipe follows)
Vegan Chocolate Ganache (recipe follows)
12 fresh raspberries, rinsed and patted very dry
Approximately 2 tablespoons mini vegan white chocolate chips or powdered sugar
Garnish: fresh mint sprigs
Place 12 mini muffin cups liners in muffin tin. in food processor, a small one if you have it, process together pecans, coconut, and one quarter cup of figs or dates, and salt. Process until the mixture starts to hold together. If It holds together when pinched between your fingers, it is the right consistency. If not, keep adding figs or dates, one or two at a time. Divide mixture among lined muffin cups and press into bottoms. Fill each with chocolate mousse. (If there is any mousse left over, spoon into a carton and chill, covered, for another use.) Refrigerate for an hour or so and then prepare chocolate ganache, swirling about 1/12 of the mixture in the center of each tart. While ganache is still soft and pliable, press a raspberry gently into the center and garnish with white chocolate chips. Return to refrigerator until chilled through. If using powdered sugar, dust just prior to serving. Serve with mint sprigs if desired. For a quick cool-down treat, freeze the tarts for about a half hour before serving.
Vegan Chocolate Mousse (easily doubles):
8 ounces firm or extra-firm tofu (if you purchase blocks in 14 ounces rather than 16, use half or 7 ounces)
6 ounces vegan chocolate chips, melted and cooled slightly
1/4 cup sugar
1 teaspoon vanilla
1/2 teaspoon almond extract (it masks the slightly off-taste of silken tofu)
Pinch sea salt
Optional: 1 tablespoon raspberry liqueur
Place tofu in bowl of large food processor and process until creamy. Add remaining ingredients and process until smooth, creamy, and completely combined, scraping down sides of bowl as necessary. This mousse sets up quickly and can also be served on its own or as a cake filling.
Vegan Chocolate Ganache:
2 tablespoons non-dairy milk, half-and-half or creamer
1/4 cup vegan chocolate chips
Heat non-dairy milk in small cup in microwave or until very warm. Whisk in chocolate chips and let cool until very spreadable, but not warm enough to melt mousse.
These hot, humid summer days in Southeastern Virginia call for cooling foods that hydrate. My Banana-Tangerine Nice Cream fits the flavorful bill to a “T.” Plus it is beautiful and healthful, a little sweet, and a little tart.
Once the fruit is frozen, it goes together in minutes, ready to eat immediately as soft serve or to scoop after a short stint in the freezer.
Feel free to experiment with different combinations of fruit–you need about 5 cups total–but remember that fruits like bananas and mangoes lend a lovely creaminess to the texture.
If chocolate is your jam, add a little cocoa powder, starting with about 2 tablespoons. You may need to add slightly more agave nectar.
To blend, I use my large heavy-duty Cuisinart food processor, but a Vitamix might work well. Whatever you use, it needs to be strong and sturdy to process the frozen fruit chunks, though you can let them thaw ever so slightly before processing or blending so that your machine doesn’t have to work so hard.
Banana-Tangerine Nice Cream
3 medium bananas, peeled, cut into 1-in pieces, and frozen, and ever so slightly thawed, if desired
3 tangerines, not peeled, pitted, quartered, and frozen, and ever so slightly thawed, if desired
3 tablespoons agave nectar
Place half of fruit and all of agave nectar in food processor and process, sturdying your machine on the counter if necessary, until somewhat broken down and blended. Add remaining fruit and keep processing, scraping down sides of bowl as necessary, until the mixture lightens in color and changes texture to a creamy, luscious buttercream-like consistency. This will take Just a few minutes. Serve immediately or cover and return to freezer for a scoopable consistency.
With fresh fruits and vegetables glistening in the refrigerator and perspiration glistening on my skin even at 8:00 a.m.–or 8:00 p.m.–cool, hydrating, and refreshing gazpacho seemed to need be the order of the day.
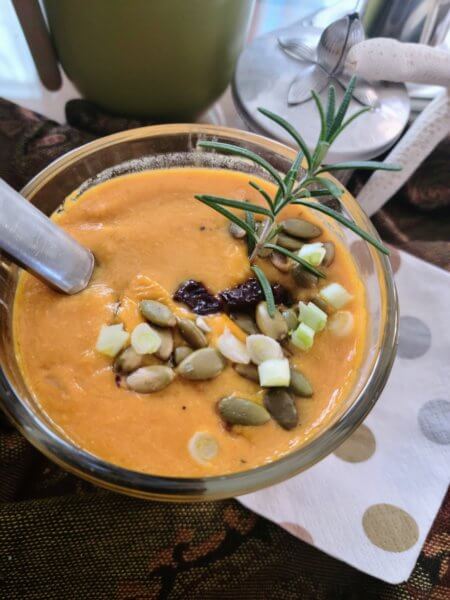
Nothing is easier nor more nutritious than chunking up vegetables and fruit and giving it a good whirl in the food processor or heavy duty blender.
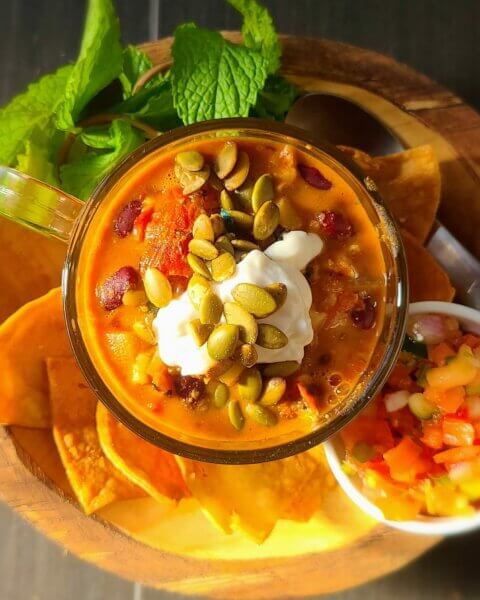
Quasi-decadent garnishes include bread cubes toasted in a tiny bit of olive oil and sea salt, roasted and salted sunflower seeds, mint sprigs, and a drizzle of olive oil. I used blood orange flavored for this batch, but unflavored olive oil would be just as delicious.
When the heat’s got you down, this soup will perk you right up.
Tomato-Peach Gazpacho
1 red onion, peeled and quartered
1 large tomato, cored and quartered
1 peach, pitted and quartered
1 tangerine, pitted and quartered
Juice of 1 small to medium lime
1 to 2 cloves garlic or roasted garlic
1/2 teaspoon smoked paprika or to taste
1/2 teaspoon garlic powder
Sea salt and freshly ground black pepper to taste
Garnishes: croutons, roasted and salted sunflower seeds or other seeds or nuts, mint sprigs, drizzle of olive oil, flavored or plain
place everything except garnishes in the bowl of a large food processor or heavy duty blender and process or blend until as smooth as you desire. Ladle into bowls or cups, garnish as desired, and erve immediately or chill, covered, until serving time. Garnish just before serving.
For some reason, probably all Pinterest’s fault, I was craving M&Ms cookies and bars. Pinterest can ignite an obsession like nothing else.
But I learned the hard way not to order Unreal brand chocolate-covered peanuts, basically a vegan M&M, from Amazon in July and Southeastern Virginia. They arrived like this.
Out of three 5-oz bags, only about 50 of the candies were usable–the rest were a melted, cracked, and clumped mess. The upside is that the candies are a beautiful color and taste delicious, so I would buy them again, just in the fall or perhaps directly from the company.
With enough candies to make a half batch of cookies, that is what I did and it was worth it. Besides, I don’t need a lot of cookies around tempting me, but if you are unable to purchase these candies or the equivalent in the grocery store, you might want to wait until a cooler month unless it happens to be cool where you live. And if the latter, lucky you!
My recipe includes simple directions I learned recently for creating a perfect bakery style shaped cookie every time, provided you make the large variety because it takes two scoops.
However you scoop them, you will love them, if you can prevent yourself from eating all of the dough first!
M&M Cookies (vegan & plant-based)
1/2 cup vegan butter
1/2 cup vegetable shortening
1/2 cup brown sugar (I like dark brown)
1/2 cup granulated sugar
2 teaspoons vanilla
1 teaspoon baking soda
2 1/4 cups all-purpose flour
2 to 4 tablespoons non-dairy milk
1/2 cup vegan chocolate chips
1/2 cup vegan M&M style candy
1/2 cup broken pecans or peanuts
Preheat oven to 350°. Line a baking sheet with Silpat or parchment paper. In bowl of electric mixer, cream together butter, shortening, both sugars, vanilla extract, and baking soda. With mixer on medium to low speed, beat in flour in three portions, with 1 or 2 tablespoons milk in between each, scraping down bowl as necessary. Avoid over beating. With mixer on lowest speed or by hand, mix in chocolate chips, candies, and nuts. Using a one tablespoon scoop, make small cookies by placing one scoop about two inches apart in rows. To make bakery style large cookies, after placing one scoop onto baking sheet, put a second scoop in the center and press down very firmly. Big small cookies for about 8 to 10 minutes and large ones for about 12 to 15, or until golden brown.
I think I am becoming an unintended expert at micro-sizing food, mostly out of necessity. Namely becauseI am cooking for one and am a restless cook who grows bored easily if I have to eat the same thing day after day.
My omni partner, Bob, does not eat the way I do, almost on principle. We have had occasional heartfelt discussions, a story for a different day, about my feelings of rejection when he declines even a taste of the dishes I prepare because, as for many of us, cooking is a gesture of sharing and love.
But, he, a smoker for many years, truly tastes food differently and, like all of us, wants to control his own diet. Still, it is fun to cook together as long as we can tailor the ingredients for our own tastes and lifestyles. Basically, anything that can be custom-filled or -topped works well: tacos, pizzas, wontons, fried ravioli, etc. But, I can assure you, he would not go near a tomato pie.
If we weren’t in the middle of a pandemic, I would share with friends as I always have, but many of us are not too keen on eating food from other people’s kitchens right now.
So cakes become cupcakes and cupcake recipes are downsized to make only four and, in this case, a big luscious tomato pie became six luscious two-bite tartlets.
Months ago, I purchased a bag of these tartlet pans at a thrift store to make this really cool metal floral wall hanging for a friend. All of the flowers were assembled out of metal housewares And I featured the end result in my DIY Decor column. I never really thought I would use the leftovers, but they have come in handy on a number of occasions.
Ingredient note: I am a calorie-counter and an avid exerciser. So I use Walton Farms no-calorie mayonnaise available at our Harris Teeter. (It is not great on its own, but when it is mixed with other ingredients with strong flavors, it is worth it to me to save 100 calories per tablespoon.) But use whatever kind of mayo you prefer, including homemade. I make a delicious tofu mayonnaise (available here on this site) with only 10 calories per tablespoon, but I was too hungry to stop and make a batch.
I use Everything Bagel seasoning in my creamy topping because I love the mixture of dried garlic and onion, sesame seeds, poppy seeds, etc. Feel free to omit, as there will be plenty of flavor without it. But, I highly recommend.
Whatever you choose to top yours with, enjoy celebrating these glistening red gems of the season in two-bitesize format.
Mini-Tomato Pie Tartlets Press-In Crust (vegan & plant-based)
6 approximately 1.5 x 3 inch tartlet pans
3/4 cup all-purpose flour
2 tablespoons vegetable oil
1 tablespoon non-dairy milk
Pinch sea salt
Pinch garlic powder
Pinch onion powder
1/4 cup vegan mayonnaise
3 tablespoons shredded vegan mozzarella cheese
1 tablespoon shredded or grated vegan parmesan cheese
1 generous teaspoon thinly sliced green onions
1 teaspoon minced fresh basil or chiffonade
Pinch sea salt
Pinch black pepper
Optional (but recommended): 1/2 tsp Everything Bagel seasoning or to taste
6 slices tomato (to fit your tart pans)
Garnish: fresh basil sprigs
Preheat oven to 350°. Place tart pans on baking sheet. In small bowl, combine flour, vegetable oil, non-dairy milk, salt, and garlic and onion powders. Mix together with a fork until moist and crumbly. Add a drop or two more oil or non-dairy milk if necessary. A little bit of the dough should hold together when pinched with your fingers. Divide into six portions, crumble into the bottom of each tart pan, and press evenly onto sides and bottom. Bake 10 minutes or until set and just beginning to turn golden. Meanwhile, in a small bowl, blend together remaining ingredients except tomatoes and garnish. After tart shells have baked, lay a slice of tomato in each one and top with 1/6 of mixture. Return to oven and bake for another 10 minutes. Garnish with fresh basil sprigs and serve warm or at room temperature.